
What are MFA and SSO?
|
Why use MFA?
Multi-factor authentication (MFA) helps protect your account from unauthorized access by requiring you to provide more than one form of identification.
When MFA is enabled for your account, you'll enter a code generated by an app to complete the login process.
Important: If MFA is not enabled by November 15th, 2023 you may be prevented from accessing x360Recover until it is configured. Refer to the How to work with MFA section below for instructions |
Why use single sign-on (SSO)?
Now you can securely access vaults and appliances through single sign-on (SSO) which provides:
Simplified user experience by eliminating the need to remember multiple login credentials. Enjoy one-click access to all Axcient applications
Streamlined account management by centralizing access to securely manage access to Axcient
Improved security by replacing multiple passwords with a single strong one |
How to use MFA and SSO with x360Recover
Below, we've put together some how-to articles on using both MFA and SSO with Axcient products.
We've included instructions on how to set up MFA in x360Portal, and, also, how to set up MFA for direct login users in x360Recover Manager (RMC)
Important: If MFA is not enabled by November 15th, 2023 you may be prevented from accessing x360Recover until it is configured.
How to work with MFA
Set up multi-factor authentication (MFA) in x360Portal
To set up MFA in the x360Portal:
NOTE: MFA is now required by default for all x360Portal accounts. Users will be directed to setup and configure MFA on first login.
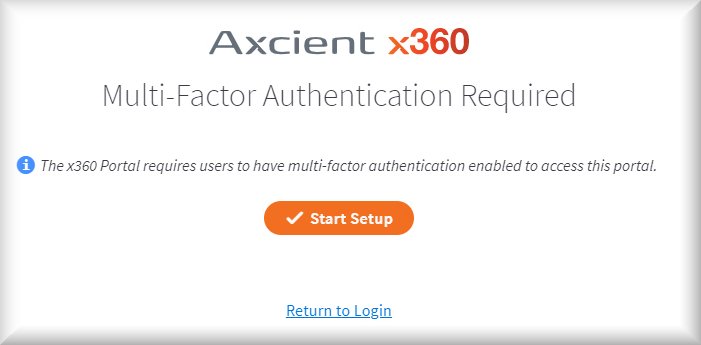
2. After logging in, you will be redirected to the Multi-Factor Authentication Setup page.
Click Start Setup to begin.
3. You will be prompted to select an authentication method.
You can authenticate by using an app or by using an SMS text message via your phone.
NOTE: Authenticating with an app is the most secure method.
4. . If you choose to authenticate with SMS, you will be prompted to enter the phone number you wish to use.
Enter your preferred phone number and click Next to continue.
5. If you choose to authenticate with an app, you will be prompted to download the app of your choice. We support all standard One Time Password (OTP) based authentication applications. Some common examples include Google Authenticator, Authenticator (for iOS), Microsoft Authenticator, LastPass Authenticator and Authy 2-Factor Authentication.
Click Next to continue.
6. You will be shown a QR code.
Open your chosen authentication app on your smart device and scan the QR code to create your new account.
Alternative method: If you prefer not to scan the QR code, you can opt to use a secret key instead. Click the Unable to scan? Click here to use a secret key instead link to manually input a 16-digit key code.
Click Next to continue.
7. You will be prompted to enter the 6-digit code generated by your authentication app.
This will verify that the new account has been set up properly.
Enter the 6-digit code from your authentication app and click Next to continue.
8. Finally, click the checkbox indicating that you understand you will not be able to access your account without your MFA device. Then click Complete.

NOTE: After November 15th, 2023, all users who access RMC directly will automatically have MFA enabled.
For direct login users: Set up multi-factor authentication (MFA) - x360Recover Manager (RMC)
With the release of version 9.0.0, Axcient x360Recover provides basic support for multi-factor authentication (MFA) to enhance security.
After November 15th, 2023, all users who access RMC directly will automatically have MFA enabled.
x360Recover MFA supports open One-Time-Password (OTP) applications that run on any smart phone. You may install any compatible application (such as Google Authenticator or Authy.)
NOTE: OTP is highly reliant on accurate time synchronization. Both the smart phone running the authentication app and the Management Portal must be synced to the correct time in order for both to agree on the generated MFA token.
How to enable MFA (Multi-Factor Authentication) for direct-login x360Recover Manager (RMC) users
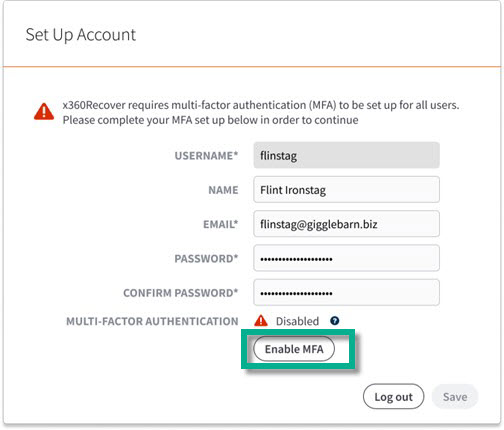
1. Login to the x360Portal using the credentials that were emailed to you.
2. Verify that your name and email address are correct.
Choose a new password.
Then, click Enable MFA:
3. Follow the instructions given in your authenticator app to scan the randomly generated QR code.
If you are unable to scan the code, you can instead use a secret key (Note: This must be supported by your authenticator app).
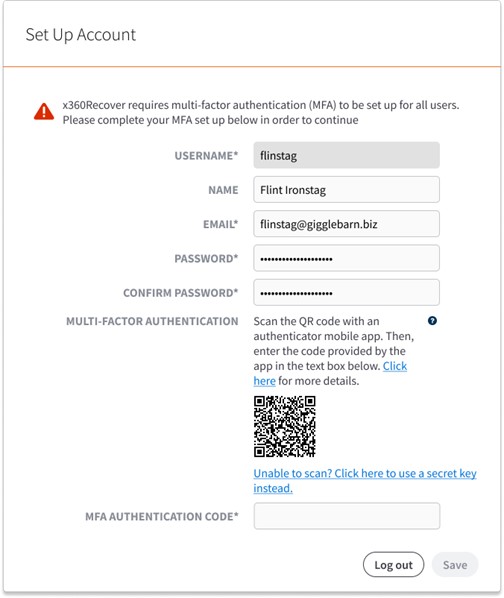
4. Once your app is configured, enter the generated MFA token, and click Save.
You will then be shown a recovery code. Copy this code to a safe place. In the event that you lose access to your authenticator app, you can use this one-time code to access your account and set up MFA again.
IMPORTANT: If you lose this code, you will not be able to recover your account without admin intervention.
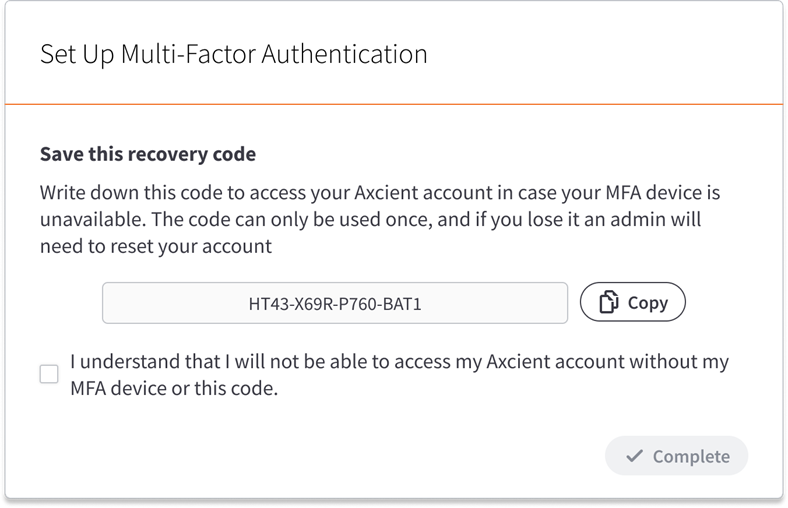
5. After checking the box indicating that you understand you will not be able to access your account without your MFA device or the recovery code, click Complete. This completes MFA setup, and you will be directed to x360Recover Manager.
Disabling Multi-Factor Authentication for direct-login users
Users with ‘Org Admin’ or ‘Client Admin’ accounts can edit a user’s account via the Users tab.
In the past, it was possible for Admins to un-check the box for MFA.
IMPORTANT: After November 15th, 2023, you will not be able to disable MFA for direct-login accounts.
MFA will be automatically enabled for those users who use direct logins.
For information on configuring MFA for x360Portal SSO-enabled accounts, see the “Set up multi-factor authentication (MFA) in x360Portal” section above.
Logging into x360Recover RMC directly with MFA
With multi-factor authentication enabled, an additional step is required to complete login directly to the Management Portal at http://my.axcient.net.
Enter the one-time MFA code generated by the authentication app that you configured when enabling MFA:
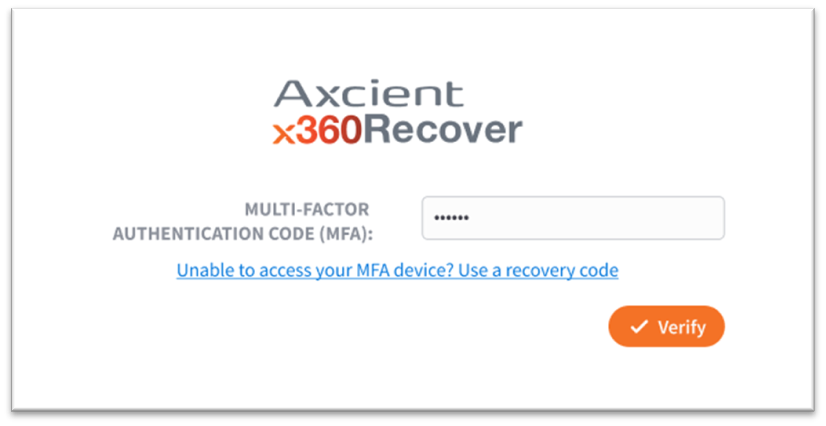
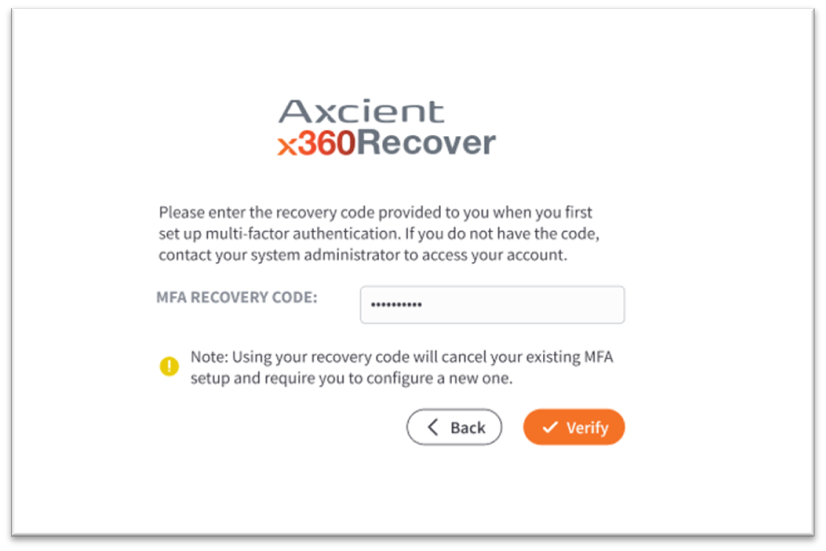
If you are unable to access your MFA device, you have the option of using the one-time recovery code that was displayed when you set up MFA for your account (see below).
Please note that using this code will require you to go through the MFA setup process again, and will generate a new recovery code to replace the one you used.
Learn more about using the x360Portal with MFA
How to work with SSO
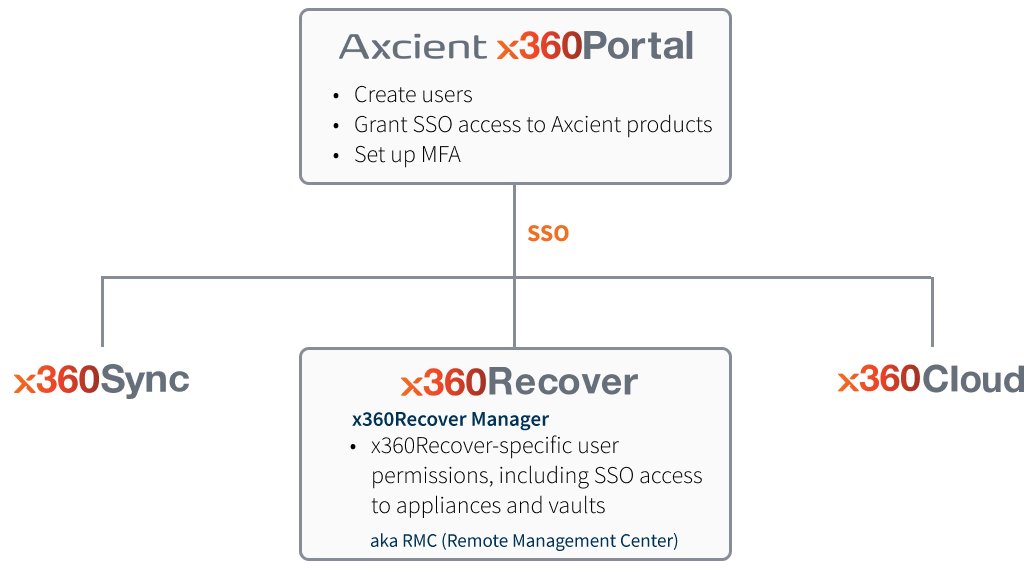
Get started with SSO
1. If you are a new partner, you'll first create user accounts for all of your Axcient products in x360Portal
2. Then, you'll use SSO to access and manage each desired Axcient product (x360Recover, x360Sync, and/or x360Cloud.)
Enable single sign-on (SSO) for x360Recover
NOTE: By default, SSO access is enabled for x360Recover Org Admins and Org Managers, and disabled for Org Read-only Users.
Org Admins can enable SSO access for any of their Org-level accounts. Enabling SSO for users allows seamless access to all x360Recover appliances and vaults without requiring a secondary login at each device.
The following list explains each Org user type:
- Org Admin: An Organization Admin can monitor backups, configure SLA thresholds and PSA integration with ConnectWise or Autotask, download or subscribe to BDR usage and summary reports, use the Axcient business continuity features - Virtual office and Runbooks - and manage users in their organization.
- Org Manager: An Organization manager can monitor backups, configure SLA thresholds and PSA integration with ConnectWise or Autotask, download or subscribe to BDR usage and summary reports, and use the Axcient business continuity features, Virtual office and Runbooks
- Org Read-only: An Organization Read-only user can monitor backups and download or subscribe to BDR usage and summary reports
To enable SSO access for org read only users:
1. Click on the Users tab.
2. Select the user account in which you wish to enable SSO.
3. Click edit.
4. In the edit user dialog box, click the checkbox to the right of SSO ACCESS TO VAULTS AND APPLIANCES to enable SSO.
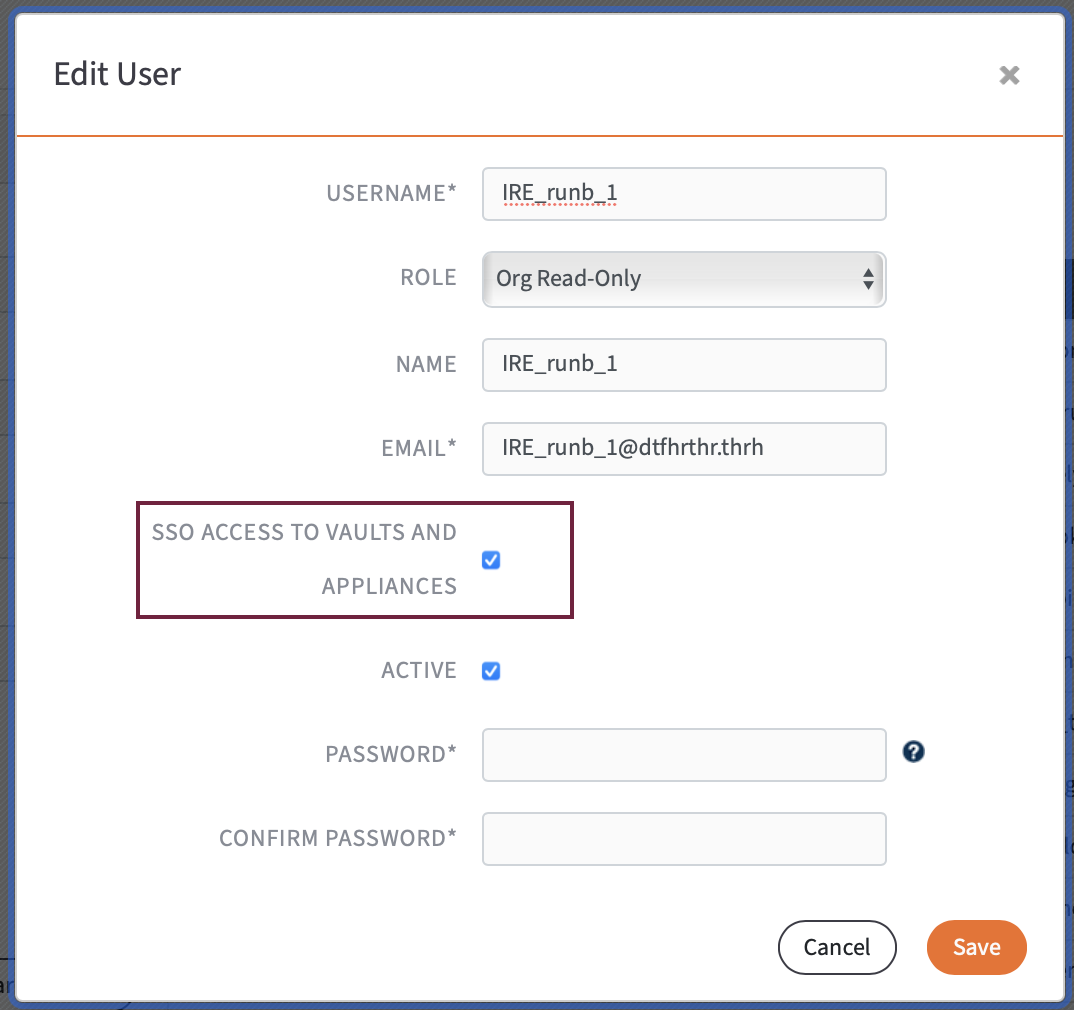
5. Click Save to complete.
Log into an appliance using SSO
1. To log in an appliance, navigate to the Services page and expand a row.
2. Click the Appliance GUI button.
If SSO is enabled, you will automatically be logged in without needing to use another set of credentials.
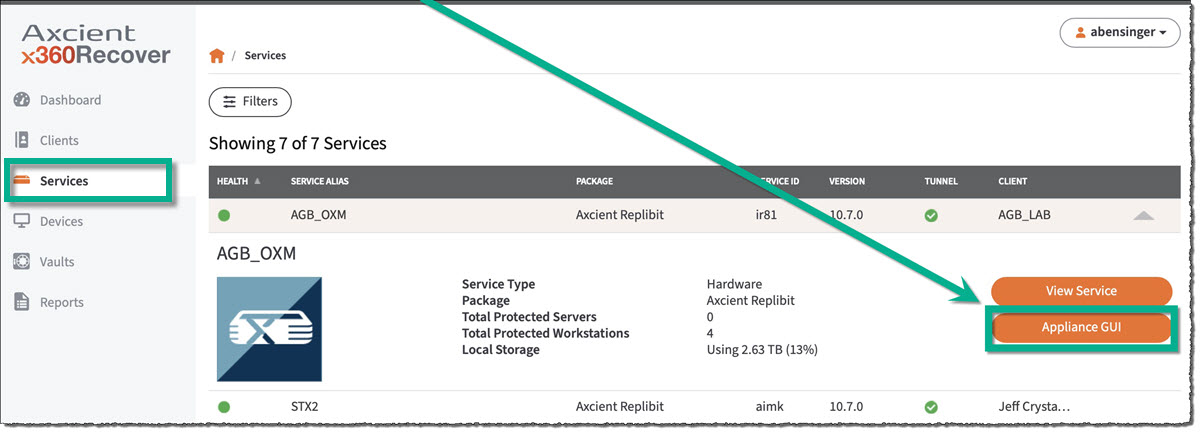
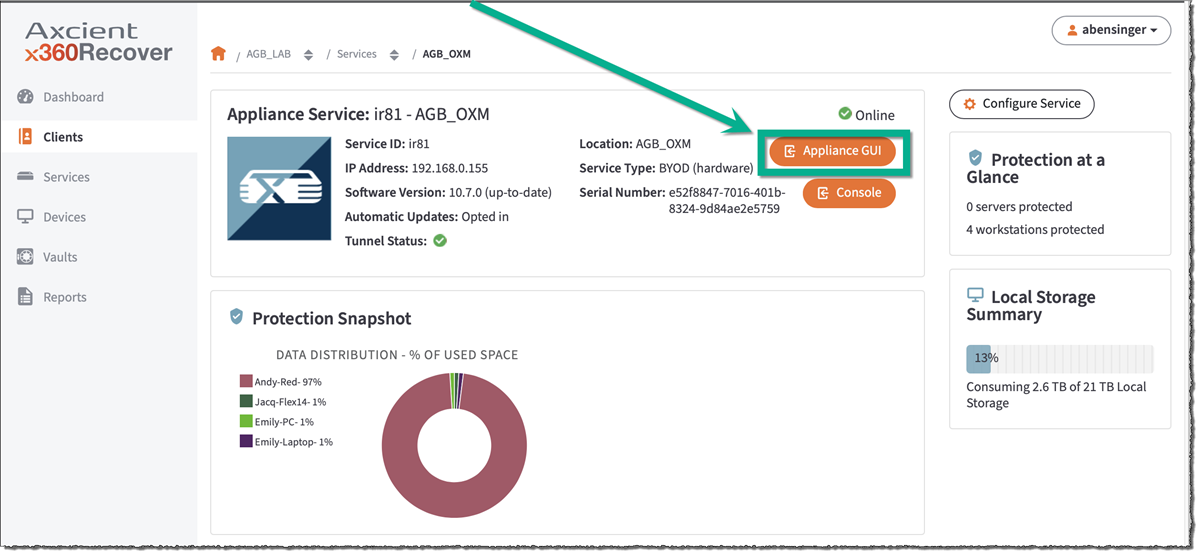
Alternatively, click the View Service button.
This will bring you to the Service Details page, and you can click the Appliance GUI button to automatically log in from this view.
Log into a vault using SSO
To log into a vault using SSO, you can use the Vaults tab on the dashboard.
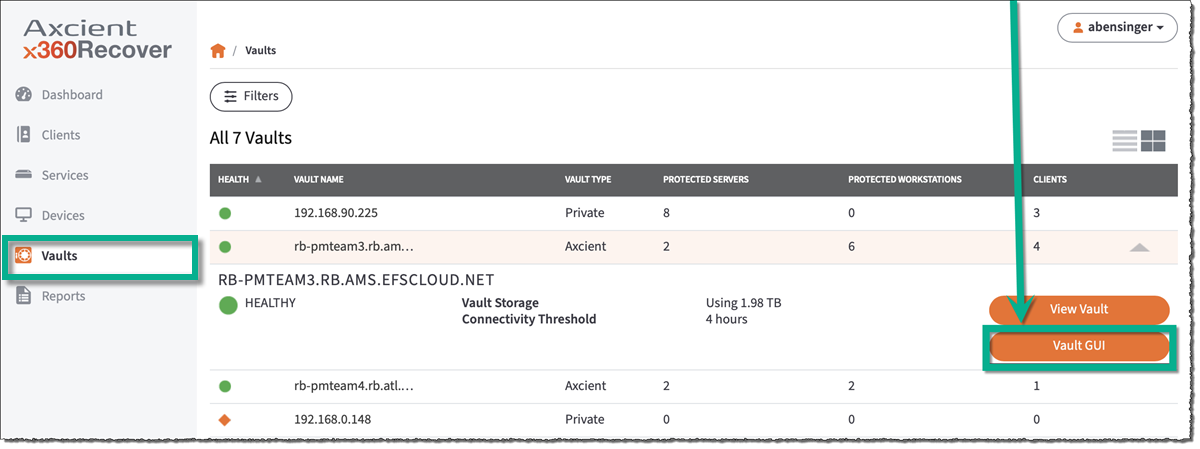
Alternatively, you can also log in to an individual Vault Details page by clicking the Vault GUI button.

Please submit a Support ticket if you need more help implementing SSO or MFA with any of your Axcient products.
Other tasks you can complete in x360Portal:
Create new users in x360Portal
Create and manage your user accounts within our top-level x360Portal to leverage global MFA functionality and granular SSO access to all Axcient products from a single login account.
Users created in x360Portal can be selectively given access to some or all Axcient products, and can be assigned product specific roles and permissions within the lower level Product portals.
If you are an administrator, you can create, edit, and delete user accounts in the Axcient x360Portal.
The Users page is where you can add employees to your organization, manage which employees have access, and set up their permission roles.
Create a new user account
NOTE: For complete instructions on using x360Portal see the x360Portal User Guide.
1. In the x360 Portal, click the Users tab.
2. Click the Create New button.
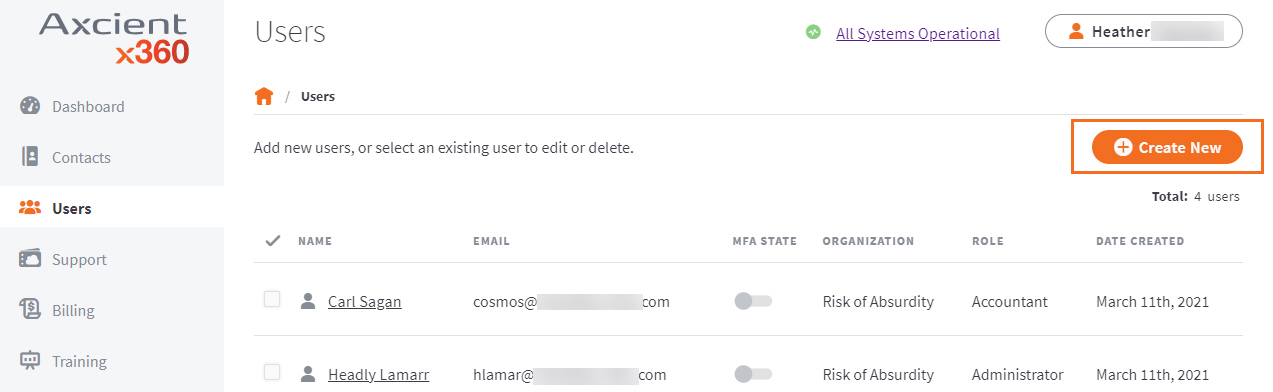
3. Enter descriptive information about the new account, including:
- First name,
- Last name,
- Email address, and
- Organization.
- Assign the appropriate permission role:
- Select the Basic permission role if you want the user to view all the information on the Dashboard, My Contacts, and Support tabs (including creating and commenting on tickets). A user with Basic permissions can also view and edit information related to his or her own account and email preferences. However, a user assigned to the Basic role cannot modify the information associated with the organization.
- Select the Accountant permission role if you want the user to have the same permissions as a Basic user, with the addition of having access to manage Billing.
- Select the Administrator permission role if you want the user to view and edit all information on the x360 Portal, including creating, editing, and deleting other users accounts. A user with Administrator permissions is also able to edit information related to the organization.
- Choose which products you would like the user to be able to access. Be sure to enable access to x360Recover by checking the box.

4. Click Create.
The new user will receive an email with instructions to reset the password and log in to the Portal.
Edit an existing user account in x360Portal
NOTE: Only a user assigned to the the Administrator role can edit user accounts.
To edit a user account:
1. On the Users page, click the user's name.
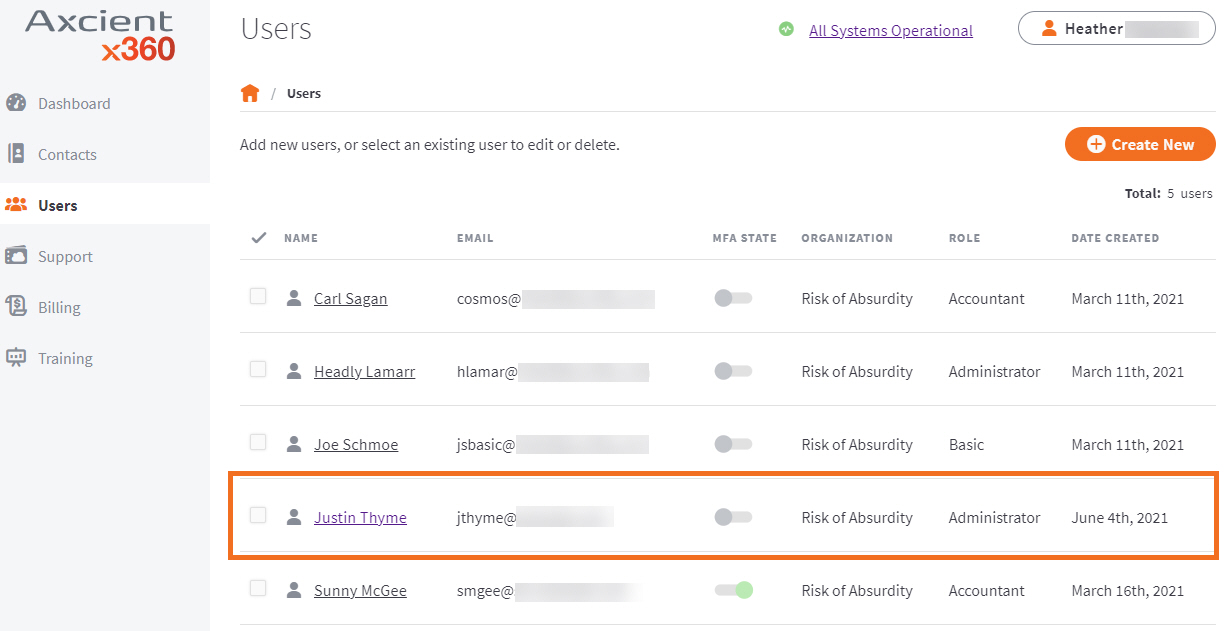
Alternatively, click the checkbox adjacent to the user's name and click the Edit button.
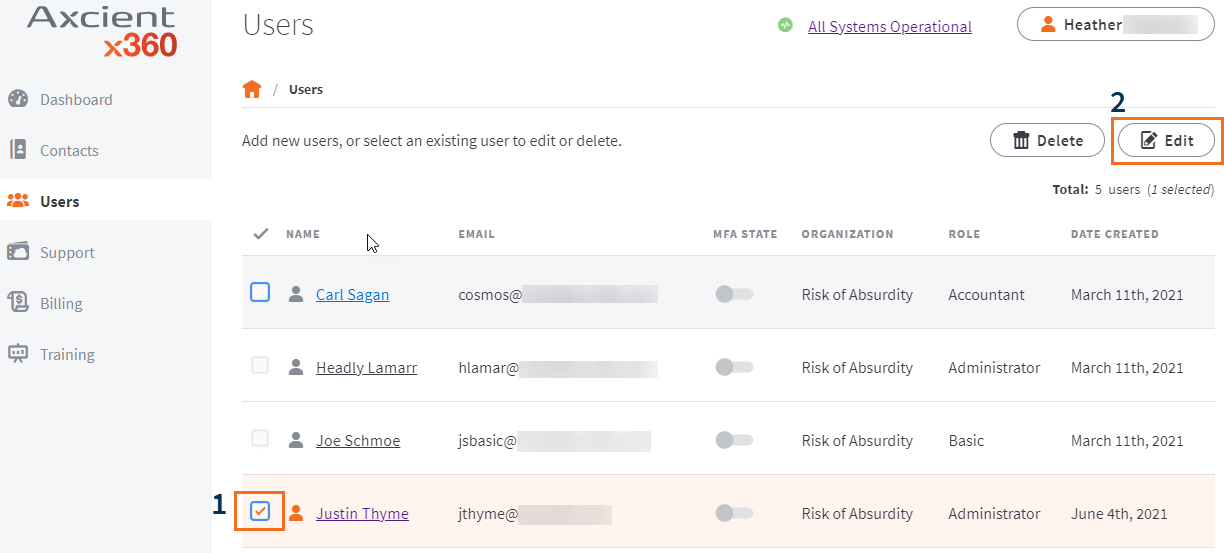
2. In the Edit User page, click the Edit button and update each field as needed. 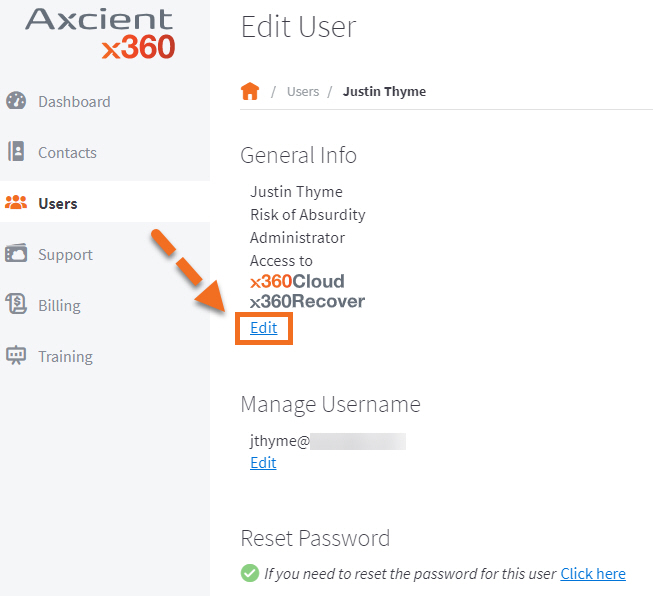
3. Click the Save button when you are finished.
Delete a user account in x360Portal
NOTE: Only a user assigned to the Administrator role can delete User Accounts.
As a best practice, we recommend deleting a user account if the user has left your organization or no longer needs access to the x360 Portal.
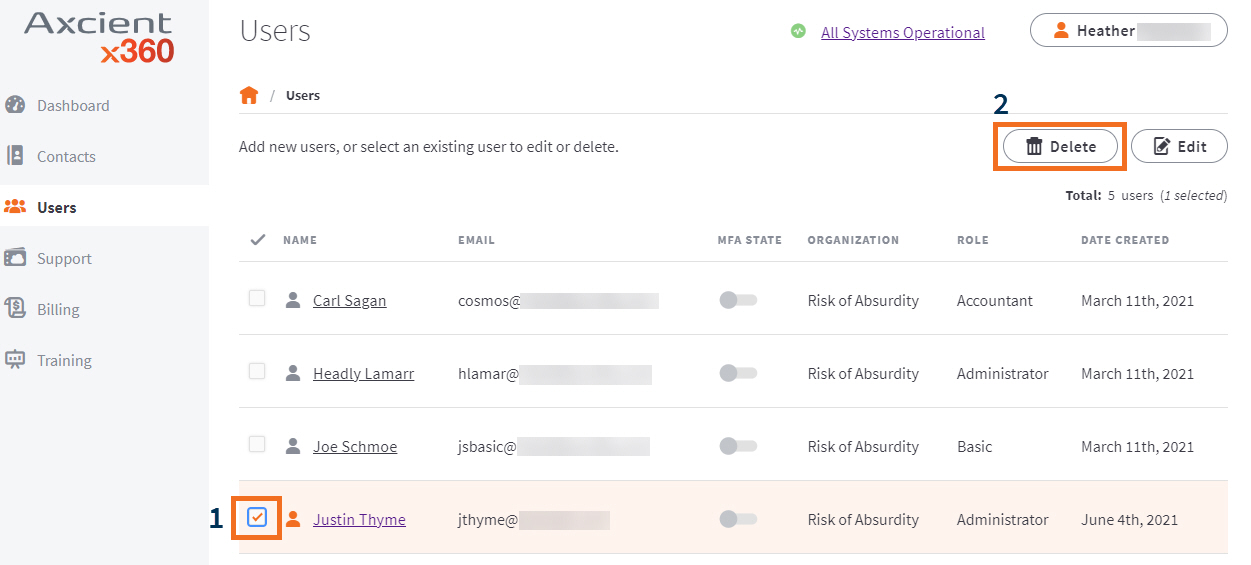
To delete a user account:
1. Find the name of the appropriate user and click the adjacent checkbox.
2. Click the Delete button.
2. In the Delete User dialog box, click the Delete button to confirm.

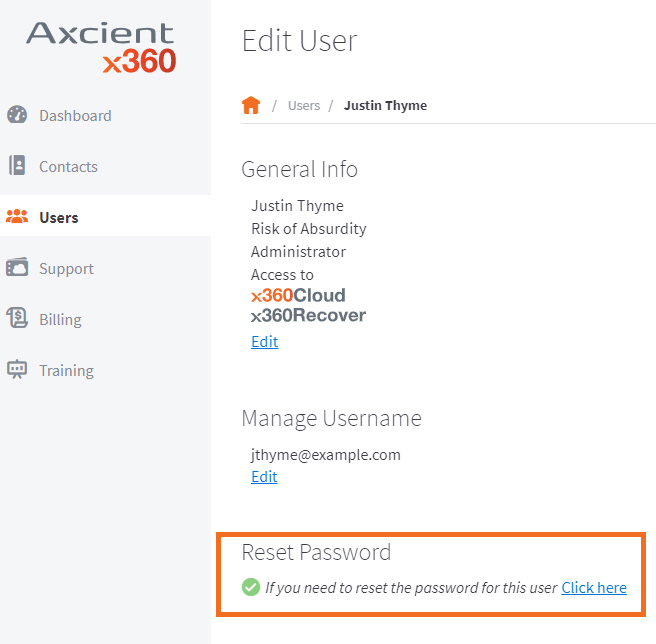
Reset user password in x360Portal
To reset an x360 Portal password:
1. In the Users page, select the name of the appropriate user.
2. In the Edit User page, find Reset Password.
3. Under Reset Password, you will see a green circle with a white checkmark.
Select the Click here link to continue.
4. In the Reset Password dialog box, confirm the password change by clicking the Accept button.
5. The user will receive an email with instructions to reset the password.

SUPPORT | 720-204-4500 | 800-352-0248
- Contact Axcient Support at https://partner.axcient.com/login or call 800-352-0248
- Free certification courses are available in the Axcient x360Portal under Training
- To learn more about any of our Axcient products, sign up for a free one-on-one training
- Subscribe to the Axcient Status page for a list of status updates and scheduled maintenance
1631