
What is the best method of file and folder recovery?
x360Recover offers a variety of file and folder recovery options.
Your best method depends on:
- which x360Recover services you use
- how many files/folders you need to recover
- if you need to preserve permissions
This article walks through types of available file and folder recovery, including methods from the appliance UI, methods from the vault UI, or methods using Recovery Center.
| METHOD | DESCRIPTION |
| 1. Recovery Center | Use our stand-alone application to recover directly from the Axcient cloud or a private cloud, with options ideal for Direct-to-Cloud users and those with a local cache repository. |
|
|
Select a snapshot and browse the file system.
|
3. Start iSCSI |
Launch an iSCSI initiator application.
|
|
Only for BDR: NOT for D2C |
After starting iSCSI, download the iSCSI Manager from x360Recovery Bare Metal Restore Utility and perform a partition-by-partition recovery.
|
Mount a protected system's point-in-time snapshot from an appliance. (Do not use the file browser to download from a vault.) Once a snapshot is mounted, use the File Browser tab to browse and download files and folders.
Pros of the Mount + File Browser tools
- Easy to use
- Available on appliances
- Works with any standard web browser
Cons of the Mount + File Browser tools
- Doesn't preserve original file and folder permissions
- Not suitable for very large files
- Limited to a few hundred files per download
- Folders are retrieved as zipped files - it may take a long time to create an archive
How to recover with the Mount tool
1. Log into an appliance or vault through x360Recover Manager. From the Protected Systems page, click into a protected system and scroll to the bottom of the page to view its snapshots.
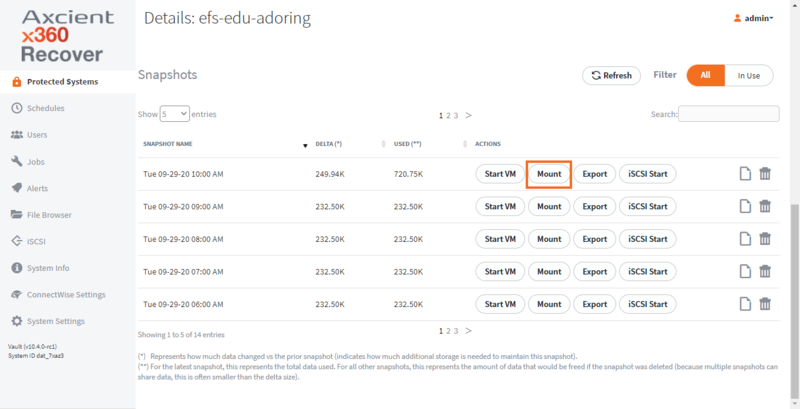
Locate a snapshot from the point-in-time you wish to recover, and click the Mount button.
2. Navigate to the File Browser page. Browse to locate the file or folder.
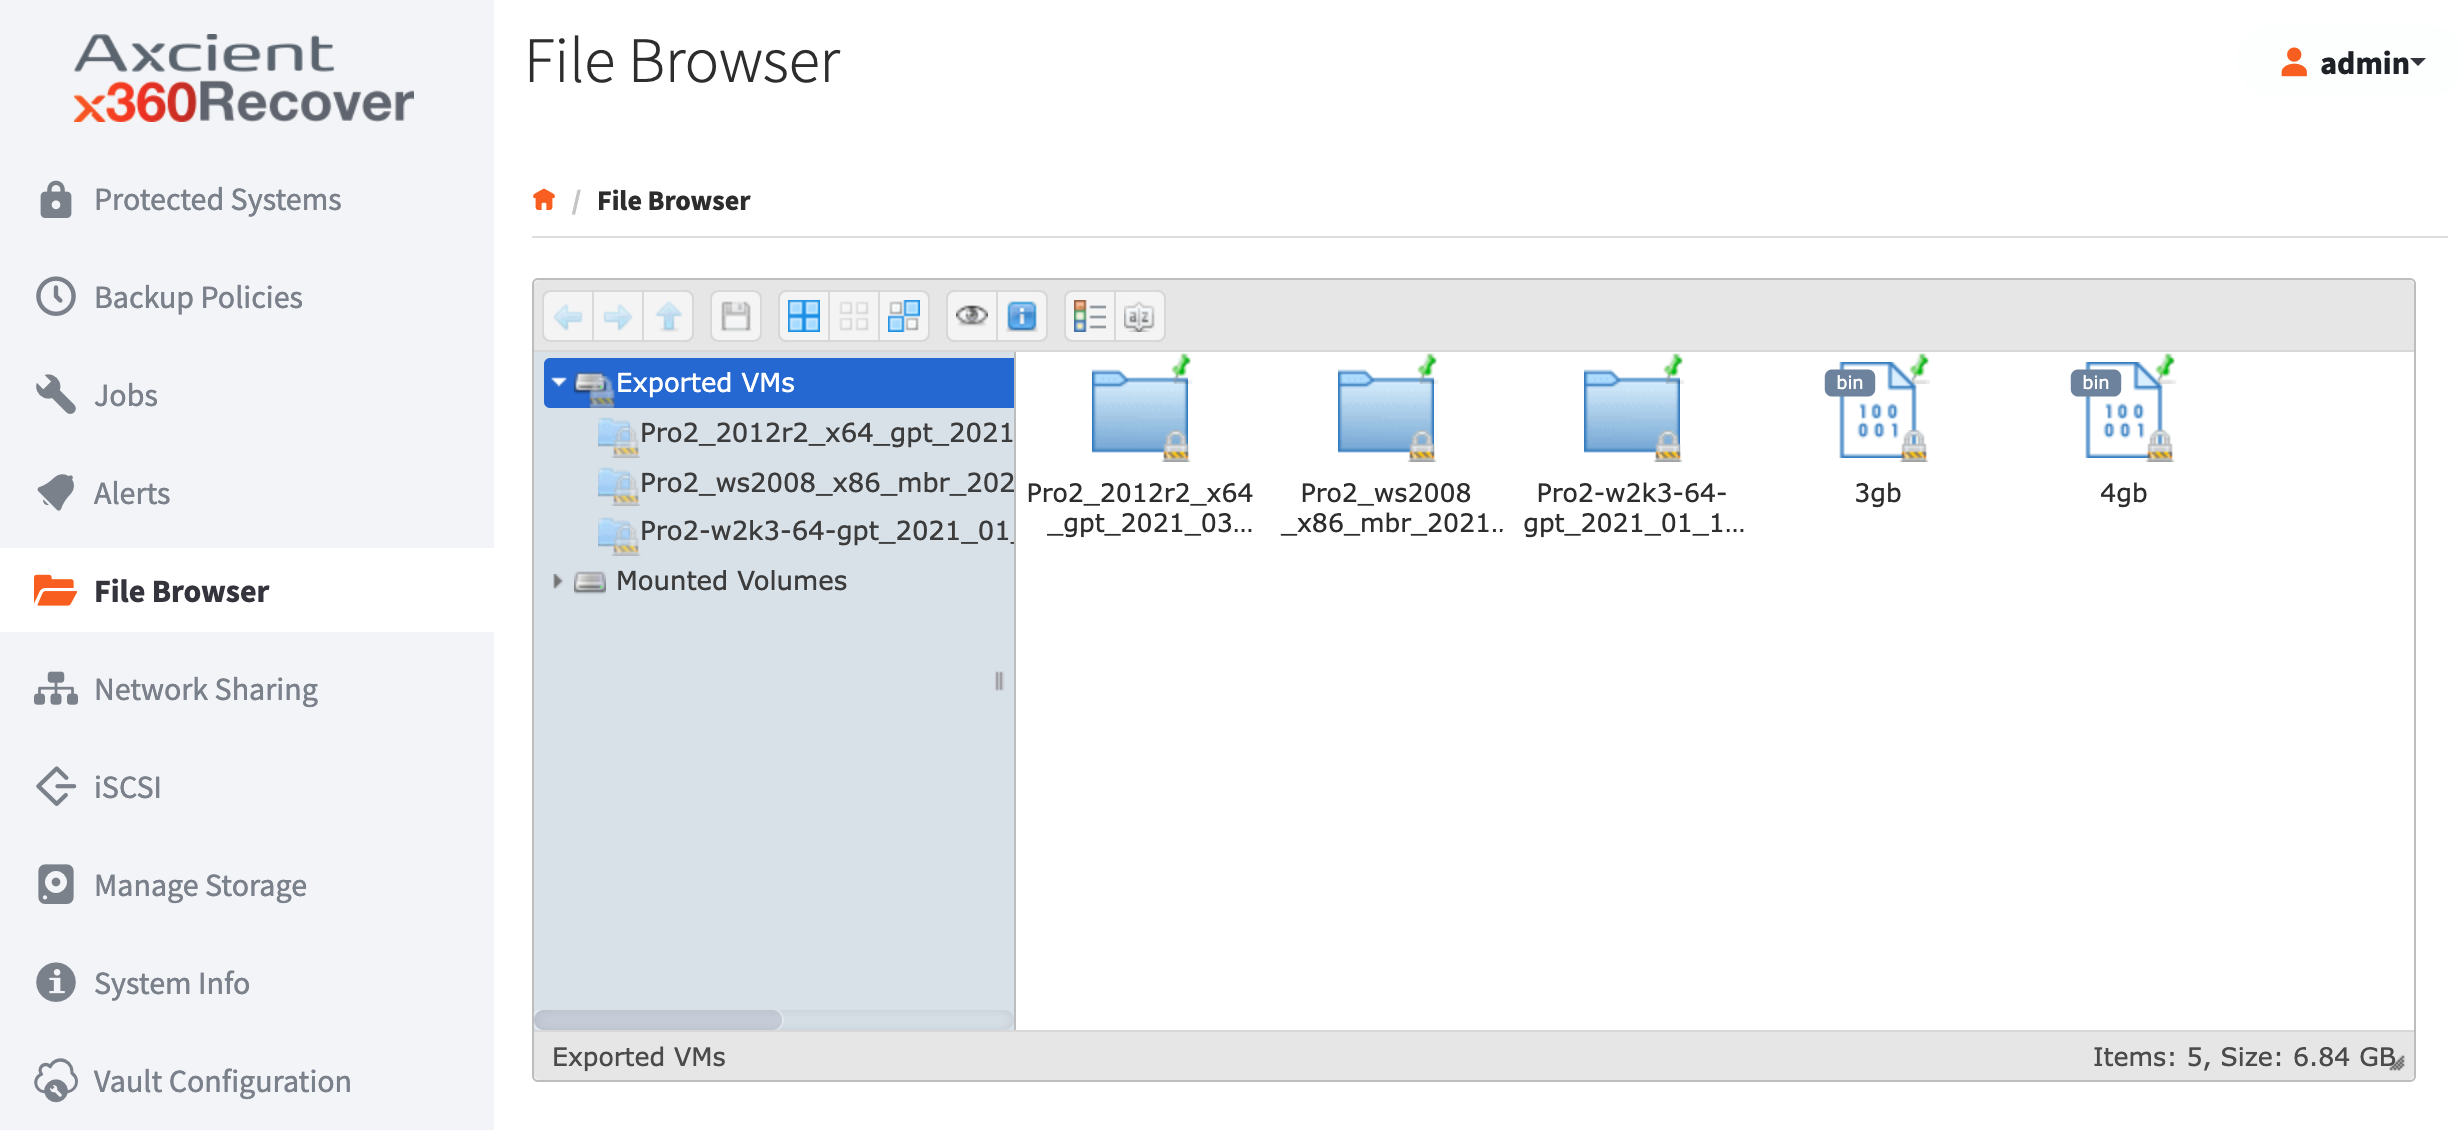
Right-click on the file or folder and select Download. When it finishes downloading, you can optionally move the file or folder back to its original location.
3. When you are done recovering, scroll to the bottom of the File Browser page to view Mounted volumes. Click Dismount for the appropriate snapshot. 
You have successfully recovered using the Mount tool!
DeleteMethod #3. Start iSCSI
Start iSCSI from a protected system's point-in-time snapshot from an appliance or vault, then use native Windows tools to connect and recover from the snapshot.
iSCSI is a standard TCP/IP protocol for connecting block storage devices (like hard disks) from a storage server to an application host over a network layer. Commonly used in datacenter environments, x360Recover implements the ability to export protected system disk volumes as iSCSI targets as a robust means to perform data recovery.
Pros of iSCSI
- Preserves original Windows file and folder permissions
- Suitable for very large files or many folders
- Supports Smart-Recovery (returns original disk architecture)
- Mounted iSCSI volumes can be searched within Windows
Cons of iSCSI
- Moderately complicated to use
- Not inherently secure for use over WAN connections
Recover with iSCSI
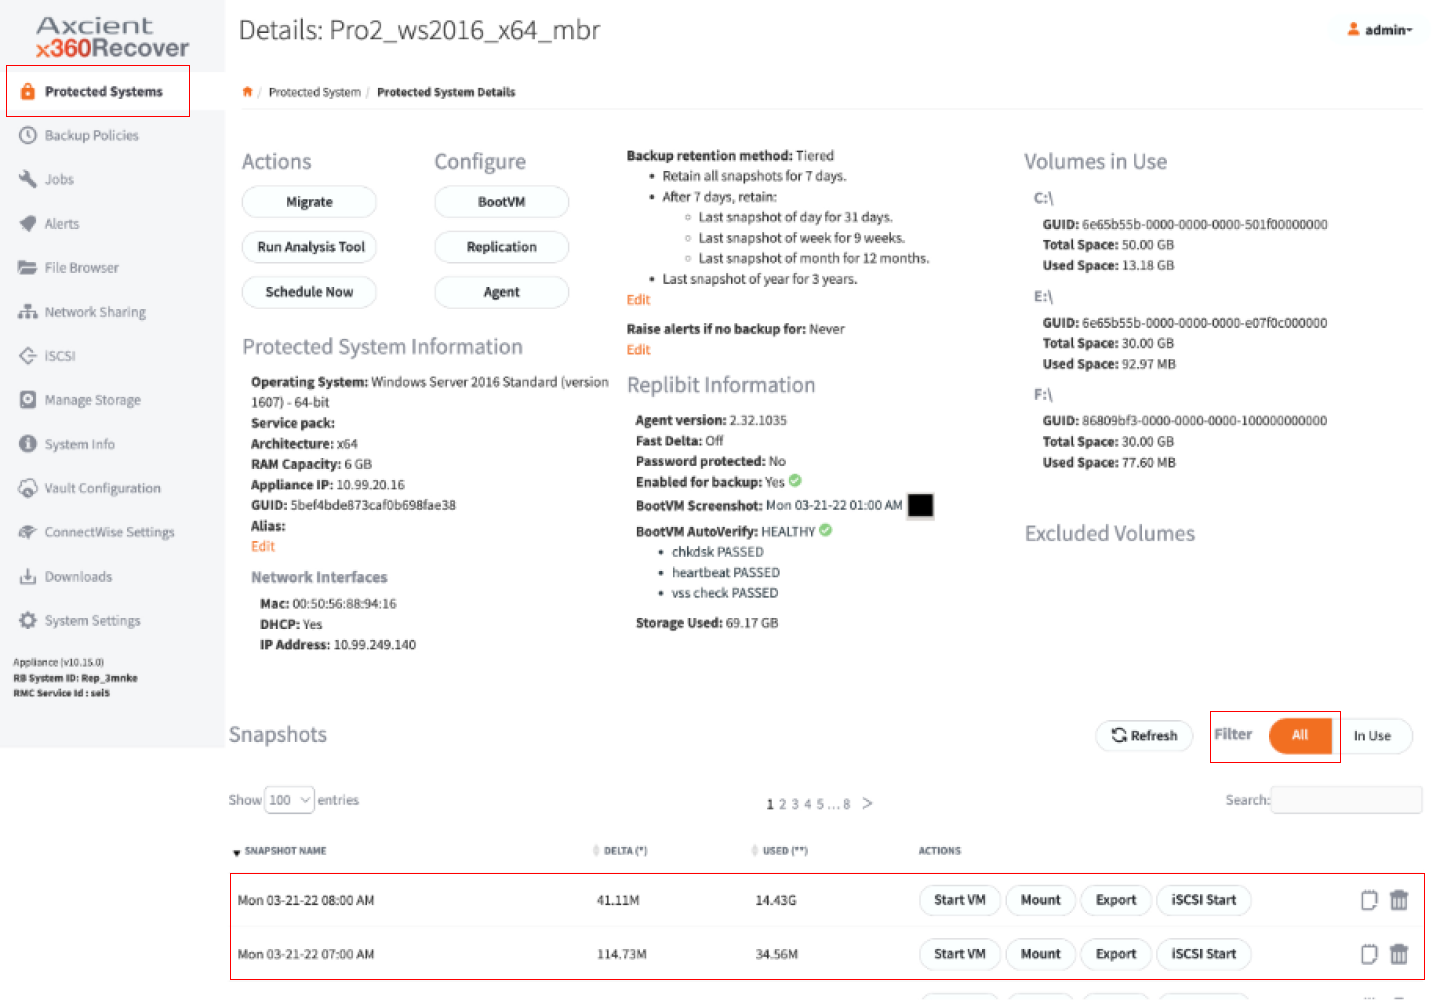
1. Log into an appliance or private vault through x360Recover Manager. From the Protected Systems page, click into a protected system and scroll to the bottom of the page to view its snapshots.
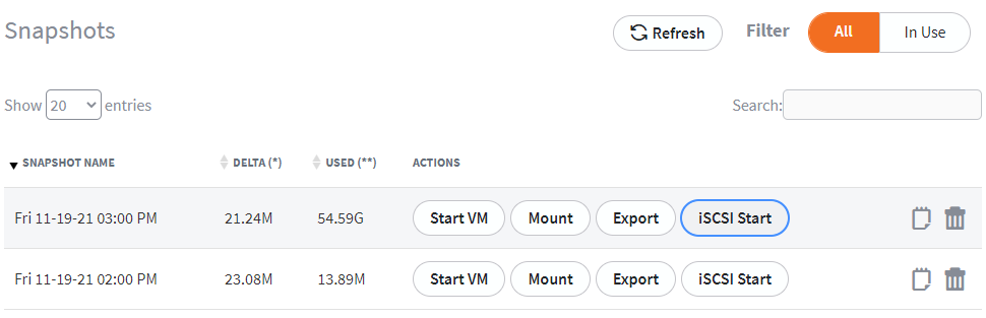
Locate a snapshot from the point-in-time you wish to recover, and click the iSCSI Start button.
2. Select Test Mode or Live Mode.
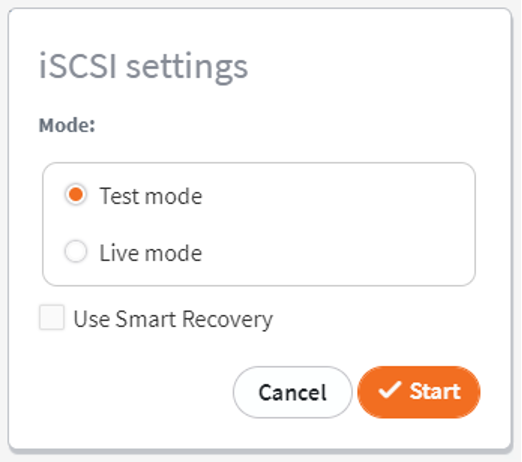
- If recovering from a recent backup, Test Mode is recommended.
- If recovering from a snapshot that was previously used to boot a virtual machine (VM) in live mode, select Live Mode to attach to the persistent snapshot clone containing the data changes made while the VM was running.
- The Use Smart Recovery option is not recommended for file and folder recovery. Smart Recovery restores the original disk identity and UUID headers. Older versions of Windows will refuse to mount two disks with identical UUID identity, while newer versions of Windows will silently change the UUID identity of the new disks. Neither of these outcomes are likely desired!
Click Start.
3. Once the snapshot has been exported, you can mount the virtual disk target to your Windows recovery system. For a system running Windows 7 or newer, or Windows Server 2008 or newer, navigate to the Control Panel's Administrative Tools.
Open the iSCSI Initiator applet.
If prompted to start the service, click Yes.
4. In the Target field, enter the IP address of the appliance or vault, then click Quick Connect.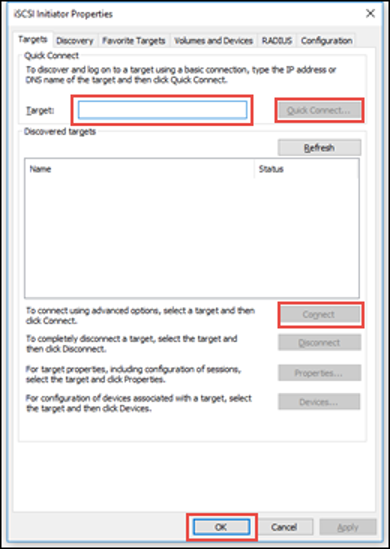
Available disks will populate. Reference the iSCSI menu pane of the appliance or vault for the IQN Name of the disk volume you would like to search.
Select the desired disk in the Discovered targets field and click Connect.
5. Once the disk has been connected, navigate to the Control Panel's Administrative Tools and open the Computer Management applet. Expand Storage and click Disk Management.
6. Locate the newly attached system disk and verify it is online. If not, right-click the disk name and select Online.
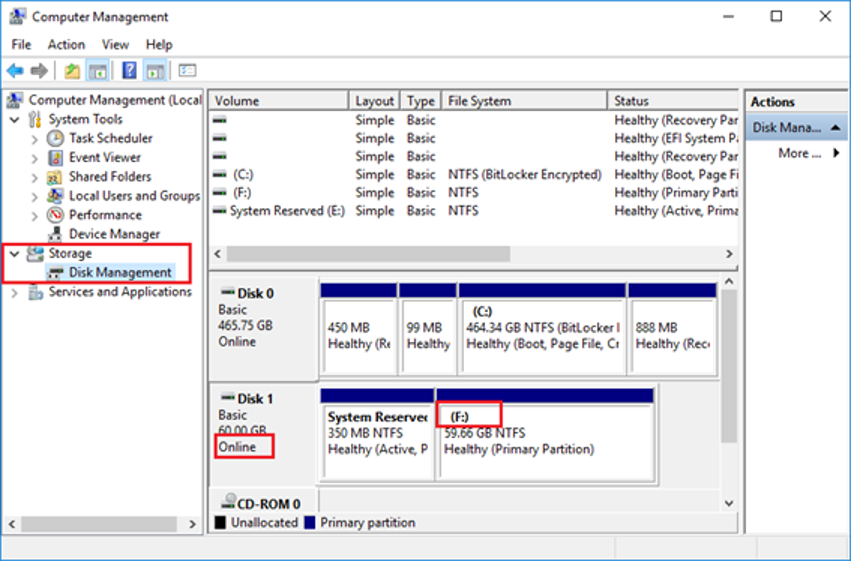
Find the drive letter that has been assigned to the disk volume(s). In the example above, it's the F: drive.
7. Use Windows Explorer or your preferred file management utility to search or browse for the file and folders you want to recover. Copy and paste them back to their original server locations.
8. Once recovery is complete, you must remove your disk connections.
- Close any Windows Explorer windows open to the recovery disk volumes.
- From the Disk Management applet, right-click the disk name and select Offline.
- From the iSCSI Initiator applet, select the connected disk(s) and select Disconnect. If you receive an error, try again after stopping iSCSI on the appliance or vault (described below).
- Remove any entries referencing the appliance or iSCSI LUNs from the Discovery and Favorites.
- In the appliance or vault, click the Stop button from the iSCSI page.
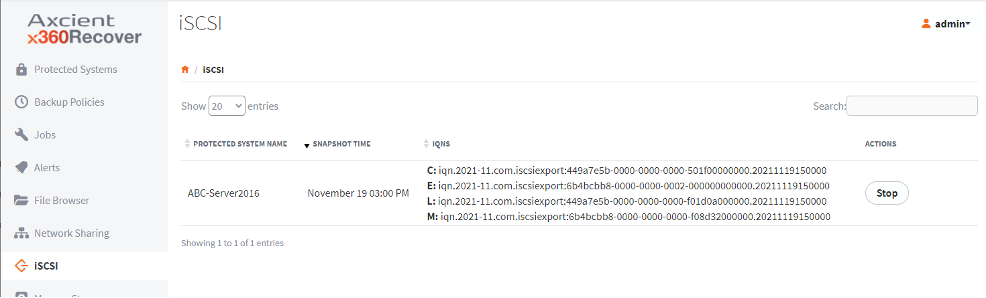
You can also click iSCSI Stop from the protected system's Details page. Be sure to change the snapshots filter from All to In Use.
You have successfully recovered using iSCSI!
DeleteIn some cases, while recovering with BDR (not Direct-to-Cloud), it may be necessary to perform a manual, partition-by-partition recovery operation to restore a system to working order. For example, if the original source disk contains multiple Windows volumes, and you must restore the original topology when recovering the system, you can use a manual copy process to recover the data, one partition at a time.
The following is an example of how to use Manual Partition Recovery to restore a system where the original Disk 0 drive contains multiple Windows volumes.
Recover with a manual partition
How to recover with manual partition
1. Export the protected system from the appliance using the iSCSI method.
If you are recovering a system that has been running in Live Mode as a virtual machine on the appliance, then select Live Mode.
Otherwise, choose Test Mode.
2. Boot your new system from the x360Recover Recovery Toolkit.
3. When the desktop loads, launch iSCSI Manager from the Utilities folder of the Launcher menu.
4. Enter the IP address of the appliance and click Discover. 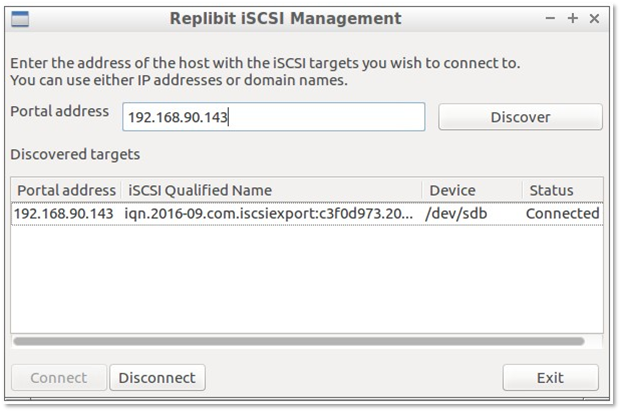
Discovered targets will populate. Select the disk target(s) containing the Windows volume(s) you wish to recover. Click Connect to attach them to the recovery tools environment.
5. Launch Disk Manager. Identify the device path for the local disk you intend to restore the volume to, as well as the device path of the original volume you mounted via iSCSI.
6. Launch LXTerminal from the System Tools folder of the Launcher menu. 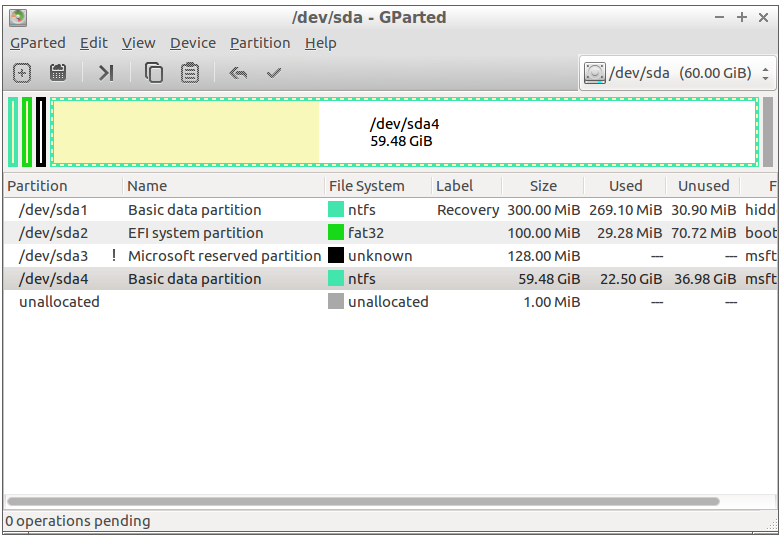
- Elevate to the root user by running sudo su.
-
Clone the partition table and disk identity onto the new system by running the following command:
dd if=<source disk device> of=<destination disk device> bs=1024 count=1024
For example, if your original protected system is /dev/sdb and your new local disk is /dev/sda, then you would run dd if=/dev/sdb /of=/dev/sda bs=1024 count=1024
7. Launch GParted from the shortcut on the desktop.
Note: If a message appears during launch stating that not all available space is in use, click Fix. For each partition from the original C: drive:
- Select the source disk device from the drop-down choices in the top right corner
- Right-click on the partition and select copy
- Select the destination disk from the drop-down selector
- Right-click the appropriate partition
- Click Paste
- Click OK when the warning on overwriting an existing partition appears.
For additional volumes, repeat the steps above to copy each partition onto the destination disk. Select unallocated space on the destination disk and a new partition will be created. Once all partitions have been selected, click the Check button from the top tool bar to perform the selected actions.
8. When all operations have completed, reboot to verify that the system will boot normally.
DeleteSUPPORT | 720-204-4500 | 800-352-0248
- Contact Axcient Support at https://partner.axcient.com/login or call 800-352-0248
- Free certification courses are available in the Axcient x360Portal under Training
- Subscribe to the Axcient Status page for a list of status updates and scheduled maintenance
1297 | 1360