
You have the ability to configure your x360Recover vault settings.
For example, as a best practice, we recommend setting up vault-wide alerts and threshold settings. (When you configure these settings, you select when a vault's health status changes. )
Review the following tasks to understand what is typically involved with successfully configuring the settings of your Axcient hosted or private vault:
Set up the storage pool (for private cloud)
For details about editing an existing storage pool, please review How to manage the storage pool
Log in and locate the storage pool
1. The first task you must complete before the other menus become active is to setup your storage pool.
The first time you log in, the navigation menu is opened and locked at the Manage Storage tab as shown below.
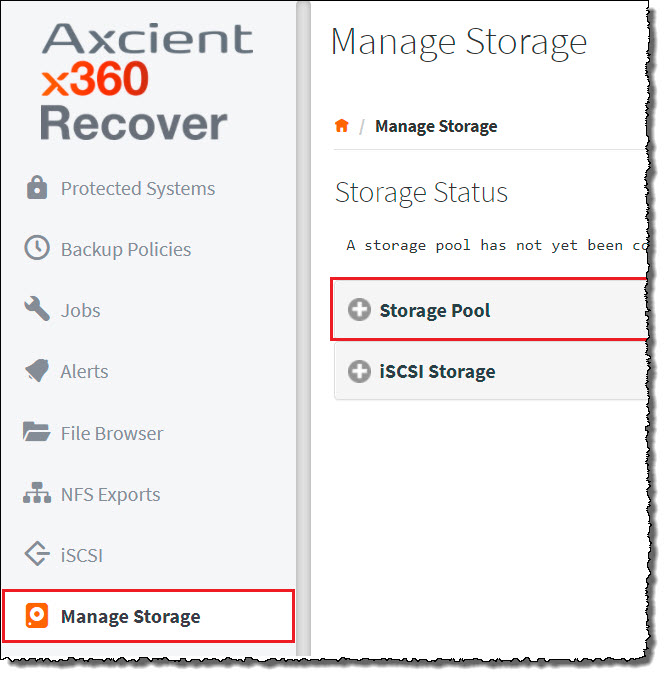
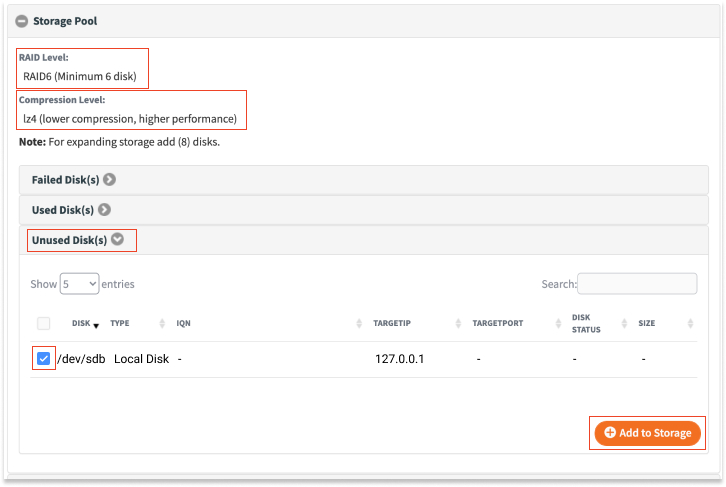
2. Expand the Storage Pool selection.
Select a RAID level
Next, select a RAID level.
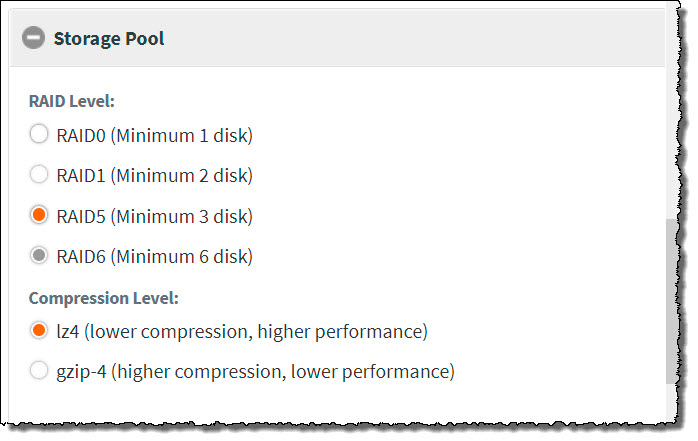
Available options are RAID-0, RAID-1, RAID-5, and RAID-6.
|
RAID-0 |
RAID-0 provides no redundancy and the loss of any disk in the storage pool will corrupt data integrity. RAID-0 is not recommended for production devices. |
|
RAID-1 |
RAID-1 requires a minimum of two (2) disks In RAID-1, the total storage available for use will be reduced by one (1) disk's worth of space (used for parity and to provide redundancy.) A maximum of one (1) disk may be lost within a RAID-1 set without losing storage pool data integrity. |
|
RAID-5 |
RAID-5 requires a minimum of three (3) disks. In RAID-5, the total storage available for use will be reduced by one (1) disk's worth of space (used for parity and to provide redundancy.) A maximum of one (1) disk may be lost within a RAID-5 set without losing storage pool data integrity. |
|
RAID-6 |
RAID-6 requires a minimum of four (4) disks. In RAID-6, the total storage available for use will be reduced by two (2) disk's worth of space (used for parity and to provide redundancy.) A maximum of two (2) disks may be lost within a RAID-6 set without losing storage pool data integrity. |
Expand the storage pool by adding disks later
Using a larger number of disks in a storage pool improves performance, as data is striped across multiple spindles
Regardless of the RAID level selected, the storage pool must be expanded by exactly the same number of disks chosen during the initial setup, using the same RAID level.
When adding additional storage sets, the size of the new disks being added does not have to be the same as the original disk set, but the set must consist of the same number of disks.
- For example, if you create a RAID-5 storage pool with three 1TB disks and later want to expand that pool, you could add three additional 2TB disks to expand the pool.
If you want to expand a RAID-0 pool by single disks, create the pool with one disk initially and then add disks, one at a time, to achieve your storage capacity target.
- NOTE: RAID-0 is not recommended or supported for production usage. Loss of any disk in a RAID-0 Storage Pool will destroy all data in the pool
Combine multiple sets to improve performance further
Using a larger number of disks in a storage pool improves performance, as data is striped across multiple spindles.
Creating storage pools by combining multiple sets of disks improves performance even more, because disk sets are striped together using RAID-0 (at the expense of extra parity space consumption.)
For example, if you combine two RAID-5 sets containing three disks each, the equivalent results equal RAID-50 or RAID5+0. Each disk set is independently redundant, and, in the case of RAID-5, could survive the loss of one disk in each set. The total usable capacity from the six disks assigned to the pool is only four disks worth of storage (because there is one disk's worth of parity in each RAID set.)
Select a compression level
After selecting the RAID level, select the compression level for the storage pool.
Lz is recommended for all devices.
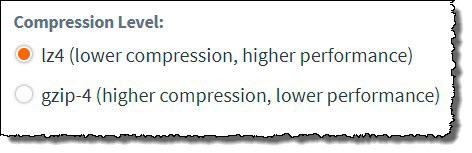
- Lz mode has slightly lower compression but higher performance.
- Gzip mode has higher compression at the expense of lower performance.
Select the desired disks
Expand the Unused Disks pane and select the desired disks to be used by the storage pool.
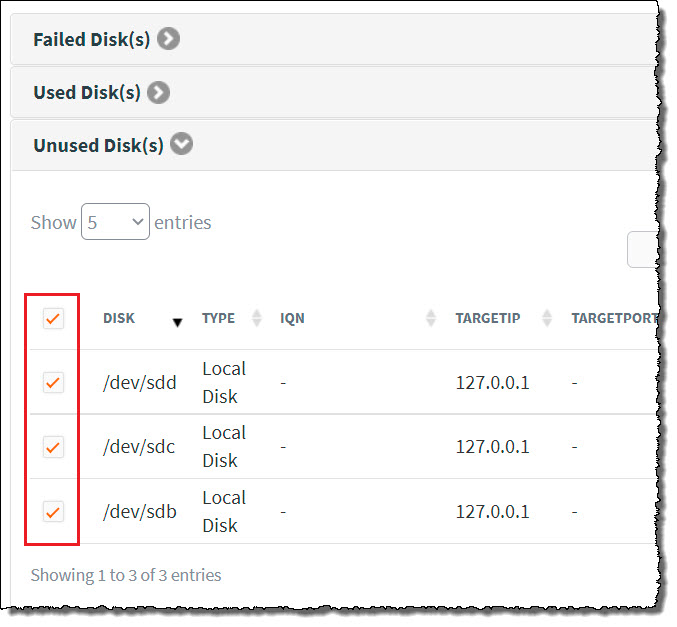
NOTE: We do not recommend having more than 10 disks in a single RAID set.
If you have more than ten disks, change your view to show 100 disks from the dropdown menu.
Create the storage pool
Once you have selected the correct RAID level, the required compression level, and the desired storage disks, click Create Storage to create the storage pool.
The Storage Status section at the top of the page will list the availability status and pool configuration once the pool has successfully been created.
Customize vault settings in x360Recover Manager
You have the ability to configure vault settings from within x360Recover Manager. For example, as a best practice, we recommend setting up vault-wide alerts and threshold settings. When you configure these settings, you select when a vault's health status changes.
How can I access Manager?
You have single-sign-on (SSO) access to Manager through the x360 Portal Dashboard.
To configure vault settings in x360Recover Manager
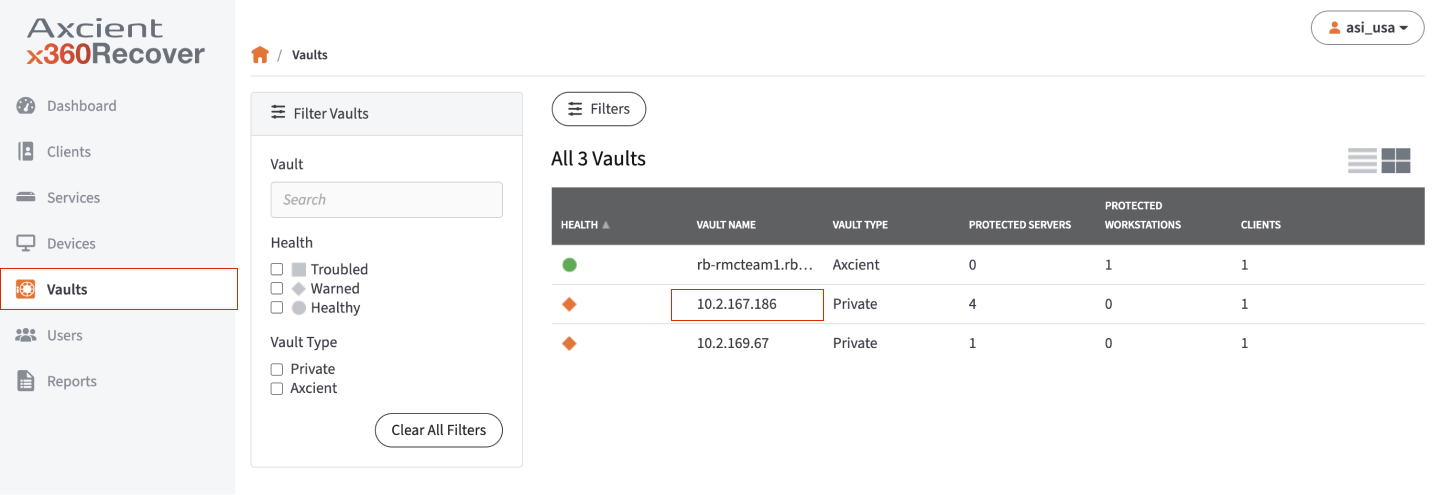
1. In x360Recover Manager, click the Vaults tab. The Vaults page displays.
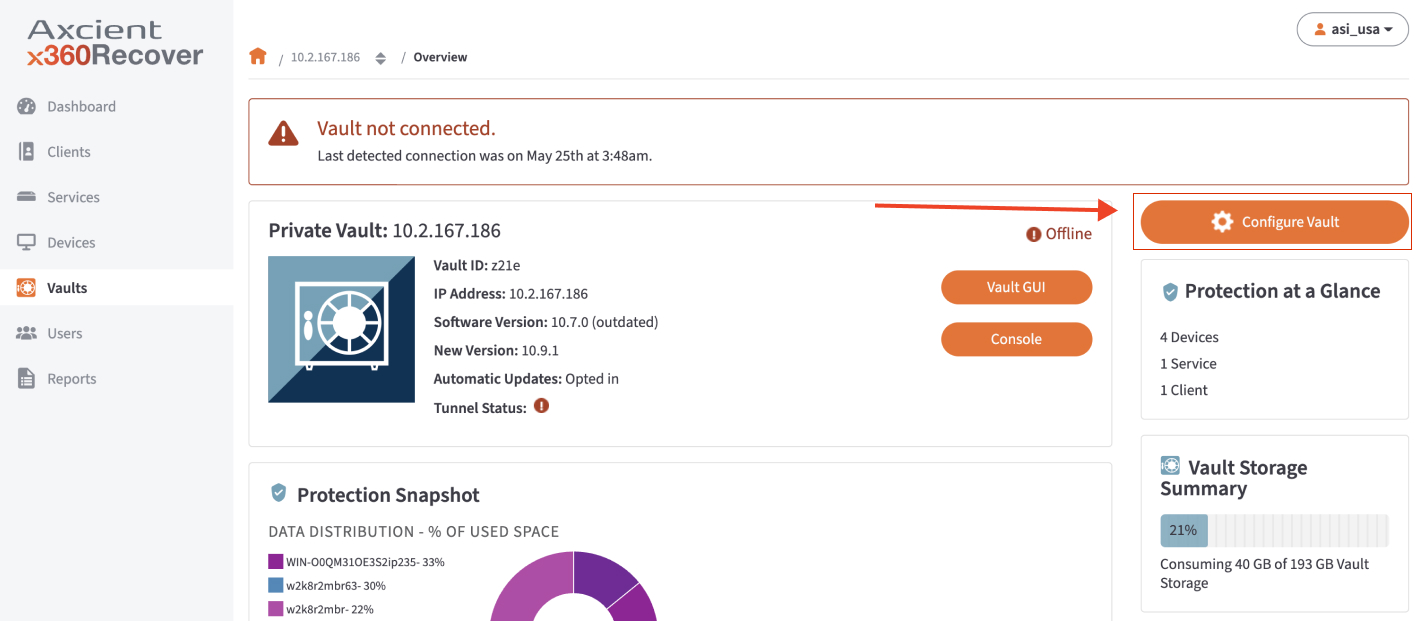
2. In the Vaults page, find the vault you want to manage and click the appropriate Vault Name.
The Vault Details page displays.
3. In the Vault Details page, click the Configure Vault button. The Vault Settings page displays.
4. In the Vault Settings page, find the Vault-Wide Alerts & Thresholds section and click the Edit button.
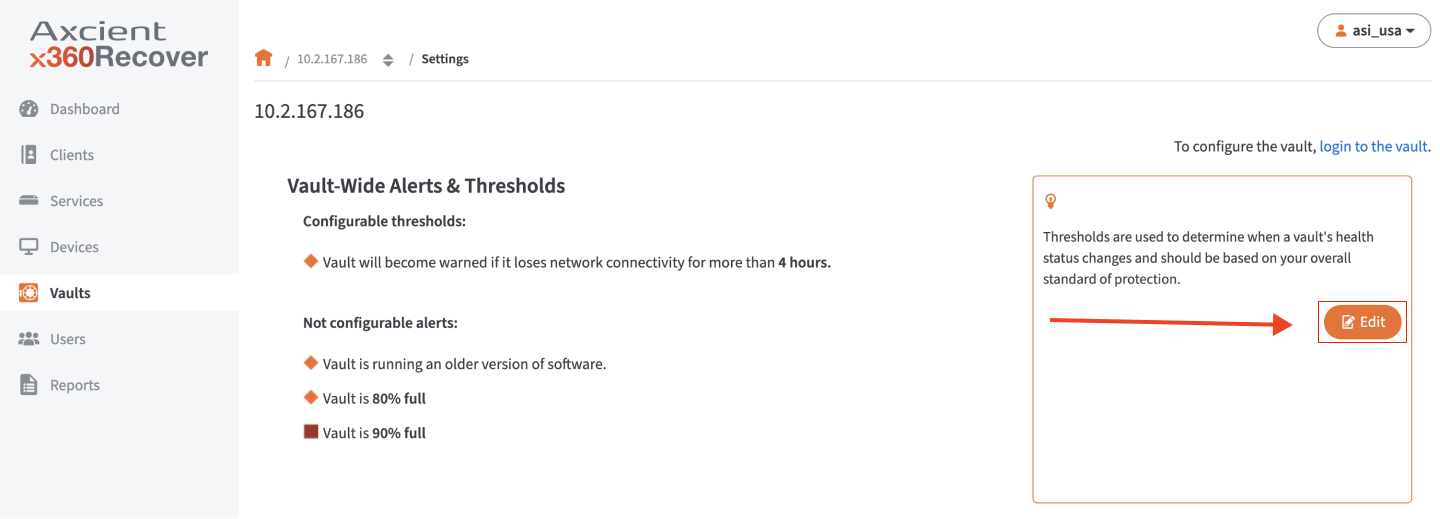
5. Click the slider tool and adjust when a vault's health status changes.
The vault will be listed as warned if it loses network connectivity for the selected number of hours.
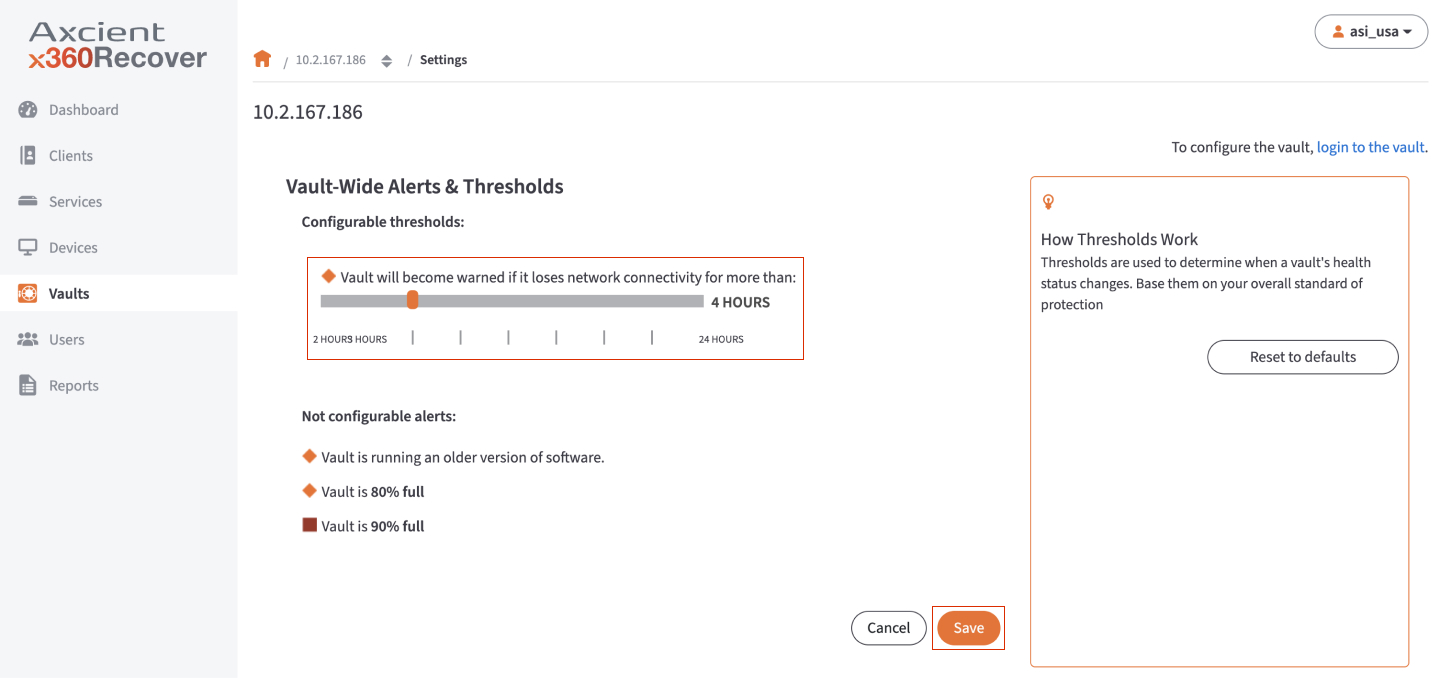
6. Click the Save button when you are finished.
SUPPORT | 720-204-4500 | 800-352-0248
- Please contact your Partner Success Manager or Support if you have specific technical questions.
- Subscribe to the Axcient Status page for a list of status updates and scheduled maintenance.
640 | 874 | 1364