
Step 1. Put the desired account into Maintenance Mode.
When creating a preload (seed) drive, the desired account must first be put into Maintenance Mode from the Axcient Backup Portal. When an account is in Maintenance Mode, online backups are not allowed to proceed. This is important because until Axcient receives the disk and loads the data onto your storage server, that account should not try to upload incremental changes to your data. The account must remain in maintenance mode until the preload has been processed, at which point the maintenance flag will removed by Axcient .
There are two methods available to put an account into Maintenance Mode:
Method #1:
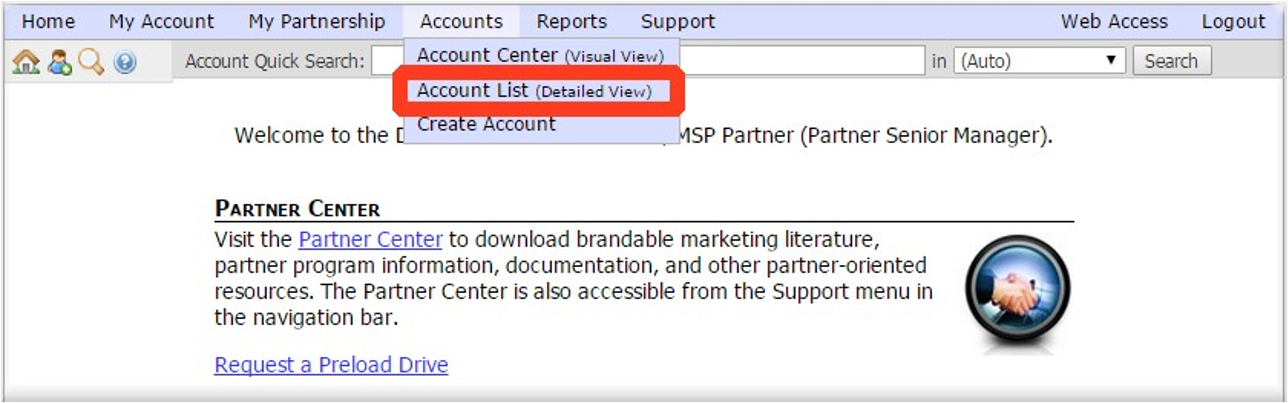
a. From the Axcient Backup Portal, under Accounts, select Account Center (Visual View):

b. Right-click on the desired account.
c. Under Account Status, choose the option Put into Maintenance Mode.
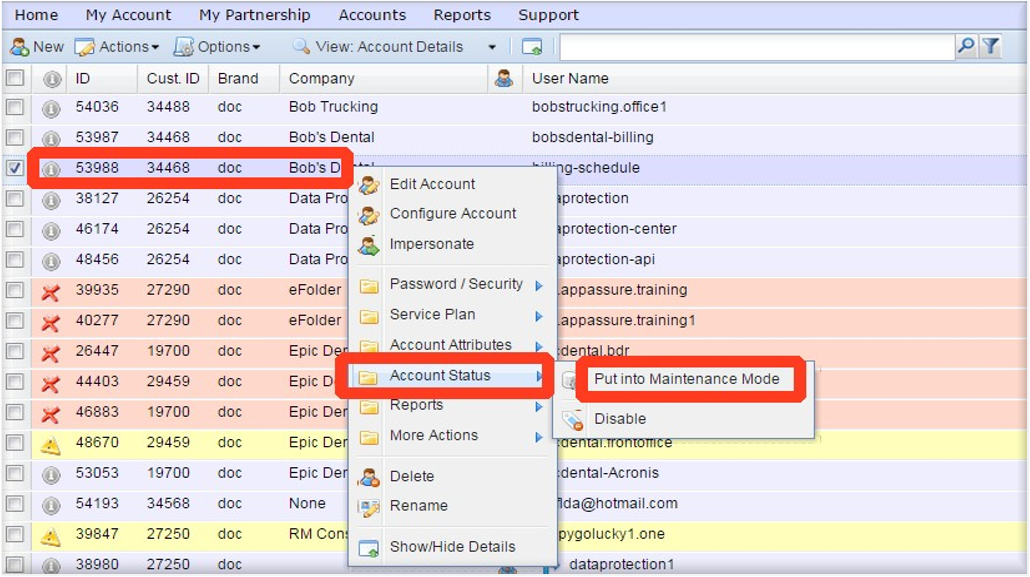
A confirmation will display when the account is in Maintenance Mode.
Method #2:
a. From the Axcient Backup Portal, under Accounts, select Account List (Detailed View):
b. Scroll over to see the Failed Logins column.
c. Click the [M] link on the row of the desired account. This will “Set the maintenance flag.”
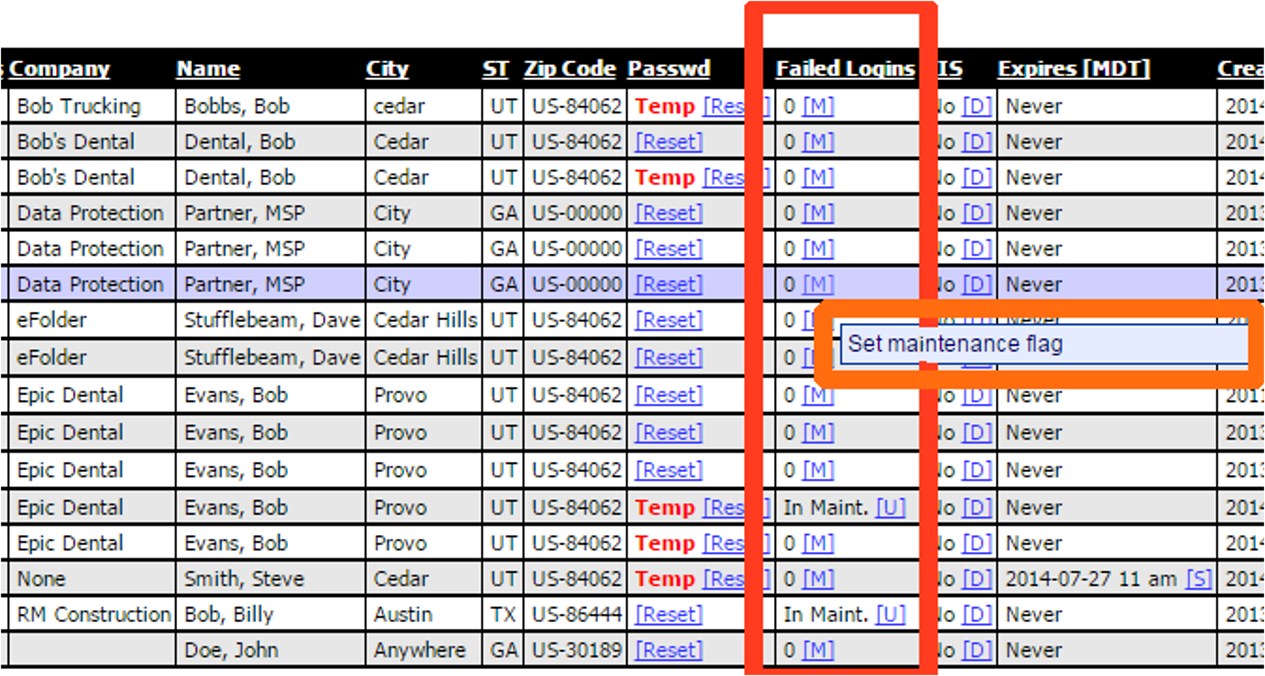
d. A confirmation will display when the account is in Maint. (Maintenance Mode).
Step 2. Verify and enable the backup schedule.
Open the backup client software and verify that the My Account, Folders, Schedule, and Options pages are configured for backups to occur as normal.
IMPORTANT: Please make sure that the Remote Backup schedule in the backup client software is enabled by setting it to Daily and notManual. Once the preload has been processed and the account has been taken out of Maintenance Mode, the disk usage on the Web Portal will not update until the first backup has completed. Backups will only resume automatically if the schedule is enabled.
Step 3. Initiate the preload from the backup client software.
a) From the File menu of the Backup Manager software on the machine containing the seed data, choose Preload Remote Backup.
b) A new window displays. Select the disk location of the portable hard drive under Portable Device Path. For example, if the disk was located at G:\, use the location G:\Backup.
Note: You cannot backup to the root directory if it contains any other data.
c) Choose the desired path and click Start.
IMPORTANT: Selecting the Remote Server option
After clicking Start, a window opens that asks “Which destination would you like to use to perform this action?” It may offer the Local Serveror Local Disk options if these destinations are enabled as backup locations. Do not choose Local Server or Local Disk.
Doing so would write the incremental backup cache to a different place and your preload would be invalid. Make sure that you use the Remote Server option instead.
IMPORTANT: Network share option
In some circumstances, you may have multiple servers on the same network with accounts to be preloaded. It may not be possible to physically attach the preload drive to each system individually, so we have made it possible to use a network share as the preload location:
- Connect the hard drive to the server of your choice.
- Configure its sharing permissions for your network.
- Use a UNC path (not a network mapped drive in Windows) as the location under the Portable Device Path field.
- Change the credentials of the {branded} Backup service to a Windows user that has access to the network location before starting the preload.
Step 4. Begin the backup process
When you click OK, you will see a warning that you are about to begin a backup-to-disk process. Choose Yes, and the backup process will begin. You can monitor the status of the backup using the Remote Backup system status page. If any errors occur during backup, please contact Support prior to sending out your drive.
IMPORTANT: Do not take the account out of Maintenance Mode after you have completed the preload backup. The account must be left in Maintenance Mode until the data has been processed by our data center. When your data has been processed, we will take the account out of Maintenance Mode and backups will resume as scheduled.
Tips
- In some circumstances, preloading a very large amount of data may take a while to copy. Meanwhile, changes most likely will have been made to the data you are backing up during that time. Once the preload has finished, you can run through the procedure again, using the same destination (for example, G:\Backup) and the data on the drive will be updated with current data. This will reduce the time it takes to sync up with the offsite backup once the preload has been processed.
- You can include preloads for multiple accounts on the same disk. Just create a folder for each account; then, connect the drive and run the preload procedure to each specific directory.
Sending the preload drive to Axcient
After successfully completing these steps, you are now ready to send the preload (seed) drive to our data center. Follow the shipping instructions you received from us with your preload drive.
If you have any problems during this procedure or see errors in the log file, please contact Support before sending us the drive.