Overview
This article reviews the steps to create a new administrative user and assign a security role.
Steps required
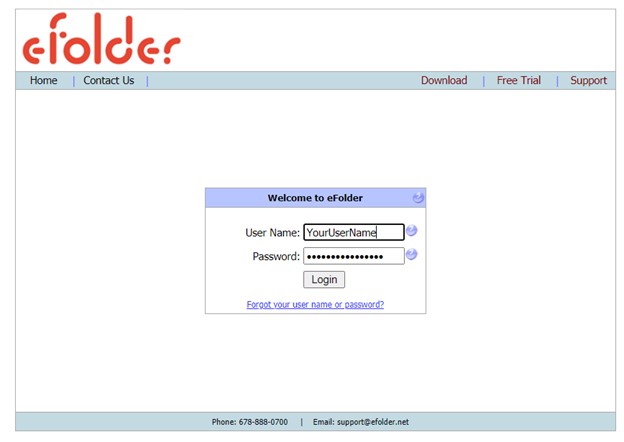
1. Log into the Axcient Portal located at https://backup.securewebportal.net/
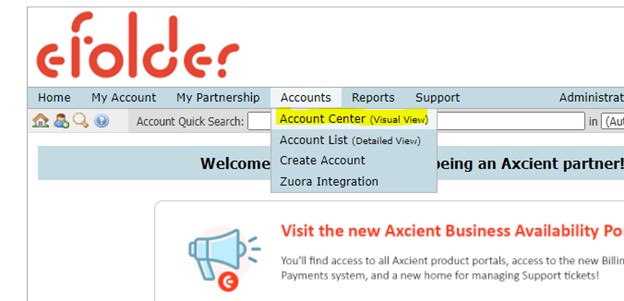
2. Select Account Center (Visual View) in the Accounts main menu bar option.
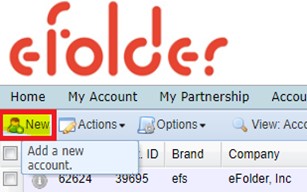
3. Click the New
Account Wizard button
on the top left under the Home button on the menu bar.
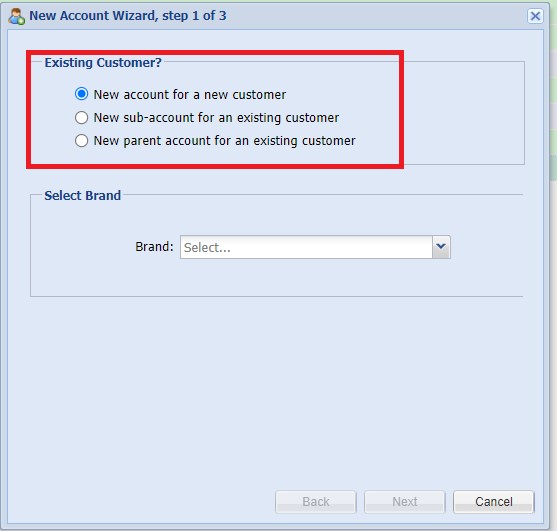
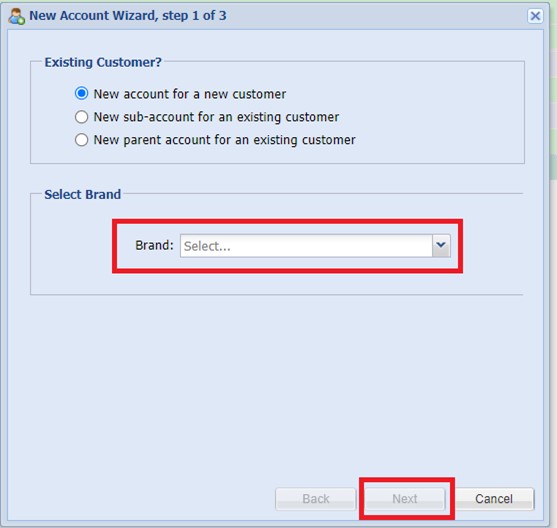
4. Your situation will determine which option you want to select:
a) New account for a new customer
b) New sub-account for an existing customer
c) New parent account for an existing customer
In most cases, select option b or c.
If you select option a, you will have to enter the contact info, as the new account will not use the existing contact info on the customer record.
5. Select the Brand from the drop down and click Next to continue.
Note: If you have more than one brand, be sure to select the appropriate brand. When you have multiple brands, one of your brands will be designated as a parent and can see all the other brands. Sub brands will only be able to see themselves.
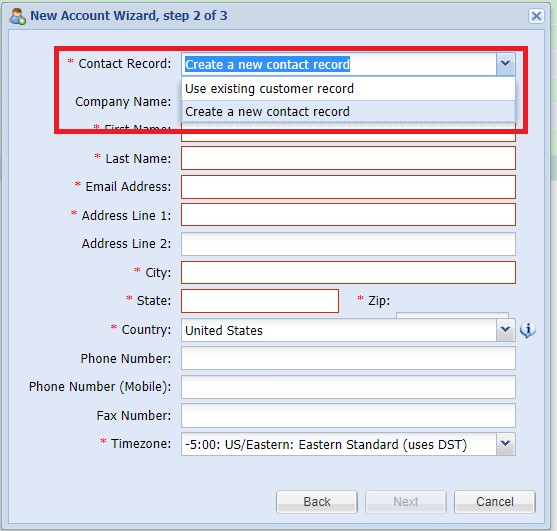
6. You can either create a new customer record or use an existing customer record.
Create a new contact record if you are creating accounts for internal employees who should manage their own log ins.
You can then enter a new email address to be on record for the account you are creating.
7. When creating a new contact record, complete the required fields (*) First
Name, Last Name, Email Address, Address Line 1, City, State, Zip,
Country, and Time
Zone. The other fields are not required, but can be completed as desired. Click Next to continue.
If you are using the existing customer record, simply click Next.
8. If you are creating a Sub-Account, select the desired parent account from the Parent Account ID pull-down menu.
(If you are creating a Parent Account, this field will not be present.)
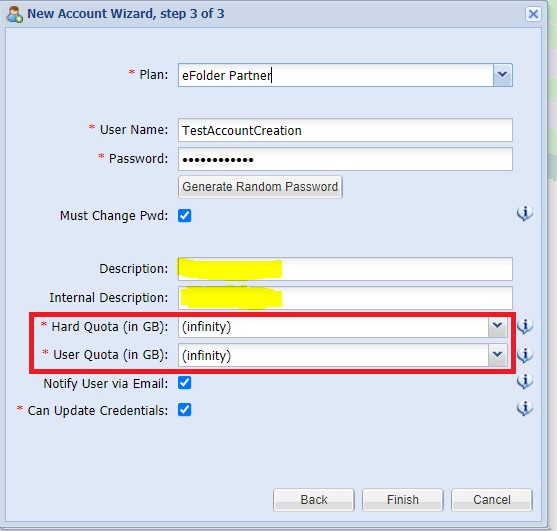
9. Enter the desired User Name.
10. You can manually enter a password, or you can select Generate Random Password.
If you uncheck the Must Change Pwd option, the user will not be required to change the password when they first log in.
You can also opt to Link password to parent. If you do this, the password cannot be changed independently from the parent account. Any time the parent account password is changed, the sub account password will be changed as well. We do not recommend this for administrative accounts.
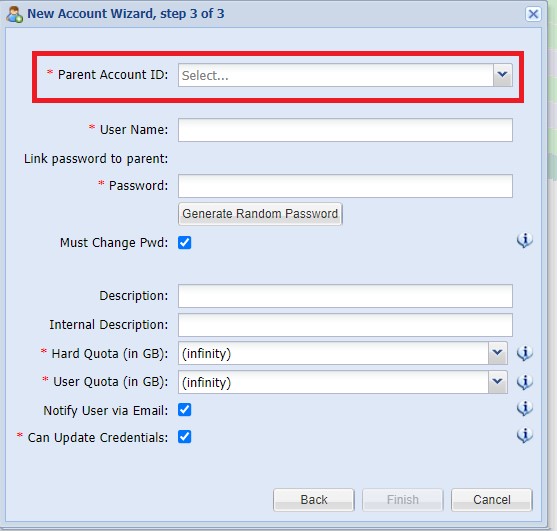
11. The Description field is not required, but can be used for notes about the account. This field can be seen by the user.
Internal Description can only be seen by your company’s administrators for the Portal.
Quotas: In most cases, you will not set a quota for these type of accounts. Do not attempt to do backups with accounts used for administration. If the username will be doing backups, you can choose to enter a quota to limit the amount of data this username can backup. The Hard Quota field will keep the account from backing up any data over that amount.
12. In most cases, you will want to leave Notify User via Email selected, as well as the Can Update Credentials. This will ensure the new user will receive an email with their username and password.
Click Finish.
13. If you selected the temporary password option, a pop up will confirm the temporary password.
Click OK to continue.
14. You will now be back in the Account Center.
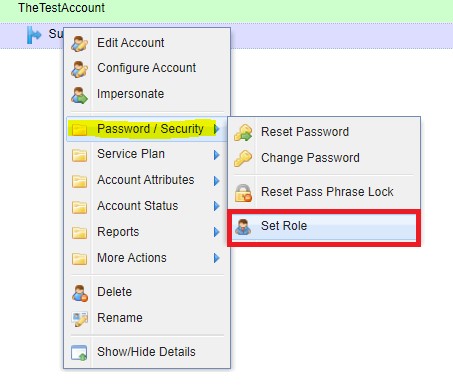
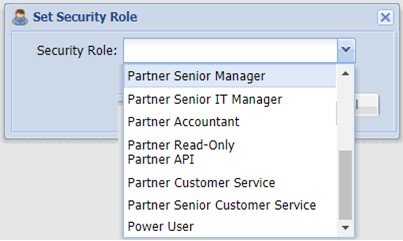
Right click on the new user and select Password/Security and then Set Role.
Select the desire security role from the pull down menu.
Set the desired security role permissions:
|
Partner Senior Manager |
Assigns security roles and manage all other accounts. |
|
Partner Senior IT Manager |
Assigns security roles and manages all accounts except Partner Senior Manager |
|
Partner Senior Customer Service |
Creates new accounts; Delete accounts; Cannot assign security roles. |
|
Partner Customer Service |
Only modifies existing accounts |
|
Partner Read-Only |
Accesses reports (such as billing reports) and documents on the Axcient Portal. |
|
Partner API |
Allows management software to pull data directly from the Axcient Portal. |
|
Power User |
Designed for end users who need to log into the Axcient Portal and see their own company accounts. |
|
Default User |
Role automatically assigned to all new accounts. |
A complete listing of all available security roles is available here:
15. Click Submit.
A popup message will confirm the operation results.
Click OK to
continue.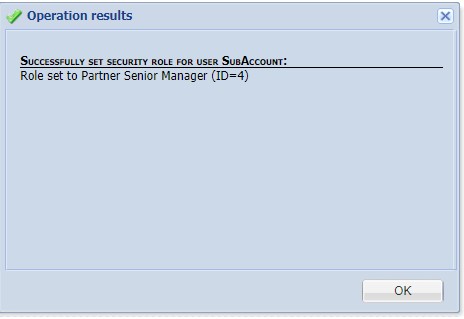
16.
The new security role icon will be displayed to the left of the
username.
If you hover over the icon, it will display the currently-assigned security role:
17. If this new account does not perform backups, consider disabling the email notifications for this account.
a. To disable the email notifications, right click on the desired account and choose Impersonate.
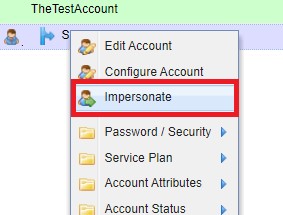
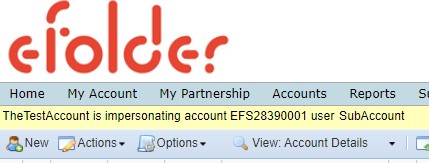
b. A yellow banner at the top of the page indicates when one account is impersonating another:
c. Go to My
Account > Notifications
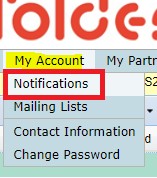
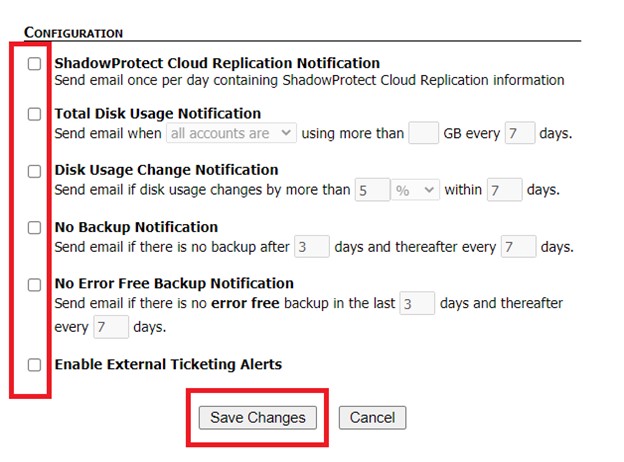
d. Uncheck all of the boxes.
Click Save Changes to continue.
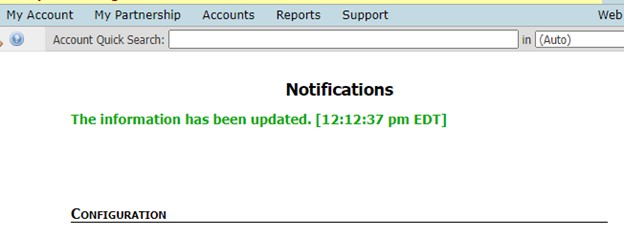
e. The page will reload with an update confirmation message at the top.
f. Click Stop
Impersonating on
the right side of the screen.
g. Your Portal will reload.
Continue with any other tasks you need to complete as normal.
SUPPORT | 720-204-4500 | 800-352-0248
Contact Axcient Support at https://partner.axcient.com/login or call 800-352-0248
Free certification courses are available in the Axcient x360Portal under Training
Subscribe to the Axcient Status page for a list of status updates and scheduled maintenance
745
