
Send an email using a customized asset
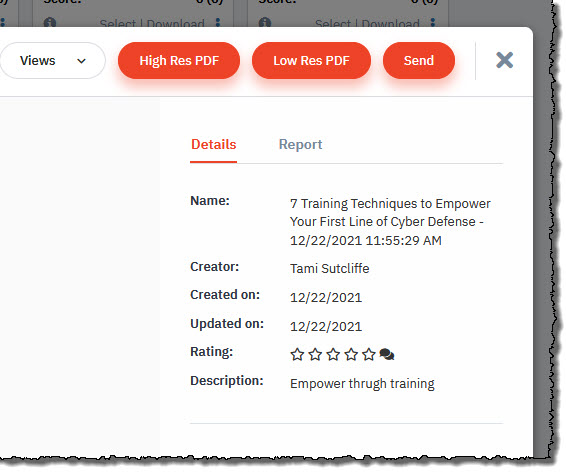
After you complete an asset customization session, a preview window will display several choices.
[For instructions on preparing and customizing an asset for publication in an email, please review View and customize your AMP assets]
If you click Send...
...a window with the configuration choices for this email will open.
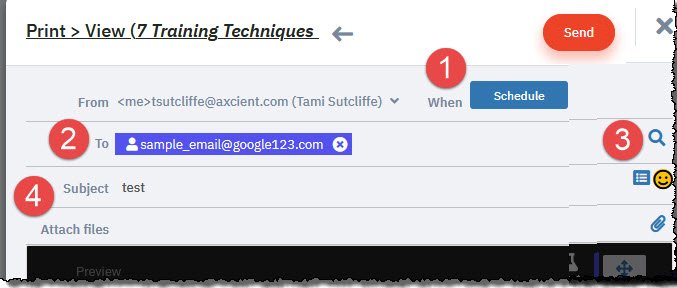
1. To schedule this email: Choose when you wish this email to be sent by using the dropdown menu by the blue Schedule button. This will let you (a) customize a specific send date and time or (b) send immediately.
2. To add contacts: Click the empty To: field and type in the desired email address.
3. To choose pre-existing contacts: To determine which of your pre-populated contacts will receive this email, click the magnifying glass at the far right of the To: field. This will allow you to select any pre-uploaded contacts or lists. Select the desired contacts and click Select.
4. To add a subject: Type in the desired email subject on the the subject line
When all the desired fields are completed, click Send.
Set up an automated email "drip" campaign
Automated email drip campaigns send a targeted message, triggered by specific dates or actions. You set them up to reach just the right person - at just the right time. Since the emails are automated, this kind of campaign stays in touch with contacts while you invest your time elsewhere.
How to set up a drip email campaign
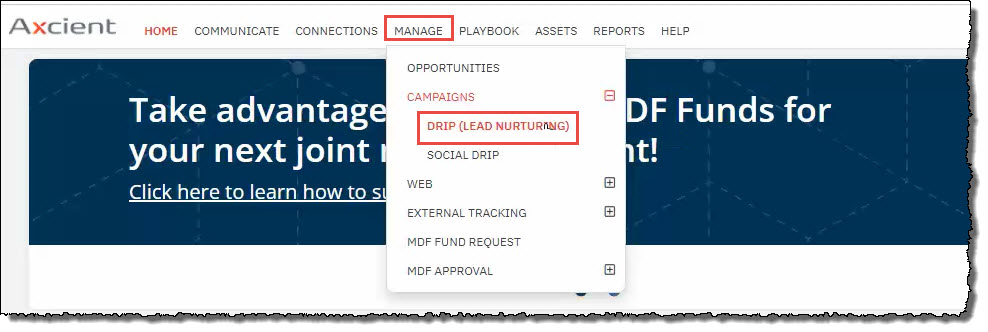
1. Log in to the AMP via the x360Portal and hover over the MANAGE tab.
2. Click CAMPAIGNS.
3. Then, click DRIP (LEAD NURTURING)
4. Select the template for the type of campaign you would like to configure by clicking the gear icon in the lower right corner of the desired campaign.
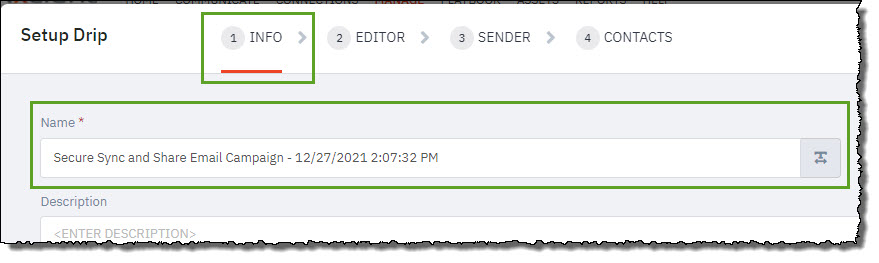
For example, the template selected below is for a Secure Sync and Share Email Campaign:
![]()
After you click the gear icon on the desired campaign template, four tabs appear containing the Setup Drip tools. Your four choices are Info, Editor, Sender, and Contacts
STEP 1. Configure the INFO page
In the INFO screen, you can rename this campaign and enter a description, if needed.
- When you have completed the desired changes, click the arrow > to continue on to the EDITOR screen.
STEP 2. Configure the EDITOR page
Within the EDITOR screen, you can edit (1) the event name, (2) the send dates, and (3) the email copy. 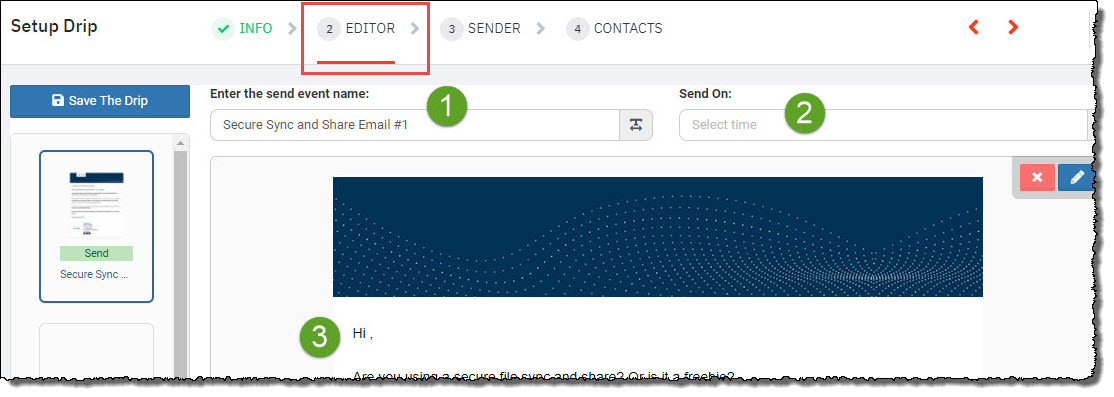
1. To edit the Send event name, make the changes in the appropriate field.
2. To edit the Send on date, make the desired changes in the appropriate fields. You can also add and edit customized delays by clicking the Delay button in the editor for each desired instance.

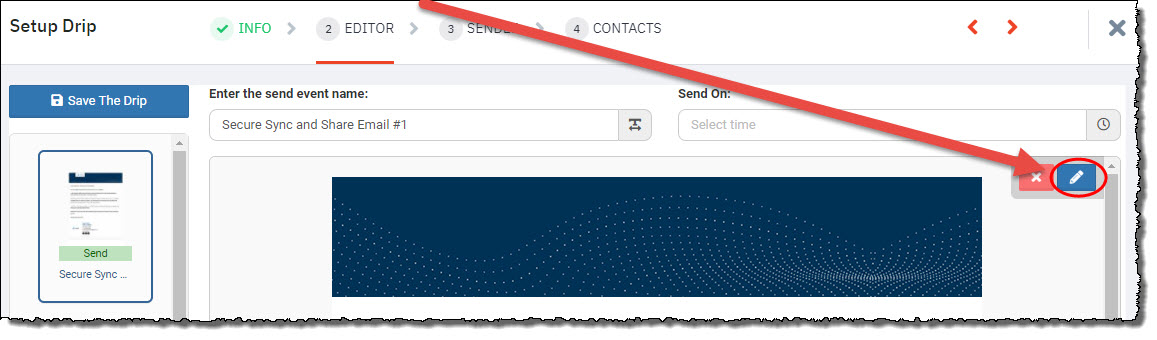
3. To edit the information included in the body of the email, click the blue pencil icon on the top right.
When you have completed all desired changes, click the arrow > to continue on to the SENDER screen.
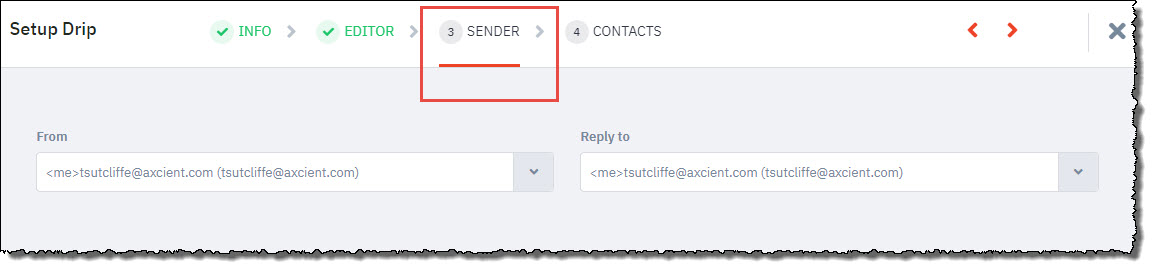
STEP 3. Configure the SENDER page
Update the Sender information to match your desired email address. (Sender indicates who the email originates from.)
When you have completed all desired changes, click the arrow > to continue on to the CONTACTS screen.
STEP 4. Configure the CONTACTS page
The Contacts page allows you to customize a variety of features, including the reply-to address, the days you would like to post, the time range for sending this message and the start and stop dates.
- This is also where you can select contacts from the dynamic list which you previously uploaded.
Once you have completed all settings and selected the desired Contacts list, click the FINISH button in the top right to complete this entry.
More about using the Axcient Marketing Portal (AMP)
SUPPORT | 720-204-4500 | 800-352-0248
- Contact Axcient Support at https://partner.axcient.com/login or call 800-352-0248
- Free certification courses are available in the Axcient x360Portal under Training
- Subscribe to the Axcient Status page for a list of status updates and scheduled maintenance
999