
Connect to the VPN
When the Client VPN option has been enabled and configured within your Virtual Office, a link will be provided to the VPN Client installation and instruction page. This link is unique and specific to this running Virtual Office. Partners may copy and send this link to the desired recipients who will be connecting their workstations directly to Virtual Office via client VPN services.
Client users will need to know the following information to setup and connect to the VPN:
- The VPN Client Installation URL
This web page contains basic instructions on downloading, installing, and configuring the client software - Their VPN username and password
Usernames and passwords may either be manually configured as local users during the Virtual Office setup or runbook or integrated with an Active Directory domain controller running inside the Virtual Office (in which case the users will login with their normal Windows usernames and passwords.) - The User-Suffix (see below)
The User-Suffix is a unique domain associated with THIS Virtual Office instance that identifies the users to a specific environment. User-Suffix is shown within the Virtual Office settings once a Virtual Office is running and takes the form ‘@<clientname>’ Users will enter their username in the form <username>@<user-suffix>
Notes:
For details on starting a new Virtual Office see: Virtual Office – Getting Started
For details on using a Runbook see: Create and Manage Runbooks

STEP 1. Navigate to the appropriate Virtual Office page.
You can do this in two ways:
Through the Dashboard tab:
- Click on the Dashboard tab in the lefthand navigation of RMC.
- Open the Activities of Interest accordion.
- Open the Cloud Virtualizations accordion.
- Hover over the righthand side of the table under the appropriate Client.
- Click on the Manage Office text that appears.
or
Through the Clients tab:
- Click on the Clients tab in the lefthand navigation of RMC.
- Open the Activities of Interest accordion.
- Open the Cloud Virtualizations accordion.
- Hover over the righthand side of the table.
- Click on the Manage Office text that appears.
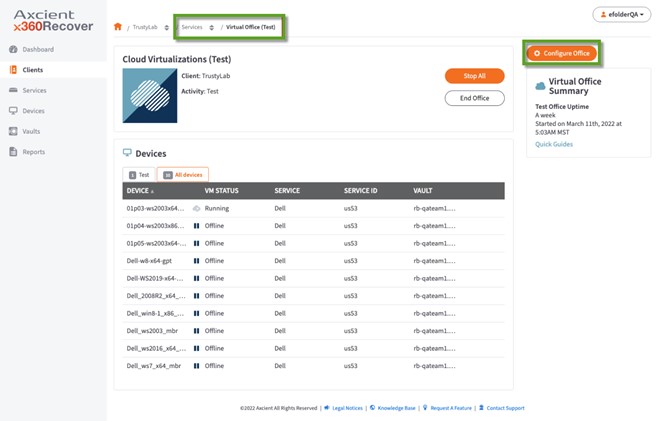
STEP 2. On the Virtual Office page, click the Configure Office button.
STEP 3. On the Configure Virtual Office page, click the VPN Client Download button in the VPN section.

Please note the User-Suffix value on this page.
The User-Suffix identifies this running Virtual Office environment for logins. When users log in to the VPN client, they will enter their username in the form <user>@<user-suffix> (i.e. ‘user1@myclient’ etc.)
IMPORTANT: VPN Client Users may either be created manually when setting up the Virtual Office (or as part of a runbook) or you may leverage Active Directory integration to authenticate using an Active Directory domain controller running inside your Virtual Office environment. Whether you use locally created users or Active Directory, the user login names will still be the same, i.e. <user name>@<user-suffix>. DO NOT enter the fully qualified Active Directory domain name for username (i.e. the Active Directory user jsmith@mydomain.com would log in to the VPN client as jsmith@myclient, etc.)
STEP 4. On the VPN Client Download page, the user is presented with instructions and a link to download and install the OpenVPN client software.
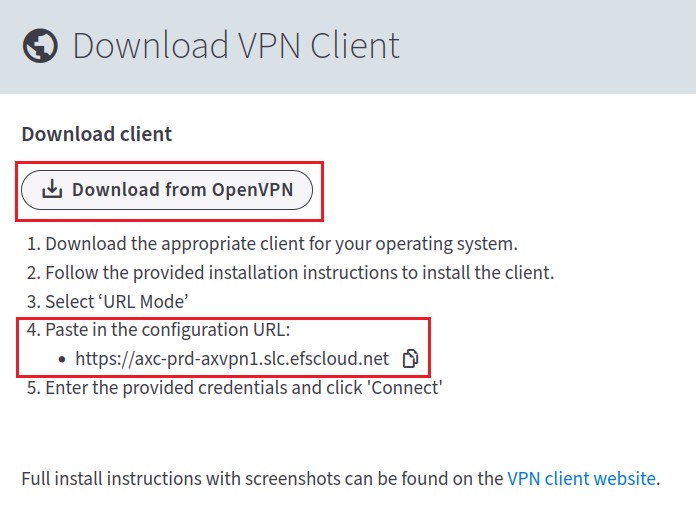
This page contains two important items:
- The OpenVPN Client software download link
- The OpenVPN Client Configuration URL
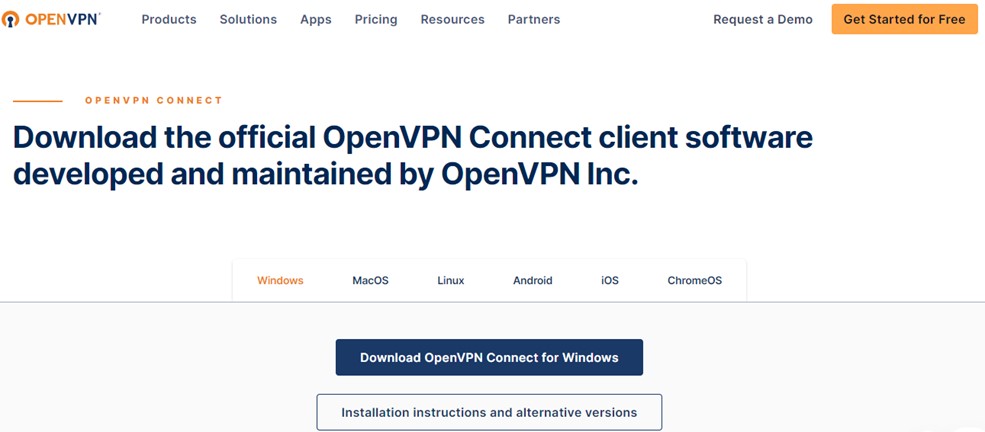
Clicking the Download button opens the OpenVPN Client Download page, which contains client downloads for Windows, Linux, macOS and other platforms, with complete installation instructions.
 Upon completion of the installation of the OpenVPN Client software, the user will be prompted for the Configuration file URL. This URL is shown on the VPN Client Download landing page (as above.)
Click the Copy gadget to copy the URL into the system clipboard and paste it into the OpenVPN Client installer when prompted.
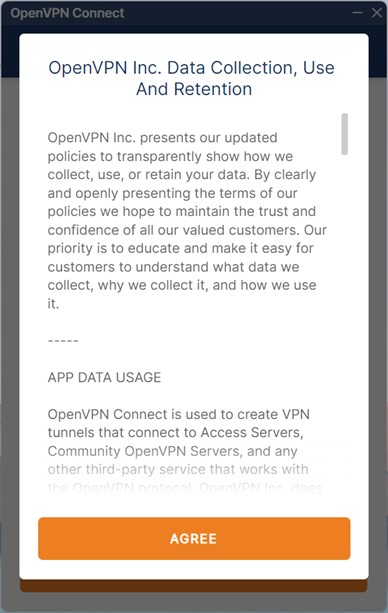
STEP 4a. Agree to the Licensing Terms
STEP 4b. Enter the Configuration URL
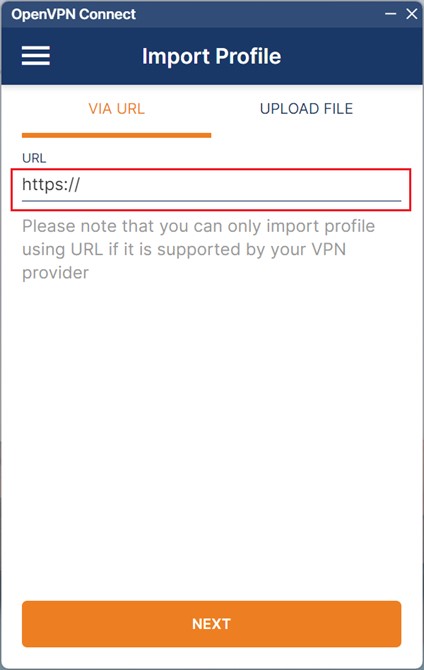 Configuration URL is located on the VPN Client Download page. This URL returns a configuration file specific to this running Virtual Office environment for the client account.
Copy and paste the URL from the VPN landing page to the OpenVPN Client application
STEP 4c. Enter the username
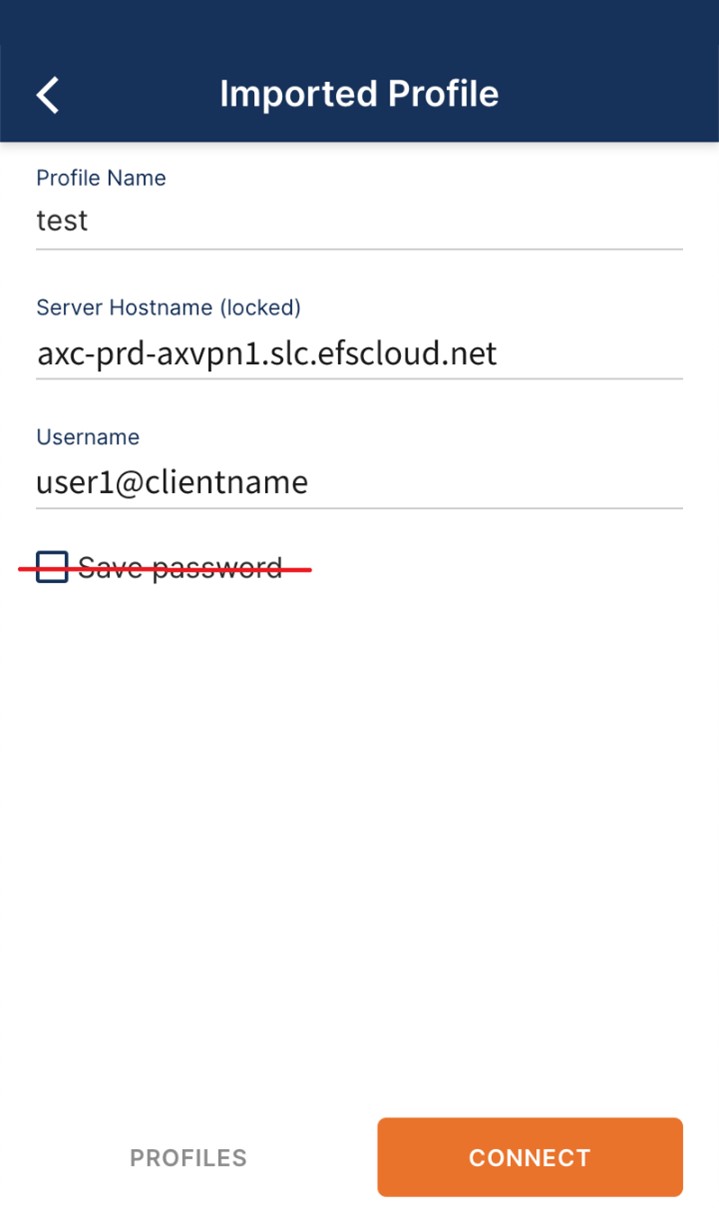 Note: The username entered is used to identify the running Virtual Office environment based on the user suffix value.
The password entered here during the client setup is irrelevant - only the username is used to validate the configuration file being downloaded.
NOTE: Do not check ‘Save password’ during this step. Actual password validation will occur when the client actually connects to the VPN.
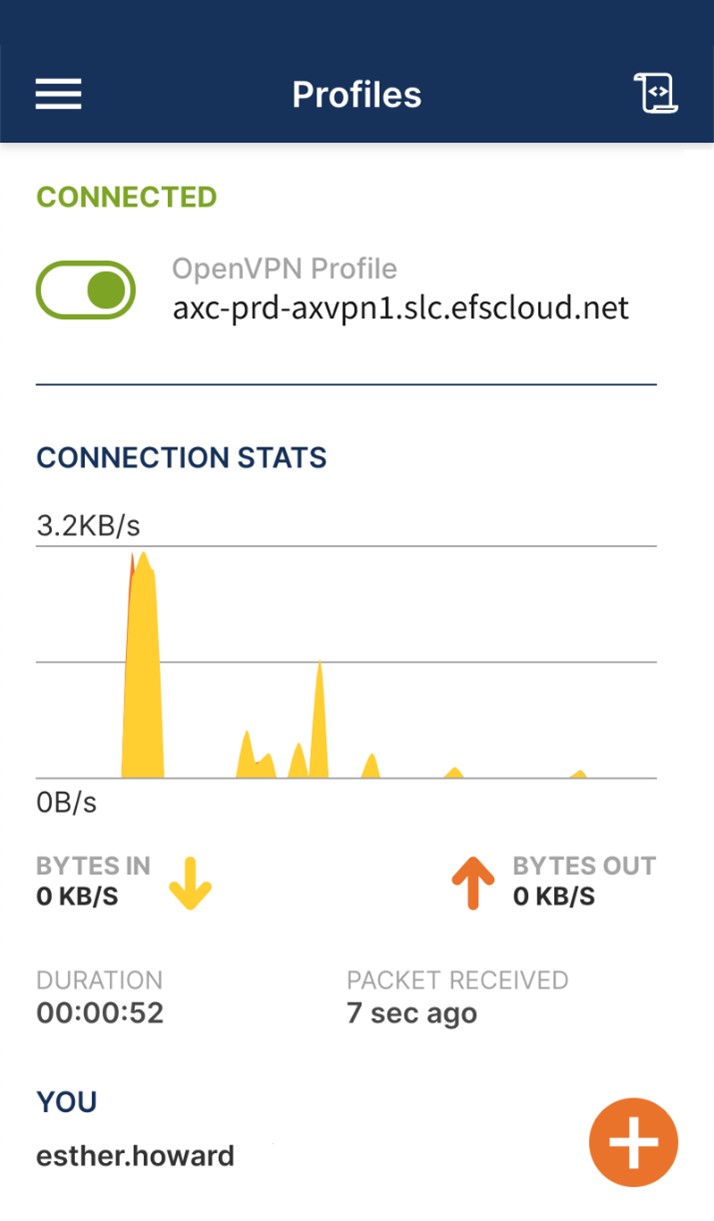
STEP 4d. Once connected, the OpenVPN Client will display connection and network traffic status.
STEP 5. You can manage and monitor your VPN connection from the OpenVPN client icon in the system tray:
The OpenVPN client icon in the system tray looks like this:
Edit Client VPN settings
To configure or edit VPN settings:
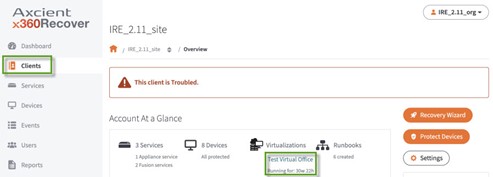
1. Go to Clients tab in the navigation.
Choose the Virtual Office (Test Virtual Office in this example) in the Account at a Glance section under Virtualizations.
2. On the Virtual Office (Test) page, click on the Configure Office button on the top right.
Click on Configure Office to make changes to the running Virtual Office.
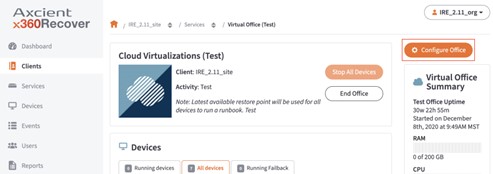 Note: From this screen you can also start and stop virtual machines or terminate and end the Virtual Office.
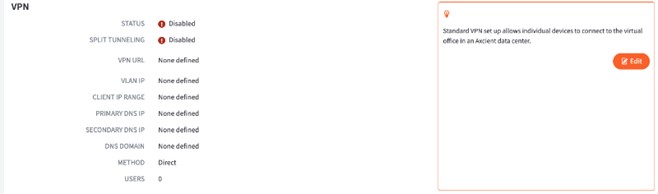
3. On the Configure Virtual Office page, click the Edit button in the VPN section.
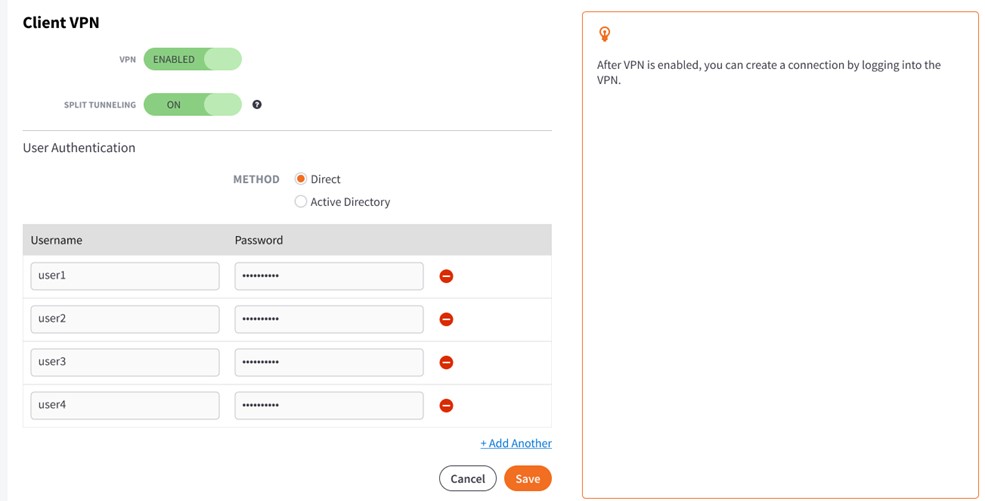
4. In the VPN section of the screen, enter a value for one or more of the following fields:
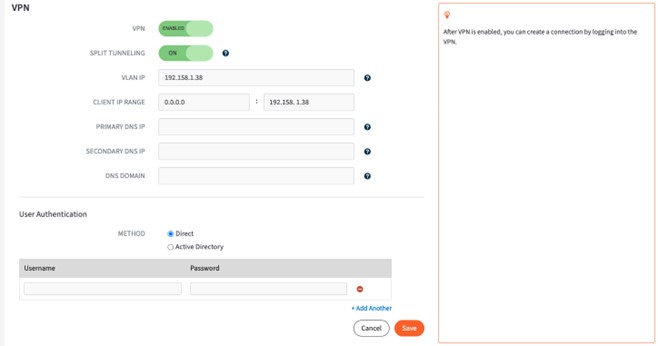
- Toggle to Enable the VPN setting to turn on Client VPN.
- Enable the Split Tunneling setting to route the VPN user’s Internet access through their device. Alternatively, disable to route all Internet traffic through the Virtual Office.
Note: Generally, Split Tunneling is recommended. With Split Tunneling Enabled only network traffic destined for the Virtual Office will be sent over the VPN. With Split Tunneling Disabled, ALL Internet traffic will be sent over the VPN, then rerouted out to the Internet from the Axcient datacenter. - In the VLAN IP field, enter the IP address that gets assigned to the virtual network interface inside the failover network. This address must be an unused IP address within the scope of the network subnet configured for Virtual Office.
IMPORTANT: DHCP services are required for Client VPN connections to receive a network address within Virtual Office upon connection. You must either (a) enable and configure the DHCP Server within Virtual Office (See DHCP Settings) or (b) have DHCP services configured and enabled on a virtual machine running within the Virtual Office. Failure to provide DHCP services within Virtual Office will result in an authentication failure error when configuring or connecting the OpenVPN Client.
-
Optional fields:
-
Primary DNS IP and Secondary DNS IP are used for resolving hostnames for IP addresses.
Note: Setting at least a Primary DNS IP is highly recommended or connecting devices will not be able to resolve network names or browse the Internet. -
DNS Domain can be used to resolve hostnames that are not fully qualified.
Note: It is recommended to set the DNS Name to the Active Directory domain name to ensure that Windows server name resolution is reliable
-
Primary DNS IP and Secondary DNS IP are used for resolving hostnames for IP addresses.
- In the User Authentication section of the screen, select the preferred method of VPN authentication.
You may either manually create local usernames and passwords specific to this Virtual Office or Runbook, or leverage Active Directory integration to perform authentication using the existing Active Directory user accounts.
To use manually-created User accounts
In the User Authentication section of the screen, click the Direct radio button to manually create login credentials for users to connect through VPN.

If you select this option, you will be required to configure the following fields:
- In the Username field, enter a username needed for users to connect through VPN.
- In the Password field, enter a password needed for users to connect through VPN.

IMPORTANT: If you choose to use manually created users, those client users will login to the Client VPN using the form <username>@<user-suffix> where <username> is the manually created username, and <user-suffix> is the unique User-Suffix value displayed within the Virtual Office Client VPN settings page.

|
To use Active Directory authentication In the User Authentication section of the screen, click the Active Directory radio button to integrate with Active Directory, which enables users to connect through VPN using their known Active Directory credentials.
If you select this option, you will be prompted to configure the following fields:
For details on configuring an IPsec Site-to-Site VPN connection with Virtual Office see: Configure IPsec Site-to-Site VPN Settings IMPORTANT: Whether you choose to use Active Directory integration or manually created users, client users will login to the Client VPN using the form <username>@<user-suffix> where <username> is the short form Active Directory username (i.e. ‘jsmith’ NOT ‘jsmith@mydomain.local’) or manually created username, and <user-suffix> is the unique User-Suffix value displayed within the Virtual Office Client VPN settings page. |

SUPPORT | 720-204-4500 | 800-352-0248
- Contact Axcient Support at https://partner.axcient.com/login or call 800-352-0248
- Have you tried our Support chat for quick questions?
- Free certification courses are available in the Axcient x360Portal under Training
- Subscribe to Axcient Status page for updates and scheduled maintenance
1791 | 1873