
Overview
Configure settings for a client organization
After you configure your client's organization, you will be redirected to the organization's Settings page, where you can:
- update services settings
- configure email address which should receive the Summary Digest email report
- review general settings such as contact details
- manage user settings including adding and deleting organization-level user accounts
STEP 1: Update Services settings
The Settings > Services page allows you to modify which services are enabled for backup and configure options for new and external users.
This screenshot shows an example of a Microsoft 365 organization's settings page:
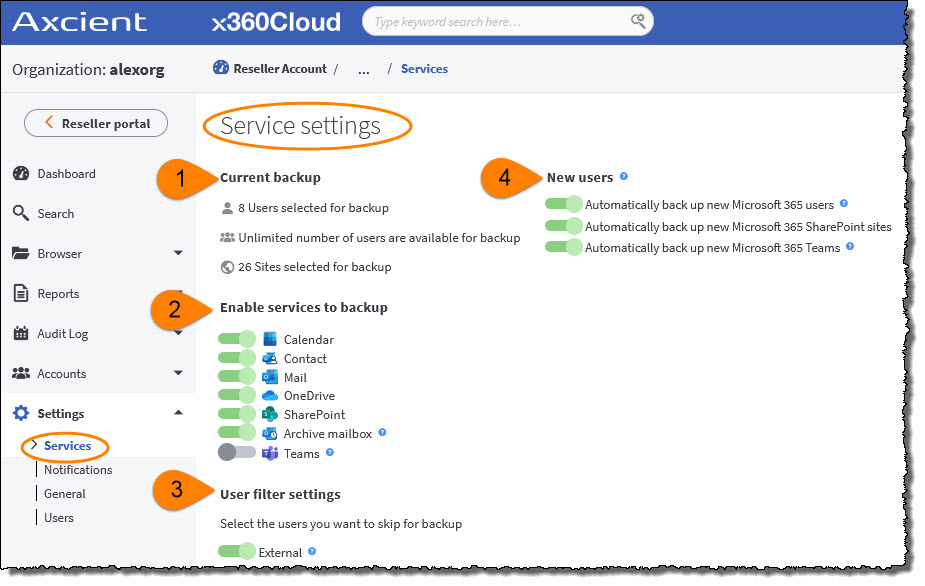
1. In the read-only Current Backup section, you can view current backup statistics for the organization's account.
2. In the Enable services to backup section, use the toggles to turn on and off Office 365 services to be backed up.
3. In the User filter settings section, select the users you want to skip for backup. Use the External toggle to skip external user accounts from the backup process.
4. In the New Users section, you can automatically back up new user accounts and new SharePoint sites:
- Use the Automatically back up new Microsoft Office 365 users toggle to automatically back up all new user accounts.
- Use the Automatically back up new Microsoft Office 365 SharePoint sites toggle to automatically back up all new SharePoint sites.
- Use the Automatically back up new Microsoft Office 365 Teams toggle to automatically back up all new Teams sites.
STEP 2. Configure email notifications
The Settings > Notifications page allows you to configure email alerts for troubled backups in x360Cloud with the Summary Digest email notification feature.
This option allows you to track backup health via regular email notifications — and also helps you keep an eye on other aspects of an organization's backup status (even when all backups are completely healthy.)
For complete details, please review Track backup health via email
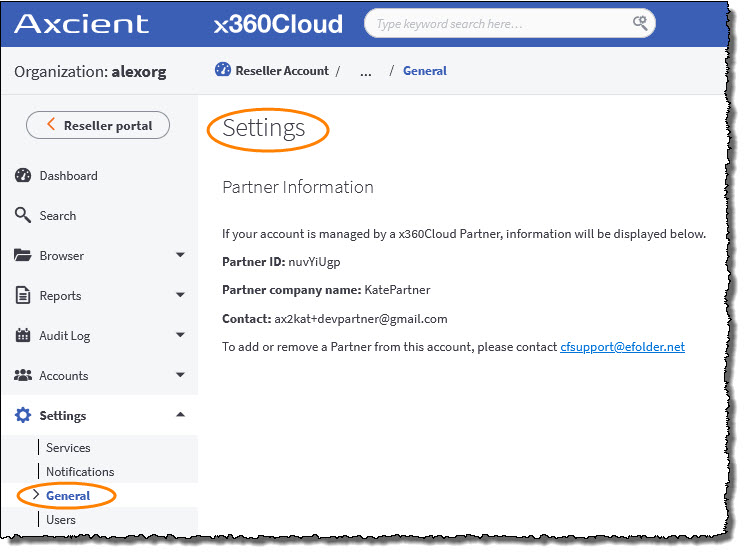
STEP 3: Review general settings
The Settings > General page displays the information for the Axcient partner account this organization is associated with.
This information can be useful when contacting Customer Service or Support.
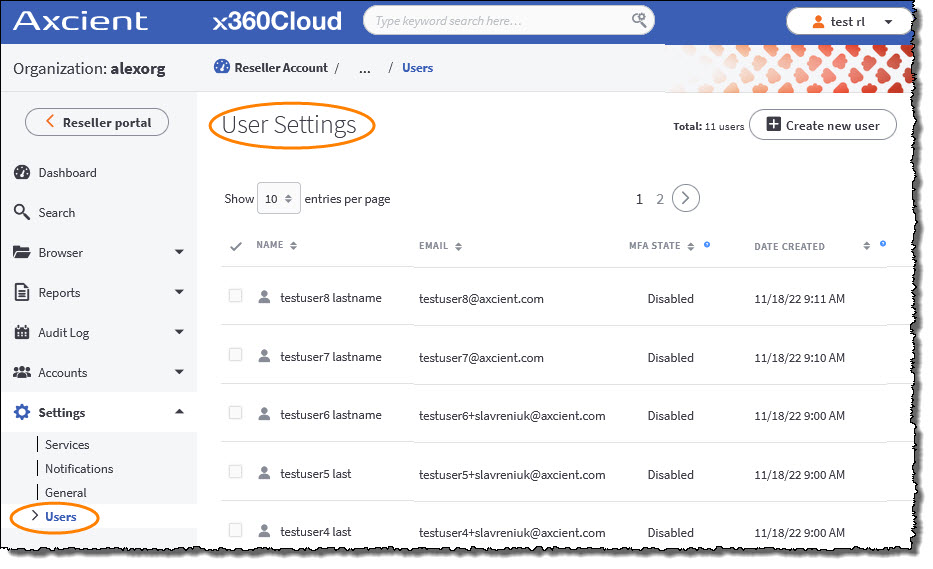
STEP 4: Manage users
The Settings > Users page allows you to view, add or delete existing organization-level user accounts.
Organization-level user accounts:
You can create organization-level user accounts so that your clients can log in to their instance of x360Cloud.
Organization-level users can perform the following tasks after logging in
- Access their organization's instance of x360Cloud at http://cloudfinder.axcient.com
- View organization backup reports
- Perform organization data search and restore
- Select (and deselect) organization end user accounts for backup
- Manage organization backup settings
- Add or edit organization SharePoint URLs
- Toggle services on or off for backup
- Explore organization audit logs
- Create or delete other organization-level users
- Enable multi-factor authentication (MFA)
Organization-level users cannot perform the following:
- Cannot access the x360 Portal at https://partner.axcient.com/login
- Cannot sign up for a new service to be backed up in x360Cloud
- Cannot create a new organization or provider in x360Cloud
- Cannot access other organizations in x360Cloud
- Cannot access user management for reseller-level accounts in the x360 Portal
To create an organization-level user account
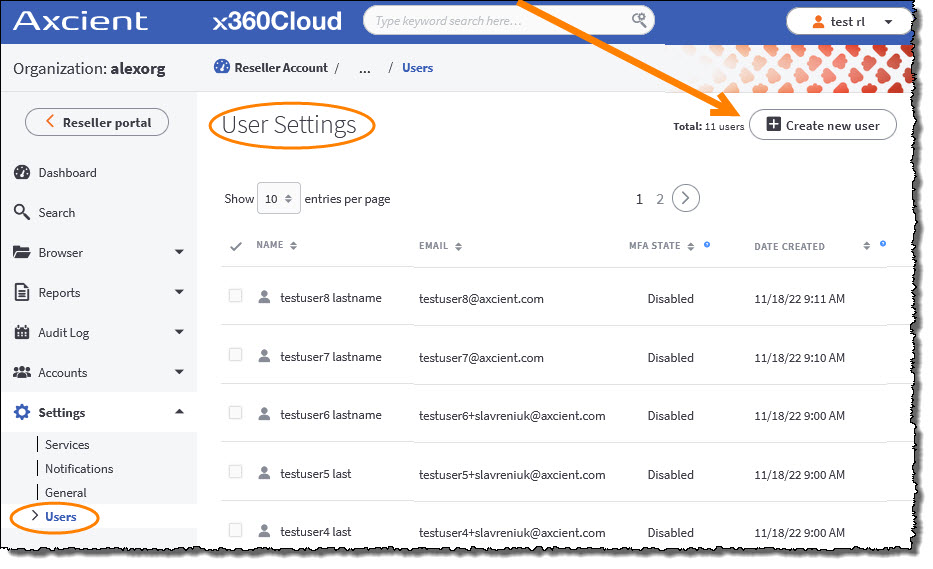
STEP 1. Navigate to the specific organization and click the Settings tab.
STEP 2. On the Settings page, click the Users tab.
STEP 3. On the Users Settings page, click the Create New User button.
STEP 4. On the Create User screen, enter information about the new user, including:
- First name
- Last name
- Email address
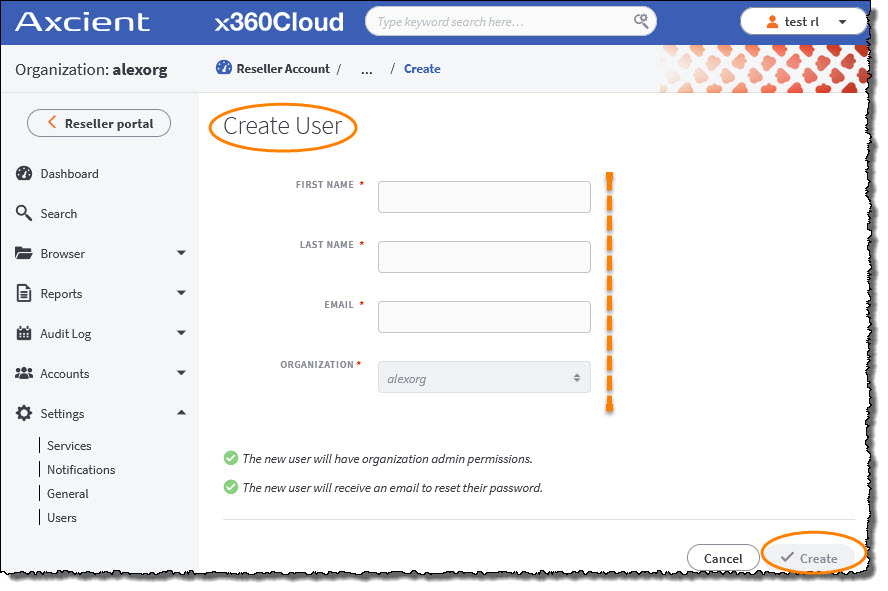
STEP 5. Click Create when you are finished.
The new user account will receive an email with instructions on how to log in and configure a password.
- Return to the 360Cloud Essential User Guide
SUPPORT | 720-204-4500 | 800-352-0248
- Contact Axcient Support at https://partner.axcient.com/login or call 800-352-0248
- Have you tried our Support chat for quick questions?
- Free certification courses are available in the Axcient x360Portal under Training
- Subscribe to Axcient Status page for updates and scheduled maintenance
1293 | 1508 | 1862