
What is a Privacy Preferences Policy Control (PPPC) file?
A Privacy Preferences Policy Control (PPPC) file is an xml formatted metadata file used by the mobile device manager service on macOS to allow administrators to pre-assign security permissions and other settings for an application.
Certain security settings (notably Full Disk Access permissions) can only be granted to an application via manual user actions or via deployment of a PPPC policy.
Why do I need it?
The x360Recover Agent for macOS requires Full Disk Access permissions to successfully be able to fully backup and protect your macOS desktop system. To avoid forcing the user to manually grant the permission to the agent after installation, system administrators may instead deploy a PPPC policy to grant the application permissions without involving the users.
Deployment of PPPC policies can only be performed via the Apple Mobile Device Management (MDM) service. You must have deployed a macOS compatible RMM or other management tool that supports Mobile Device Management to use this method.
For more information on Apple MDM see Intro to mobile device management profiles
How do I deploy a custom PPPC policy file with Microsoft Intune?
Different management tools may have different requirements and procedures for creating and deploying a PPPC policy, but many make use of a standardized xml file format. Check the documentation of your management tools for specific instructions that may be applicable to your environment.
The following is an example using Microsoft Intune as the device management platform.
Creating the PPPC File
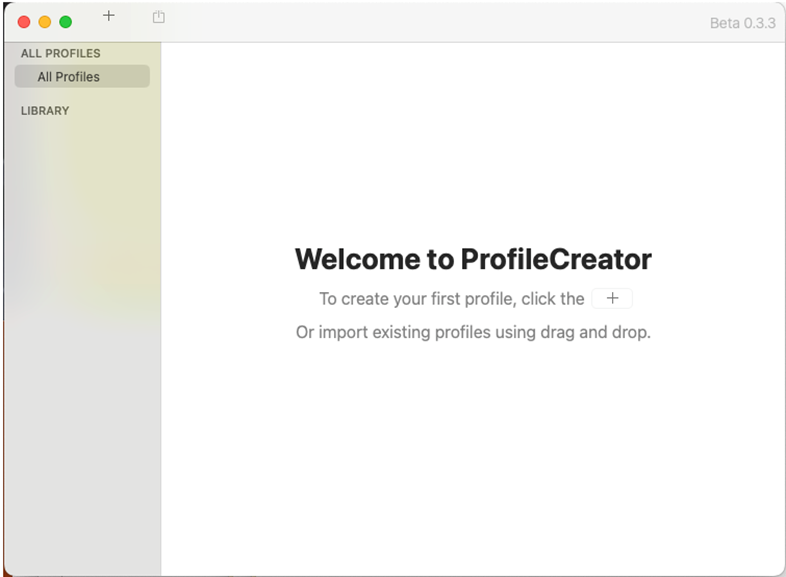
For this example, we will use the open source utility ProfileCreator.
See ProfileCreator and visit the Releases page to download the latest version.
Note: Before using ProfileCreator to generate a PPPC file, first manually install the x360Recover Agent for macOS on the administrative system so that you can easily import the application identity information.
1. Launch the ProfileCreator application.
2. Click the ‘+’ in the title bar to begin creation of a new policy profile
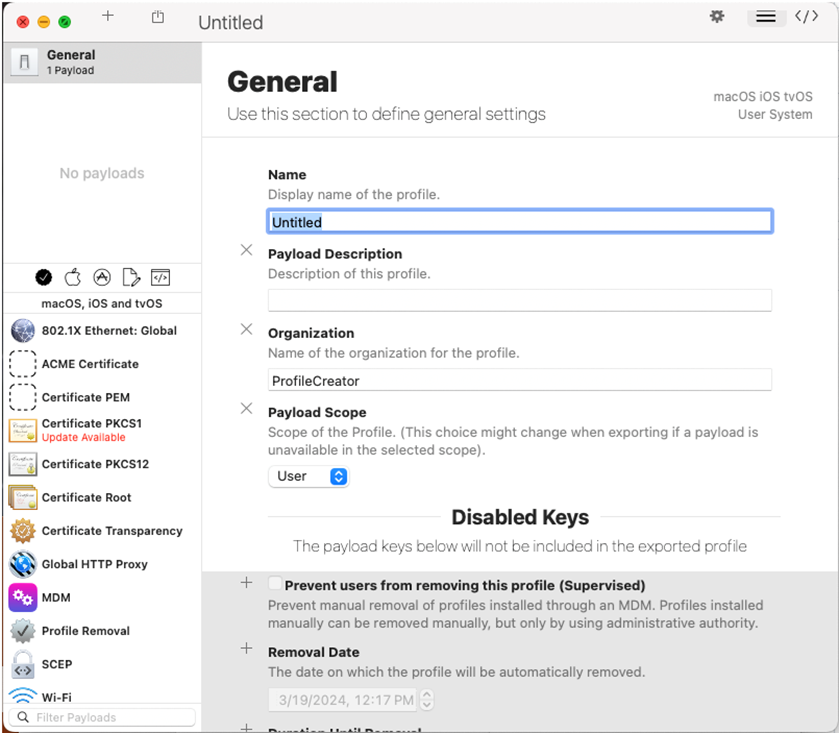
3. Fill in the Name, Payload Description, Organization, and set the Payload Scope to System
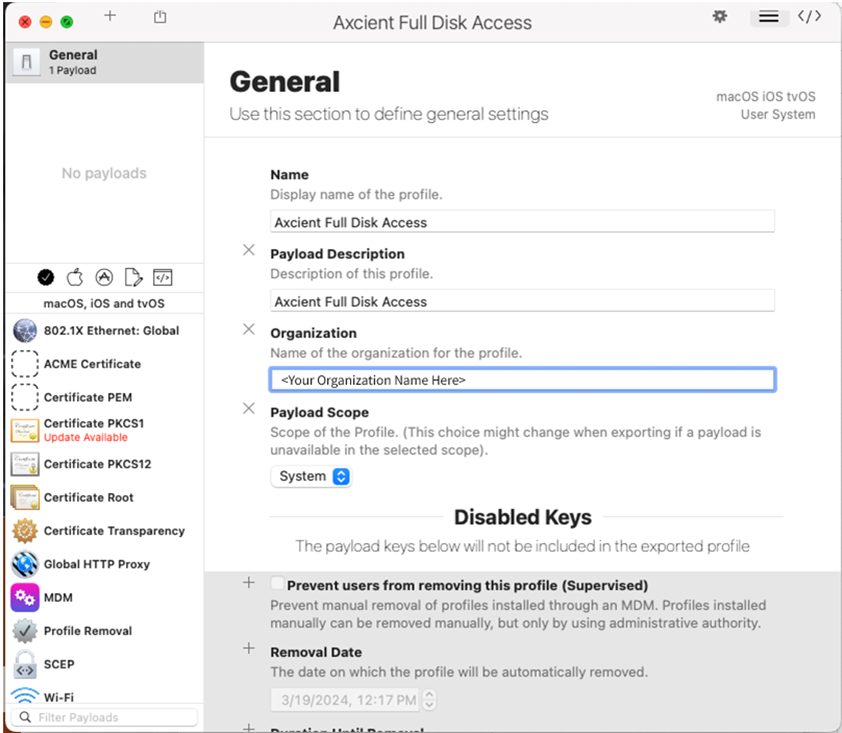
4. From the left menu pane scroll down and select Privacy Preferences Policy Control
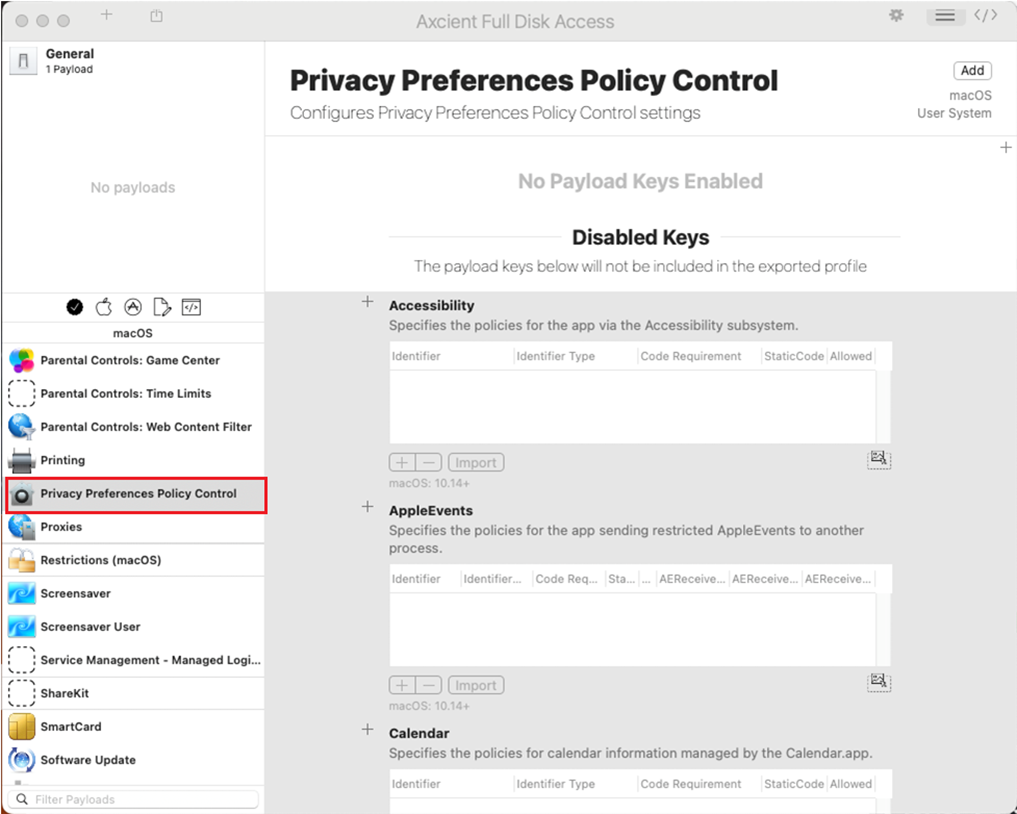
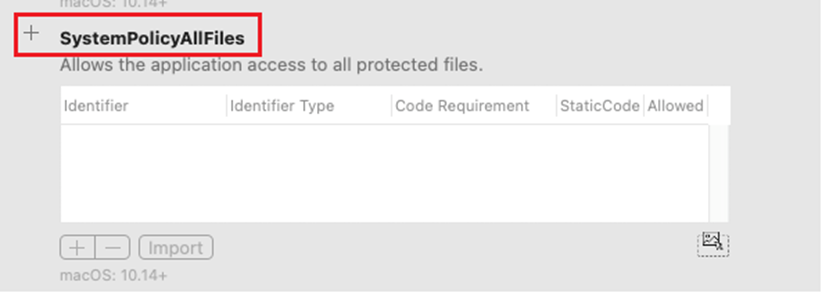
5. Scroll through the Disabled Keys list until you locate SystemPolicyAllFiles and click ‘+’ next to the label:
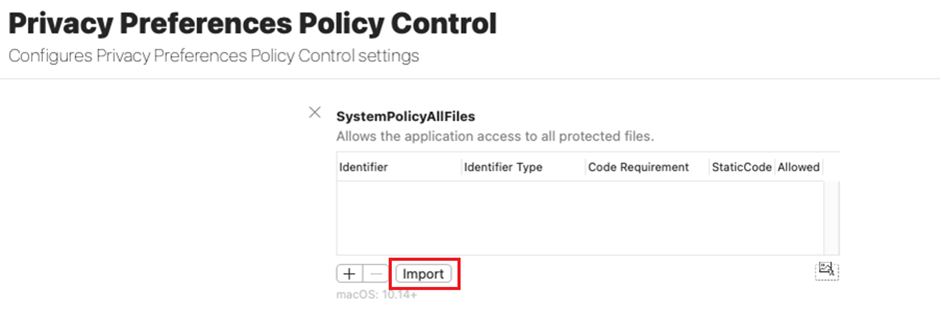
6. Once enabled, SystemPolicyAllFiles will be moved to the top of the list. Click ‘Import’ to select the application to be granted Full Disk Access.
7. Browse to the Agent for macOS application located in /Library/xCloudAgent/Contents/bin/xcloud-agent and add it to the policy
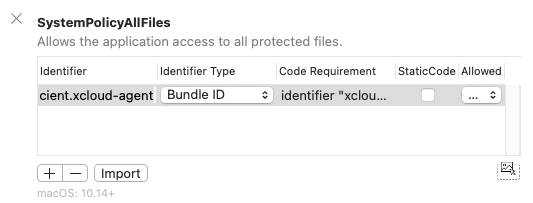
8. Change the Identifier Type to ‘Bundle ID’ and change the Identifier to ‘com.axcient.xcloud-agent’. Then set the Allowed dropdown selection to ‘Allowed’

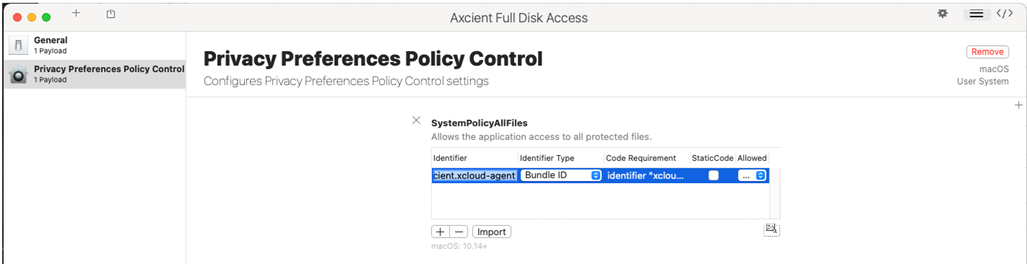
9. Click ‘Add’ in the upper right corner

10. The Privacy Preferences Policy Control payload will now appear in the list of payloads at the top of the left pane.
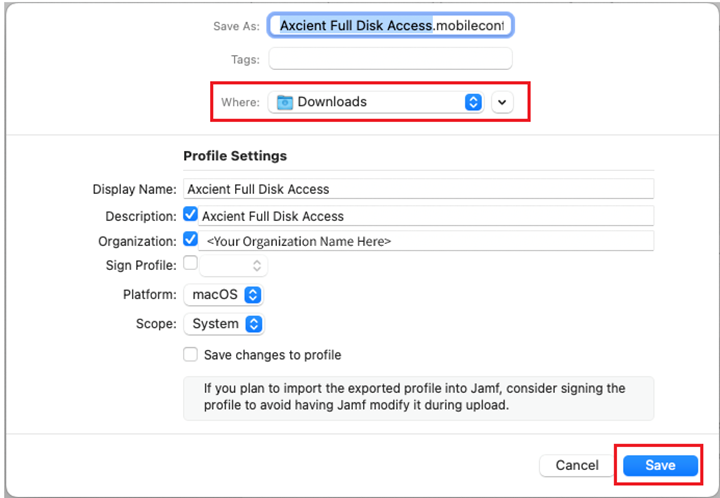
11. Select File -> Export from the application menu to save the PPPC policy file
12. Next, deploy the generated profile using your remote management platform.
For example, see Use custom settings for macOS devices in Microsoft Intune for instructions on deploying the policy from Microsoft Intune
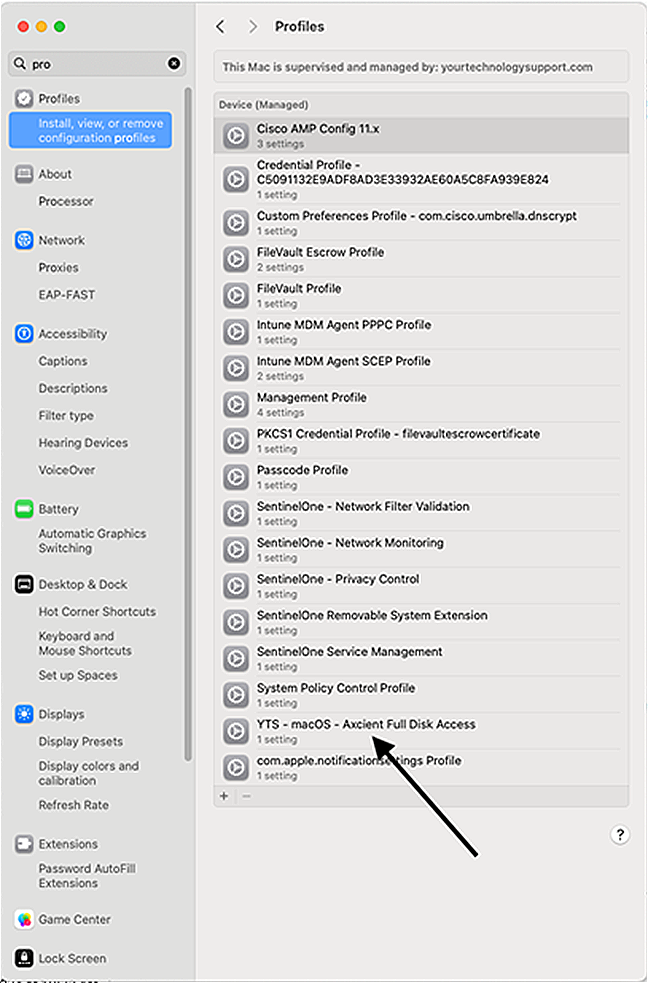
Once the PPPC profile has been installed via your management tools, install the agent normally. The Full Disk Access permissions will have already been assigned to the application and backups should be taken without issue.
For more details on agent installation see Install an Agent on macOS.
Deploy a custom PPPC policy file with Jumpcloud
Jumpcloud natively supports creating and deploying PPPC policy files on macOS managed devices.
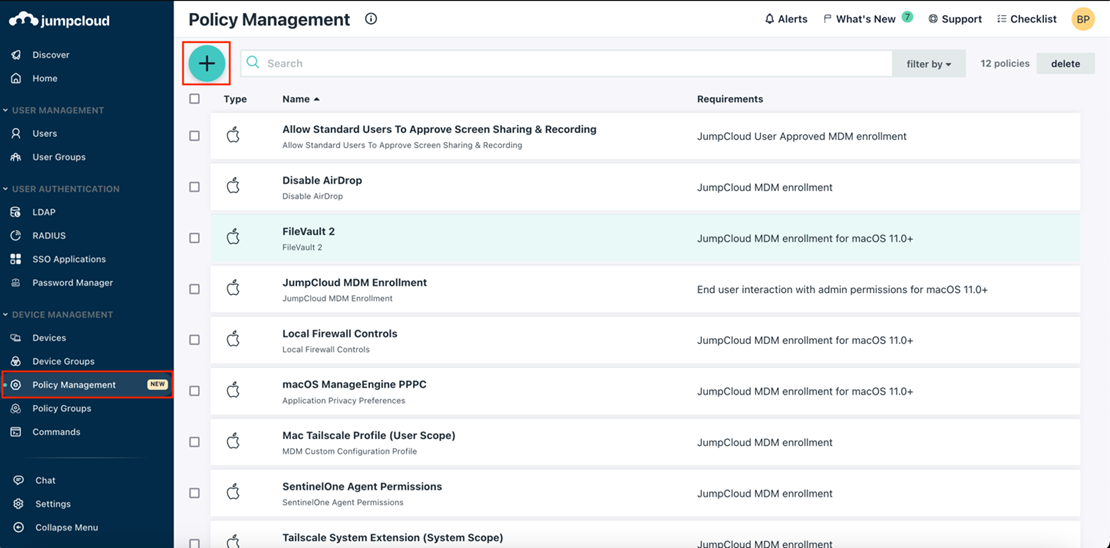
To deploy a policy file, first login to the Jumpcloud Admin Portal
From the Device Management section of the left menu pane, select Policy Management and click the ‘+’ button to create a new policy.
On the New Policy configuration panel select the ‘Mac’ tab in the top menu bar.
Select Application Privacy Preferences Policy from the list then click Configure.
On the New Policy panel, enter a unique name for the policy to identify it later.
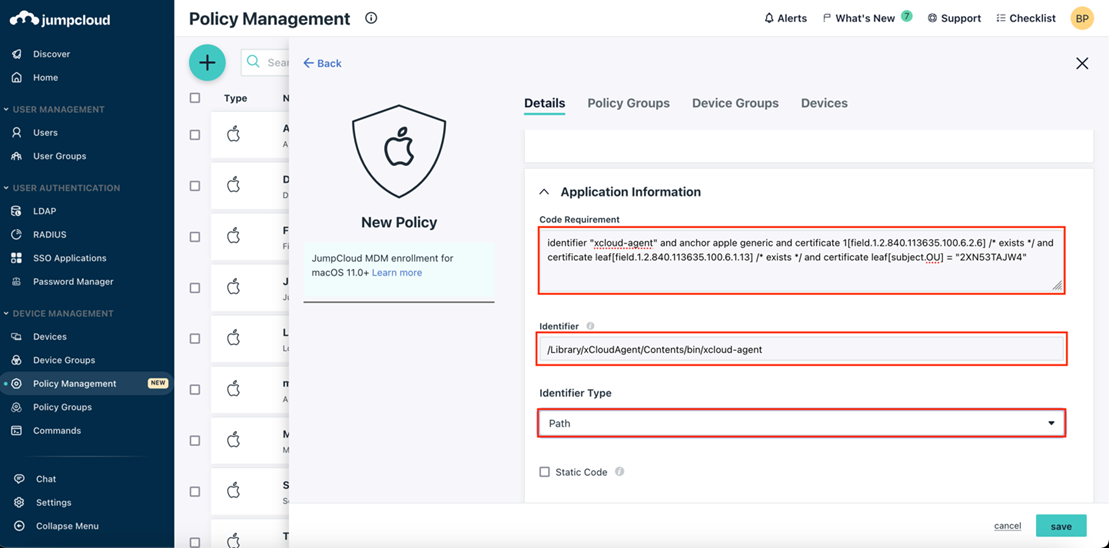
Under Application Information, enter the following:
a. Code requirement:
aa. Identifier "xcloud-agent" and anchor apple generic and certificate 1[field.1.2.840.113635.100.6.2.6] /* exists */ and certificate leaf[field.1.2.840.113635.100.6.1.13] /* exists */ and certificate leaf[subject.OU] = "2XN53TAJW4"
b. Identifier:
ba. /Library/xCloudAgent/Contents/bin/xcloud-agent
c. Identifier type:
ca. Path
Under Privacy Preferences click to select ‘Allow Access To All Files’
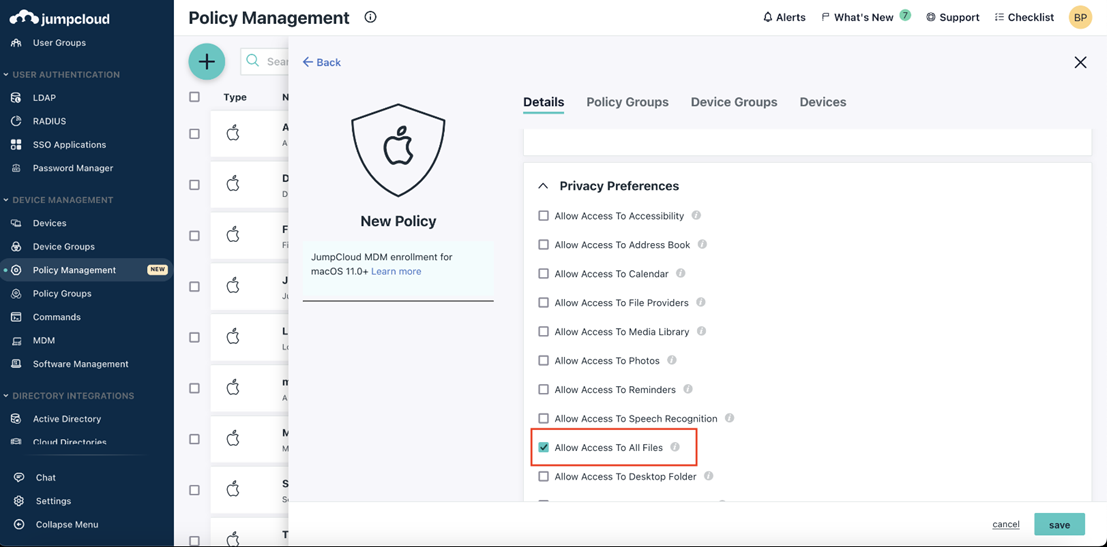
Select the desired Policy Groups, Device Groups, or Devices to which the policy should be applied and click Save.
For those technically curious as to how those cryptic identifier settings are derived, they come from the macOS ‘codesign’ utility.
First, manually install the agent onto an available macOS device. After installation the agent files are located in /Library/xCloudAgent
To determine the codesigning requirements, open a terminal and run the following:
Codesign -dv - /Library/xCloudAgent/Contents/bin/xcloud-agent
How to deploy a custom PPPC policy file with JamF
If your organization is using JamF to manage your macOS devices, there is a provided utility for creating the policy files.
For complete details refer to the instructions located on Github for the PPPC Utility.