
In some cases, it may be necessary to perform a manual, partition-by-partition recovery operation to restore a system to working order. For example, if the original source disk contains multiple Windows volumes, and you must restore the original topology when recovering the system, you can use a manual copy process to recover the data, one partition at a time. (x360Recover's Recovery Wizard recovers each protected Windows volume to its own dedicated disk.)
The following is an example of how to use Manual Partition Recovery to restore a system where the original Disk 0 drive contains multiple Windows volumes:
- Start by exporting the protected system via iSCSI Start. From the x360Recover Web GUI, select the protected system details page. Locate the desired snapshot and select iSCSI Start. If you are recovering a system that has been running in Live Mode as a virtual machine on the appliance, then select Live Mode when starting iSCSI. Otherwise, choose Test Mode.
- Boot your new system from the x360Recover Bare Metal Restore Utility.
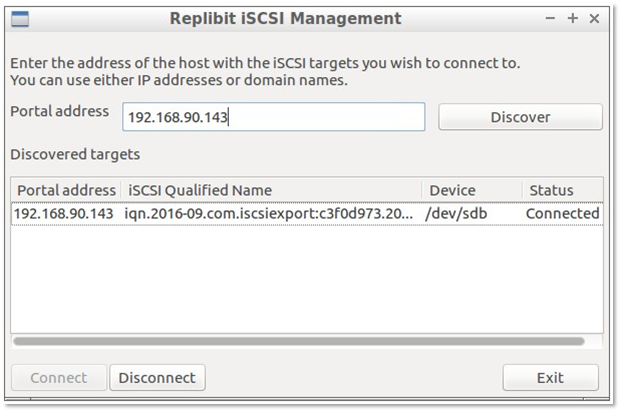
- When the desktop loads, launch iSCSI Manager from the Recovery Tools folder of the Launcher menu.
- Enter the IP address of your Appliance and click Discover.
- Select the disk target(s) containing the Windows volume(s) you wish to recover and click on Connect to attach them to the recovery tools environment.
6. Launch Disk Manager and examine your attached disk devices. Identify the device path for the local disk you intend to restore the C: volume on to, as well as the device path of the original C: volume you mounted via iSCSI Manager.
7. Launch LXTerminal from the System Tools folder of the Launcher menu.
a) Within the shell terminal, elevate to the root user by running sudo su.
b) Clone the partition table and disk identity onto the new system by running the following command:
dd if=<source disk device> of=<destination disk device> bs=1024 count=1024
For example, if your original protected system is /dev/sdb and your new local disk is /dev/sda then you would run dd if=/dev/sdb /of=/dev/sda bs=1024 count=1024
8. Launch GParted from the shortcut on the desktop.
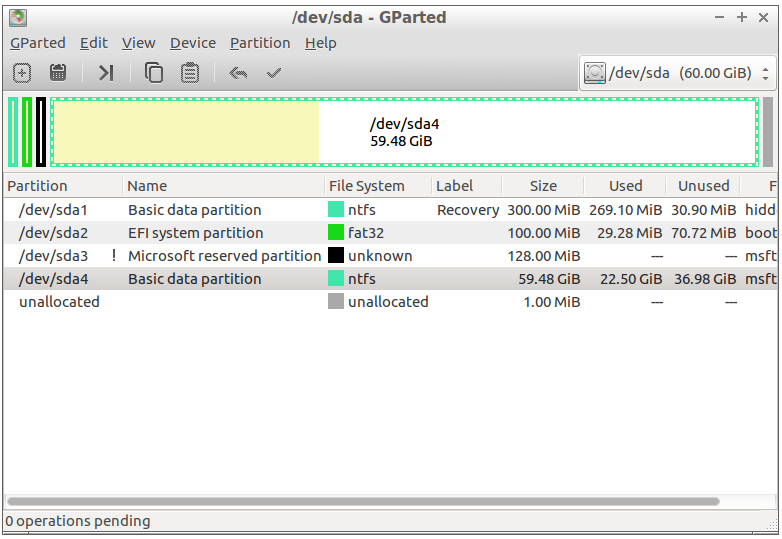
Note: If a message appears during launch stating that not all available space is in use, click Fix. For each partition from the original C: drive:
- Select the source disk device from the drop-down choices in the top right corner
- Right-click on the partition and select copy
- Select the destination disk from the drop-down selector
- Right-click the appropriate partition
- Click Paste
- Click OK when the warning on overwriting an existing partition appears.
For additional volumes, repeat the steps above to copy each partition onto the destination disk. Select unallocated space on the destination disk and a new partition will be created. Once all partitions have been selected, click the Check button from the top tool bar to perform the selected actions.
9. When all operations have completed, reboot to verify that the system will boot normally.