
How does Axcient DirectRestore (ADR) work?
Axcient Direct Restore (ADR) works by directly accessing files from the Microsoft Exchange mailbox database, and then extracting and recovering that information.
Recovery can be either (a) directly back into your live Exchange system or (b) indirectly exported via a PST file.
The key to this recovery lies in providing file access for Axcient Direct Restore to a specific point-in-time copy of your Exchange mailbox database.
- You can perform Exchange recovery from either a domain-joined workstation, or directly on the Exchange server.
- When working with a protected system on an appliance, the most efficient method of accessing the Exchange mailbox database is to use iSCSI to mount an appliance snapshot to your recovery machine.
- A simpler alternative to iSCSI is to use Recovery Center to access the snapshots on the appliance. You perform a file and folder operation to mount the snapshot from an appliance (or vault) and then access the Exchange Database through the virtual disk mounted by Recovery Center. [Instructions on starting a file and folder recovery job with Recovery Center are here:]
Get started
First, access the machine you wish to recover and install Axcient Direct Restore on that machine.
NOTE: When you recover directly to the live Exchange environment, you must be logged in to a domain account with permissions to perform user impersonation within Exchange. See Restore from the Granular Exchange Recovery into a Live Exchange Server for details on configuring user permissions.
STEP 1. Export a recovery point using iSCSI on the appliance
We recommend using iSCSI for this step.
While it is possible to download the Exchange files using a file browser or FTPS, keep in mind that Exchange mailbox database files are typically large. A file browser or FTPS is not generally practical for this type of recovery, and that is why we recommend using iSCSI instead.
1.1. Login to your appliance.
1.2. Navigate to the Protected System Details page of the Exchange server you wish to recover
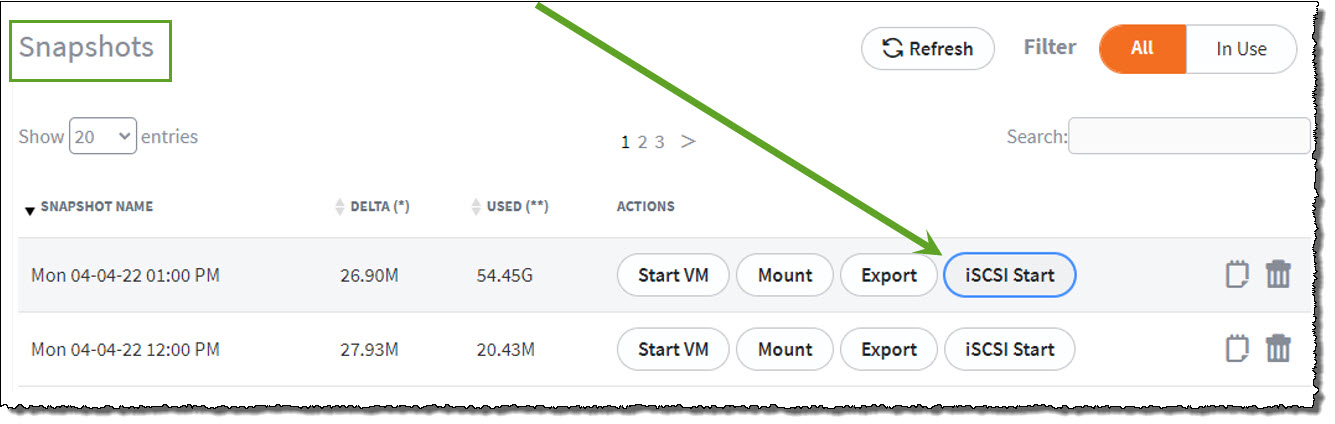
1.3. Scroll down to the Snapshots section and locate the point-in-time snapshot you wish to recover
1.4. Select iSCSI Start
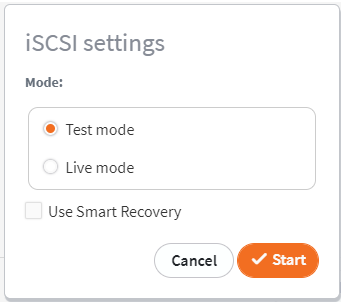
 1.5. Select Test Mode and click Start to continue.
Notes:
When performing Exchange Mailbox recovery with iSCSI, we recommend Test Mode.
- Please do not select Live mode. This is because Live mode leaves a persistent snapshot of the recovery point on the appliance (which will require support assistance to remove later.) Because no changes are being made to the recovery point and because you are not performing virtualization, there is no reason to retain this persistent snapshot data in this situation.
- Please do not select the Use Smart Recovery option. This option restores the original physical disk signatures to the recovery disk images. If you are mounting the disks to the Exchange server, these disk signatures will collide with the existing live physical disks. Depending on the Windows OS version, this will result in either (a) the recovery disks being forced offline due to the collision, or (b) the recovery disk signatures being overwritten automatically by Windows.
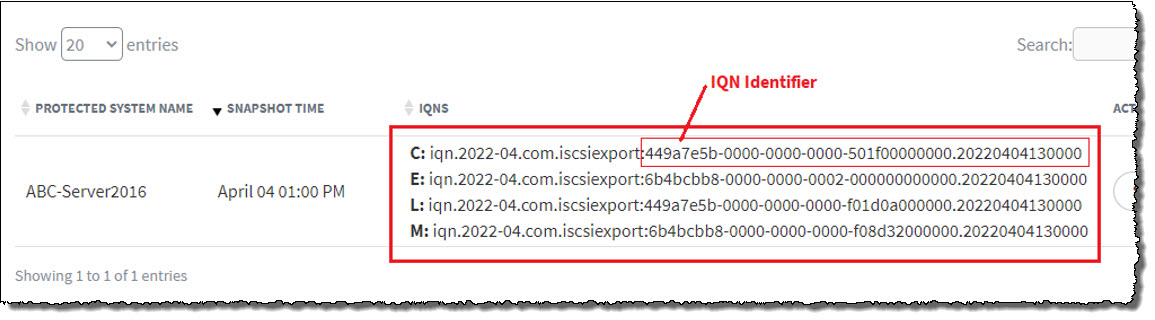
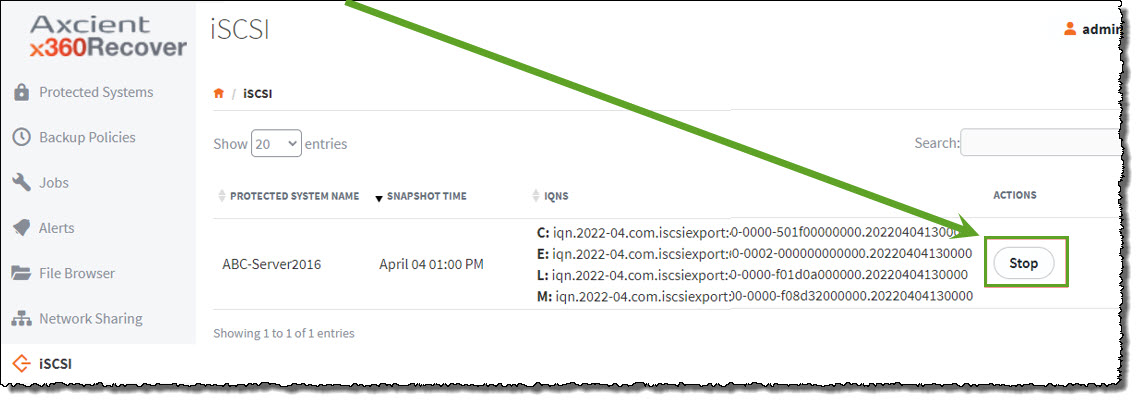
1.6. Verify that iSCSI has exported the protected system volumes by navigating to the iSCSI page from the left menu.
1.7. Note the IQN Identifier for the drive letter containing your Exchange Message Store. If your Exchange Datastore and Transaction Logs files are on separate volumes, note the IQN Identifier of both drives:
STEP 2. Mount the exported recovery point on your recovery system using iSCSI Initiator
2.1 Return to the system where you have installed Axcient Direct Restore. From here, you'll attach the iSCSI volumes exported by the appliance.
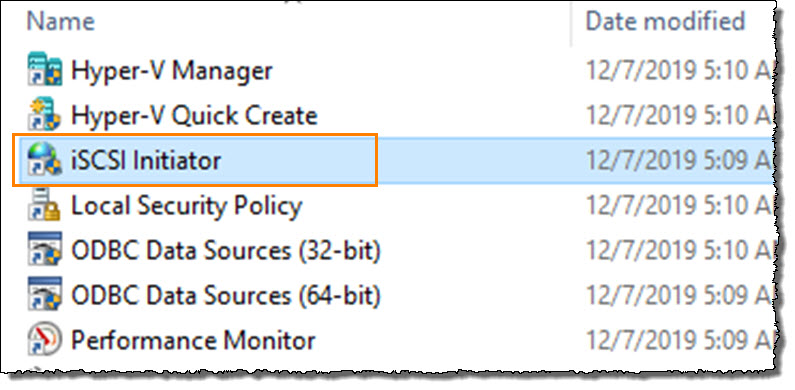
2.2 From the Control Panel, open Administrative Tools and then open iSCSI Initiator.
 2.3 Enter the IP address of the Target appliance and click Quick Connect to continue.
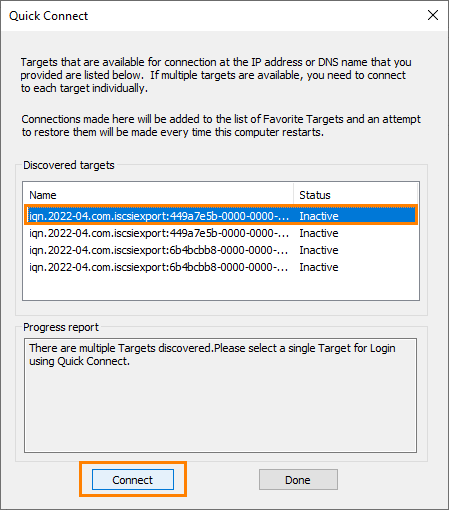
 2.4 A popup window appears, showing available disk volumes provided by the iSCSI target.
- Locate the IQN Identifiers for the disk volumes you wish to access.
- Connect to the disks by selecting the desired IQN and clicking Connect.
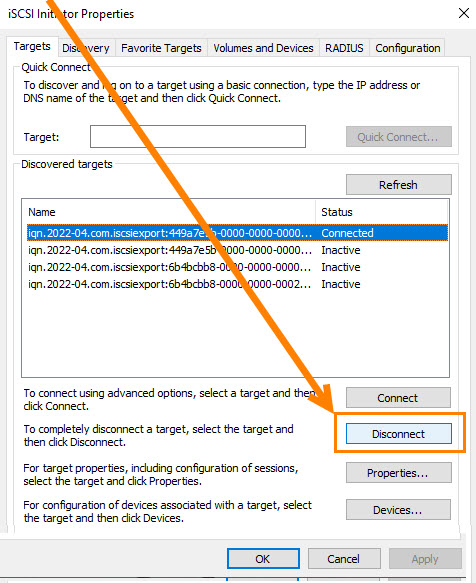
IMPORTANT: After finishing with Exchange recovery, remember to return to iSCSI Initiator and disconnect your iSCSI volumes from the appliance:
STEP 3. Identify the drive letter(s) used to mount the iSCSI disk on the local machine
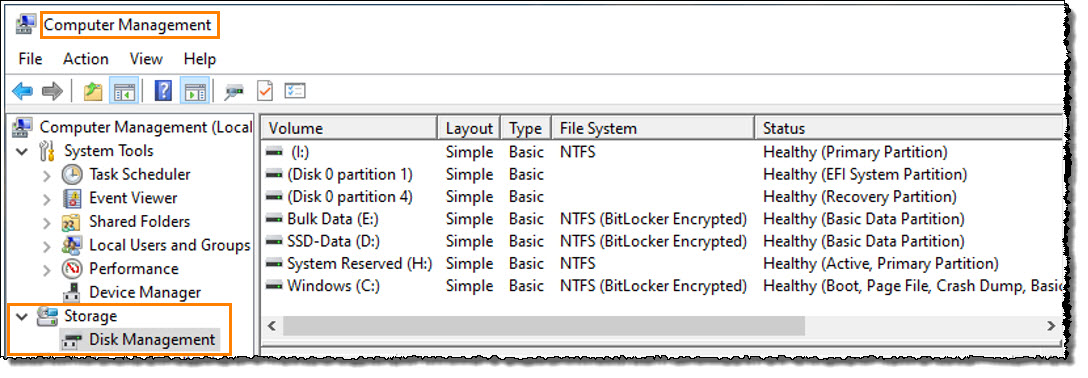
3.1 Open Computer Management from Control Panel -> Administrative Tools.
Expand Storage.
Select Disk Management.
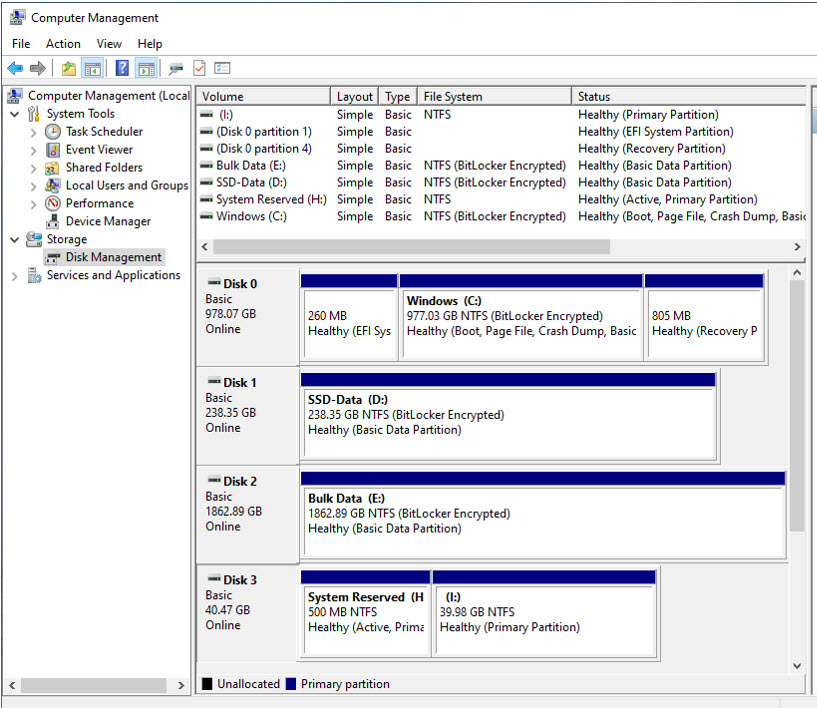
3.2 Identify the physical disk that you have added and note the drive letters assigned to those volumes. (The recently-added disks will typically be the last disk(s) in the list.)
Browse the drive letters with Windows Explorer to verify the content and locate your Exchange Message Store database files.
Notes:
Newly attached disks may initially appear as Offline, depending on variables such as your system configuration and operating system version. To assign drive letters to volumes and access data, you'll need to first set the disk to online. To do this, right click the bolded name of the disk in the left pane and then select Online.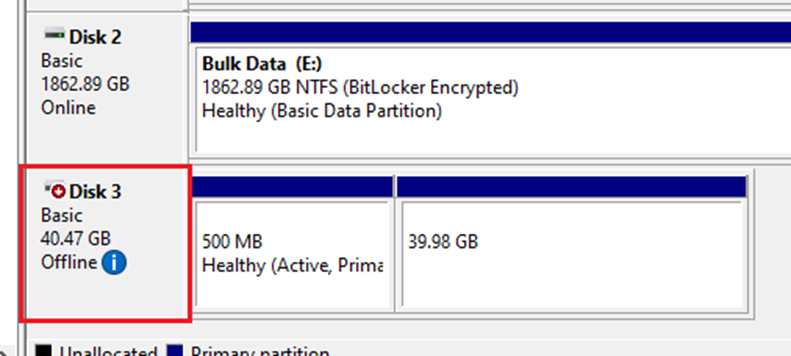
Once the Exchange database files are locally accessible on the recovery machine, proceed with recovering the Exchange mailbox data you wish to restore using Axcient Direct Restore.
See the Axcient Direct Restore User Guide for assistance performing the recovery.
STEP 4. Detach iSCSI volumes and stop recovery on the appliance
After you have completed the Exchange mailbox restoration using Axcient Direct Restore, finish by
- cleaning up the local workstation
- detaching iSCSI volumes, and
- stopping the iSCSI export on the appliance.
4.1 From Control Panel, open the Administrative Tools and launch iSCSI Initiator.
4.2 (A) Select each connected disk volume, and then, (B) click Disconnect to detach that volume.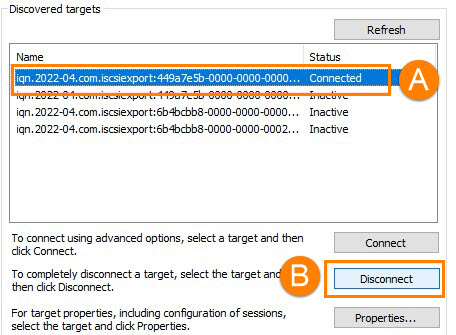
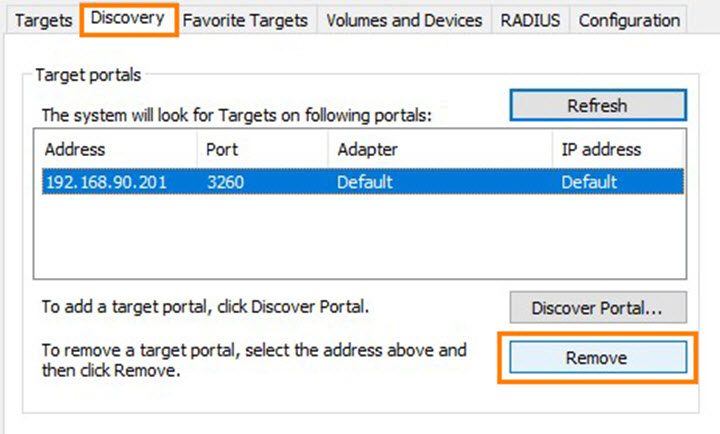
4.3 Next, select the Discovery tab.
- Remove the configured iSCSI target server.
- Click to select the IP address then then click Remove.
Click OK to close the iSCSI Initiator control.
4.4 Login to the appliance and select iSCSI from the left menu.
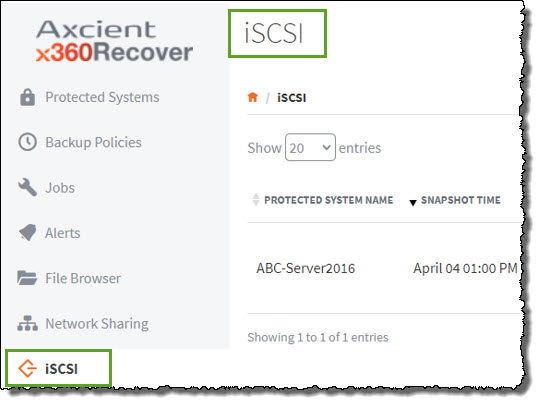
When the iSCSI page opens, click Stop under the ACTIONS column to end the export of the iSCSI volumes from the selected recovery point:
SUPPORT | 720-204-4500 | 800-352-0248
- Contact Axcient Support at https://partner.axcient.com/login or call 800-352-0248
- Free certification courses are available in the Axcient x360Portal under Training
- Subscribe to the Axcient Status page for a list of status updates and scheduled maintenance
1158