
Perform Microsoft Exchange granular recovery from a Direct-to-Cloud (D2C) protected system
Axcient Direct Restore (ADR) works by directly accessing files from the Microsoft Exchange mailbox database, and then extracting and recovering that information.
Recovery can be either (a) directly into your live Exchange system or (b) indirectly exported via a PST file.
The key to this recovery lies in providing file access for Axcient Direct Restore to a specific point-in-time copy of your Exchange mailbox database.
On a Direct-to-Cloud (D2C) protected system, the most efficient method of accessing the database is to use Recovery Center file and folder recovery to mount a vault snapshot to your recovery machine.
- You can perform Exchange recovery from either a domain-joined workstation, or directly on the Exchange server.
- When you recover directly to the live Exchange environment, you must be logged in to a domain account with permissions to perform user impersonation within Exchange. See Restore from the Granular Exchange Recovery into a Live Exchange Server for details on configuring user permissions.
- While it is certainly possible to download the Exchange files using File Browser or FTPS, Exchange Mailbox database files typically are extremely large, and it is not generally practical to perform recovery in this fashion
STEP 1. Start a file and folder recovery job with Recovery Center
1.1 Download and install Recovery Center on the system you will be recovering from.
The system you are recovering from can be either (a) a domain-joined workstation or server, or (b) the Exchange server itself.
|
What is Recovery Center? Recovery Center is a companion recovery platform for Direct-to-Cloud (D2C) protected systems. Recovery Center is a stand-alone application that allows you to recover data directly from the Axcient Cloud or a Private Cloud. Recovery Center can be downloaded at Axcient Downloads or it can also be downloaded from the Downloads page of any x360Recover appliance or vault. |
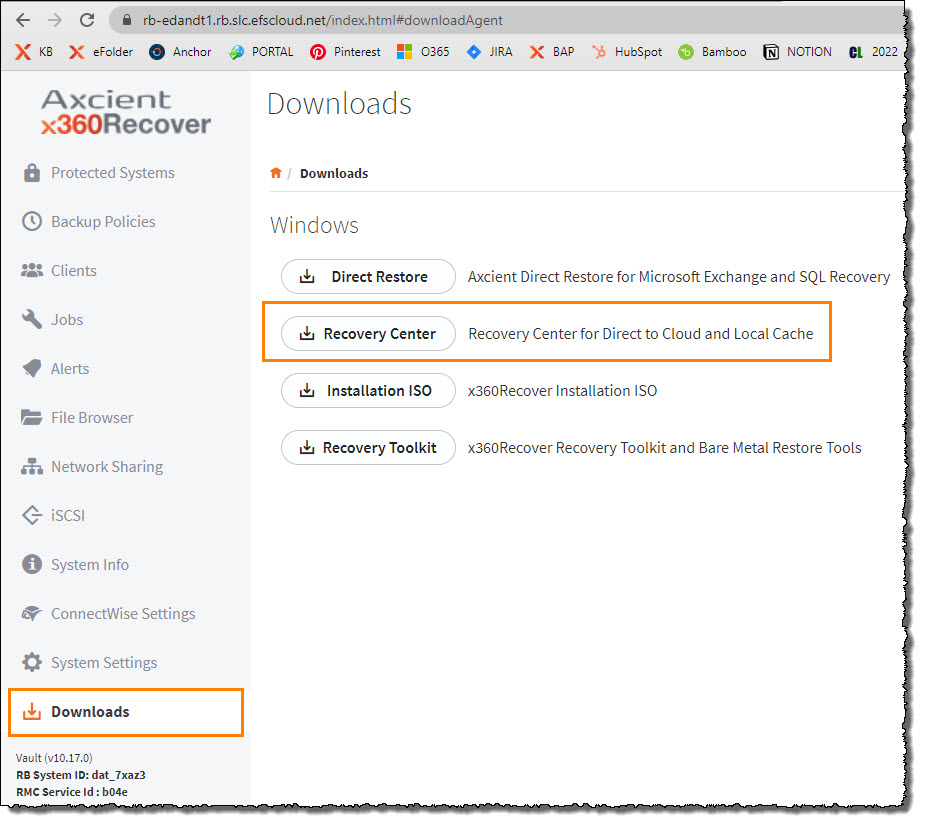
See Recovery Center for complete details on installing and using Recovery Center.
STEP 2. Create a recovery job
Once Recovery Center is installed, launch it and create a file and folder recovery job for the desired Exchange server.
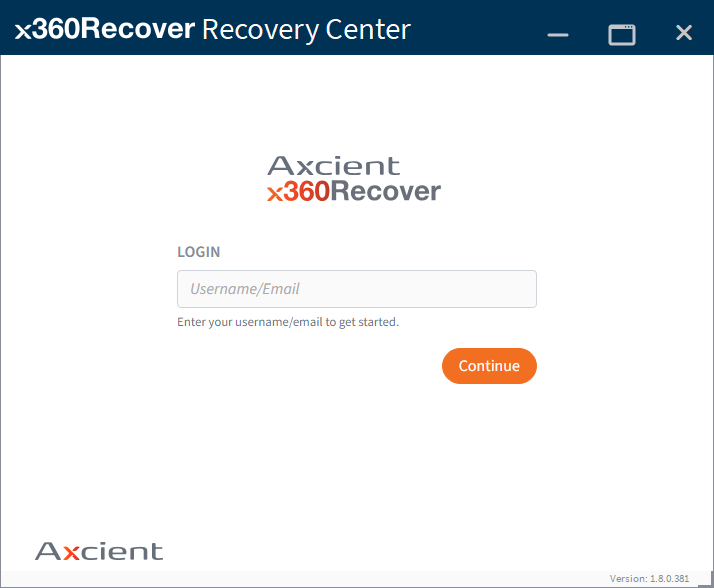
2.1 Log in to Recovery Center.
You can choose to log in using one of the following accounts:
- Your x360Portal personal account
- Your x360Recover License Portal account
- The x360Recover License Portal Client account
Enter your username and click Continue.
2.2 Enter your Password and click Login.
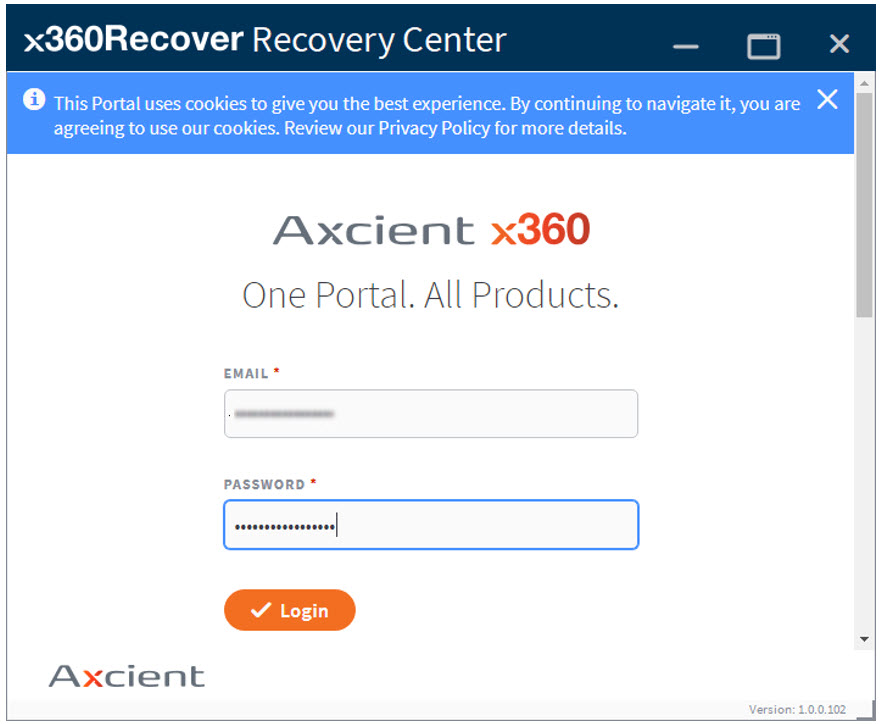
If your account has Multi-Factor Authentication (MFA) enabled, enter your 6-digit MFA code.

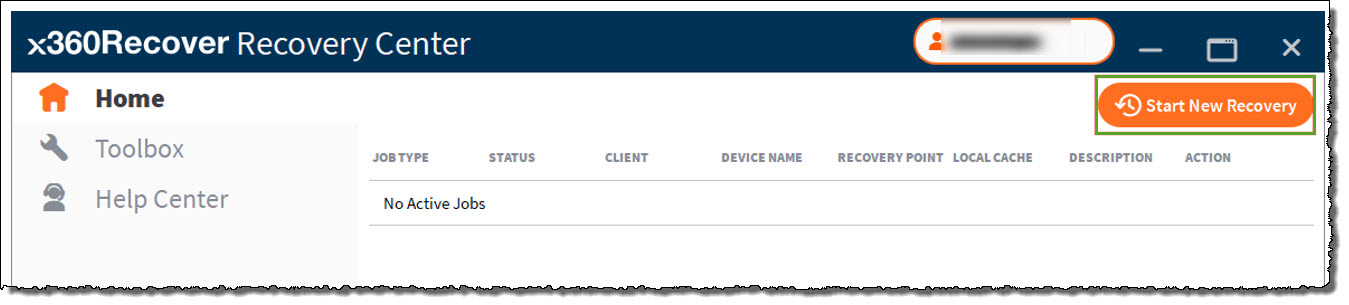
2.3 Click Start New Recovery to create a new recovery job.
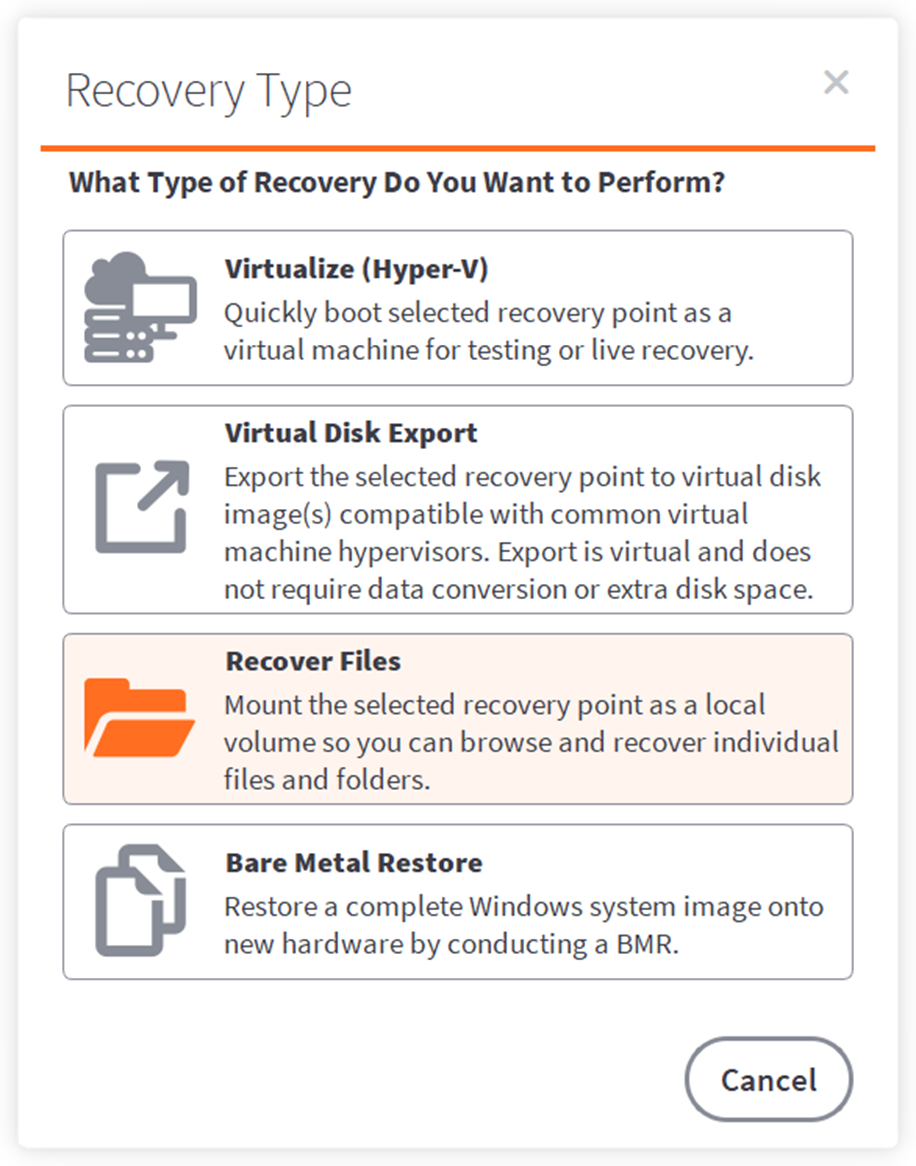
2.4 In the Recovery Type window, click Recover Files to start a file and folder recovery job.
2.5 In the Recovery Target window:
- Select the Client. You can filter the client list by typing in the provided search box. A partial search will be performed and the contents of the Results box will be filtered.
- Select the data source. (This is the appliance or vault containing the protected system to be recovered) Click on the gadget at the right edge to open available choices, or click inside the text box and begin typing the protected system name.
- Select the Microsoft Exchange Server protected system to be recovered. Click on the gadget at the right edge to open available choices, or click inside the text box and begin typing the protected system name.
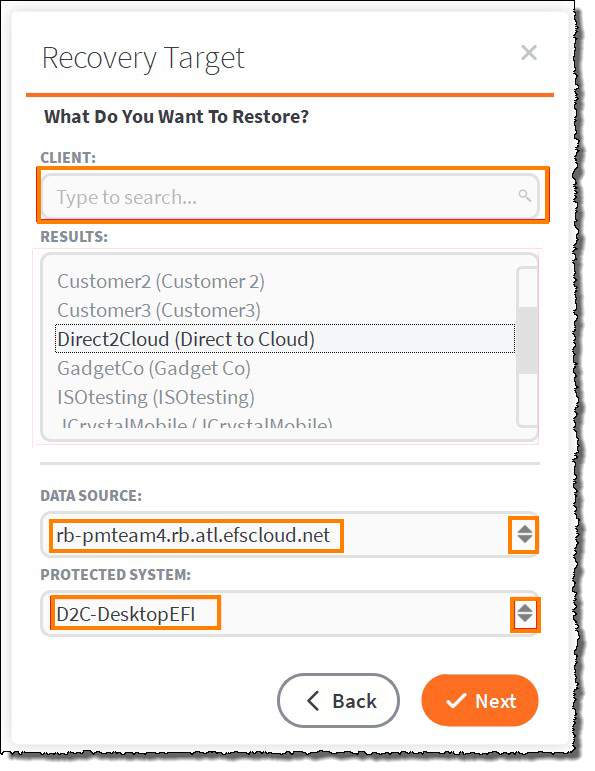
After you have selected the desired protected system, click Next to continue.
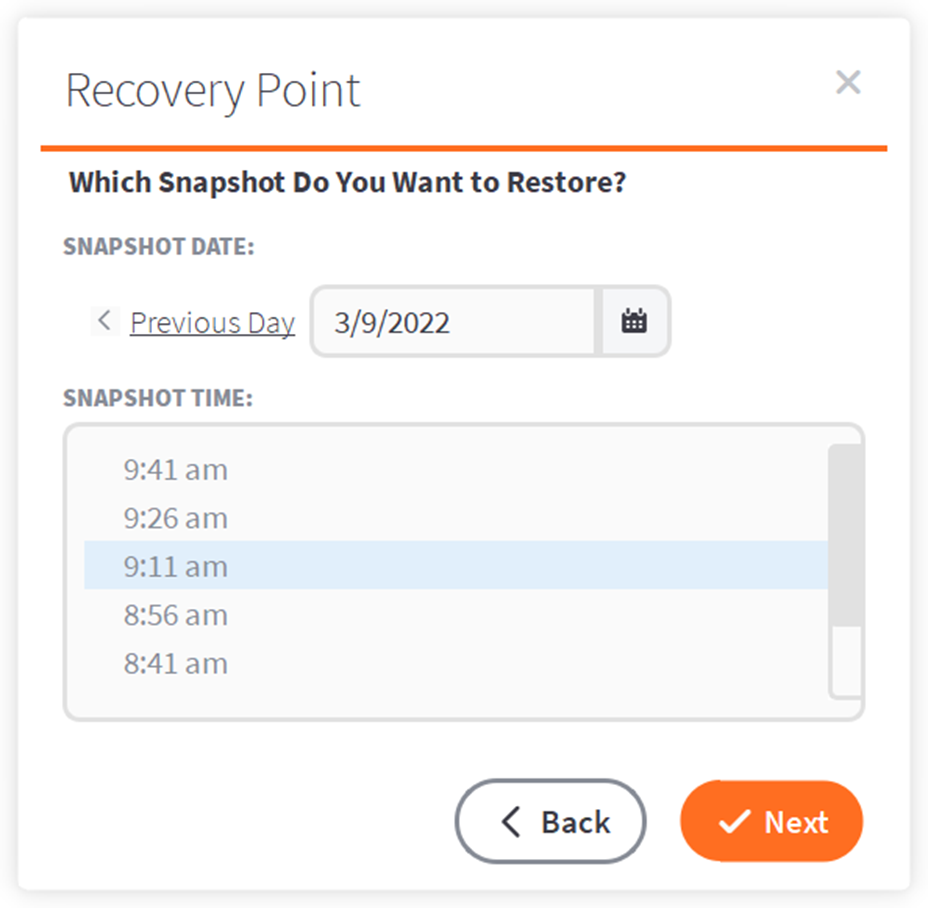
2.6 In the Recovery Point window, select the snapshot you wish to restore and click Next to continue.
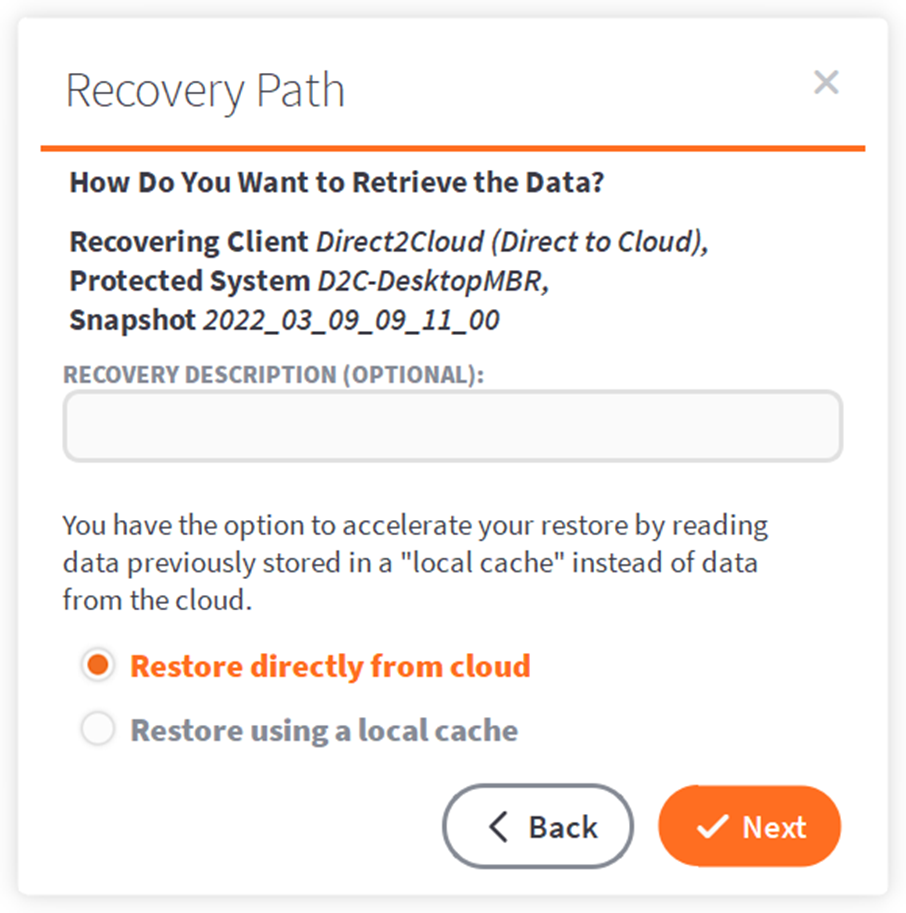
2.7 In the Recovery Path window, you will specify whether you wish to (a) restore directly from the cloud or (b) restore using a local cache available for this protected system.
| Restore directly from cloud | Restore using a local cache |
|
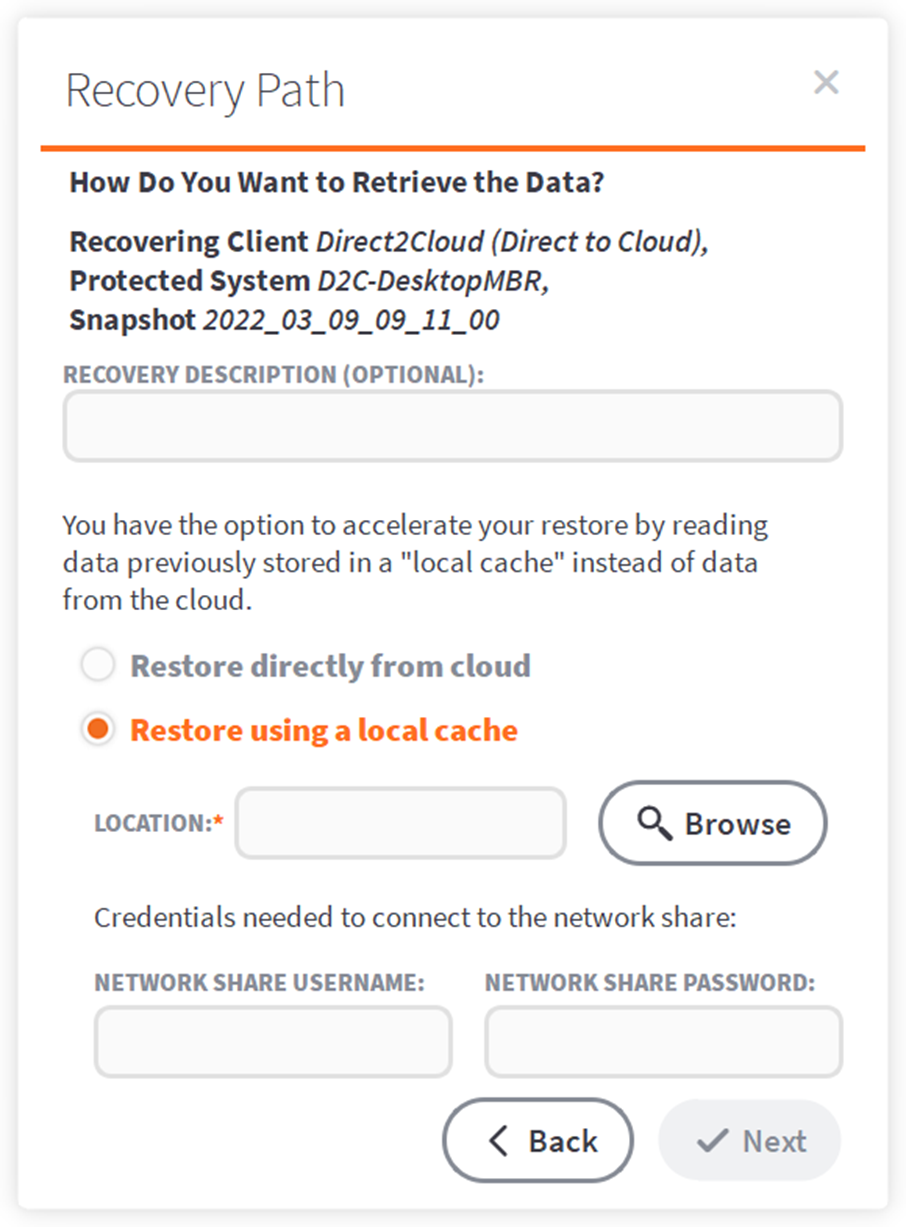 |
2.7.1. If you choose to recover data without a local cache, recovery speed will be much slower that if a local cache is available for this protected system. (See Advantages of local cache for D2C)
2.7.2 If you have a local cache available for this protected system, specify the path to the cache.
- If the local cache is on a locally- attached disk (such as a USB drive), browse to the drive letter and folder path, such as:
Z:\LocalCache
- If the local cache is located on a network share, you must (a) specify the location using a UNC path (such as \\server\share\LocalCache) and (b) provide a valid username and password to access the share.
Important: You cannot use a drive letter path with a network share. You must specify the path using UNC path format.
2.7.3 Click Next to continue.
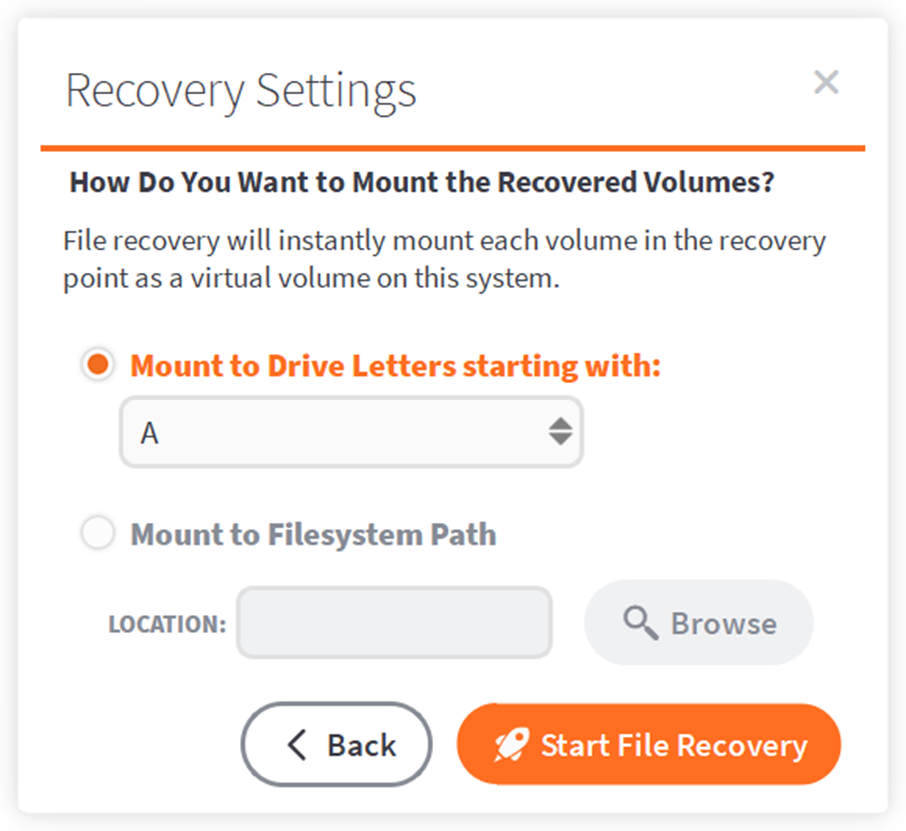
2.8. In the Recovery Settings window, specify how to mount the disk volumes from the protected system onto the local recovery machine.
You may choose to mount disk volumes using drive letters, or you may choose to mount disk volumes as folders within a folder on the recovery machine.
- If you choose to mount volumes using drive letters, the first protected system volume will be mounted at the drive letter you specify here. Subsequent volumes will be mounted to the next available drive letter in turn.
Select your location and click Start File Recovery.
Click Close when you are finished with the wizard.
STEP 3. Monitor the recovery job
Monitor the job status in the main Recovery Center window.
3.1. Once the STATUS column indicates the job is Running, the disk volumes have been constructed and mounted to the recovery machine.
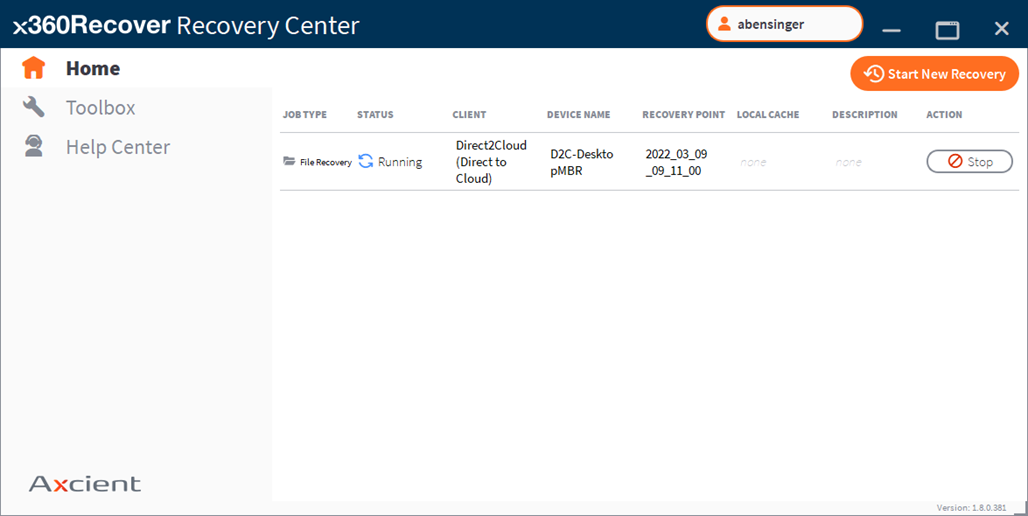
3.2. After the recovery job reaches a running status, you may close and exit the Recovery Center. Background services will continue to keep the recovery disk volumes mounts, even through a reboot of the machine.
3.3 Open File Explorer and verify that your Microsoft Exchange Server database files are accessible on the local machine.
Once the Exchange database files are accessible locally on the recovery machine, proceed with recovering the Exchange mailbox data you wish to restore using Axcient Direct Restore.
See the Axcient Direct Restore User Guide for assistance performing the recovery.
STEP 4. Stop and remove Recovery Center job when finished
Once you have completed recovery of your Microsoft Exchange Server mailboxes, return to Recovery Center and remove the Recovery Jobs in progress to clean up.
4.1. Click Stop to end the job and tear down the mounted disk volumes.

4.2. Monitor the job STATUS column.
Once the status column indicates Stopped, click Delete Job to discard the job configuration. This will release resources on the cloud vault or appliance.

SUPPORT | 720-204-4500 | 800-352-0248
- Contact Axcient Support at https://partner.axcient.com/login or call 800-352-0248
- Free certification courses are available in the Axcient x360Portal under Training
- Subscribe to the Axcient Status page for a list of status updates and scheduled maintenance
1158