
When deleting an account, you can opt to purge the data before deleting it or you can allow it to automatically purge 14 days after the account is deleted.
Allowing the data to auto purge, though, will leave the account showing usage in the portal, even after the data has been deleted. In some rare cases, data not manually purged can still lead to billing, even on deleted accounts.
| Account Center (Visual View) |
 |
| Account List (Detailed View) |

If you have an account that you no longer want to show as having data, or if you want to avoid the rare case where deleted data still leads to billing, you can purge the account of data with the following steps.
Please note: There are two methods available for this process:
| Steps for the Account Center (Visual View) version of the portal will be listed first. |
| Steps for the Account List (Detailed View) version of the portal will be listed second. |
| You will only use one method or the other, not both at the same time. |
STEP 1. If the account is deleted, ensure that Show Deleted is selected in the portal.
| Account Center (Visual View) |
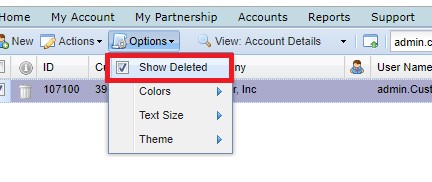 |
| Account List (Detailed View) |
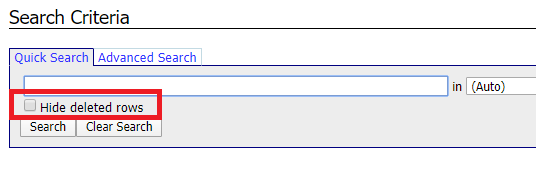 |
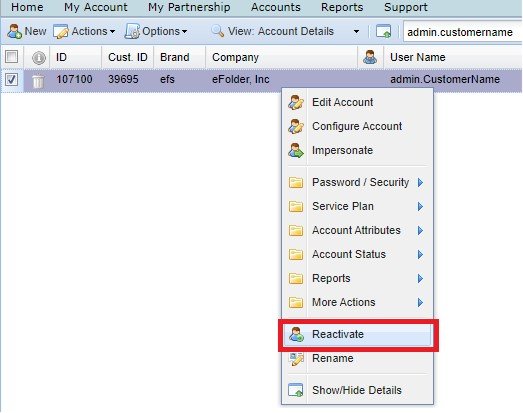
STEP 2. If the account is deleted, you must restore the account.
You must be signed in with the Partner Senior Manager or Partner Senior IT Manager account to have the proper permissions to do this.
| In the Account Center (Visual View) of the Portal, right click on the account and choose Reactivate |
 |
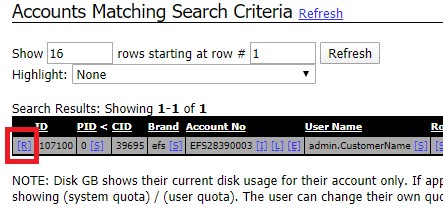
| In the Account List (Detailed View) of the Portal, click the R on the left side next to the account. |
 |
3. Install the Online Backup Manager on the machine you want to use to do the deletion from.
This does not have to be the original machine.
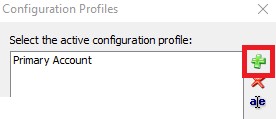
Note: if you want to use an existing install of the Online Backup Manager, you can. You will need to Create a new profile to use by going to File | Switch Profile…
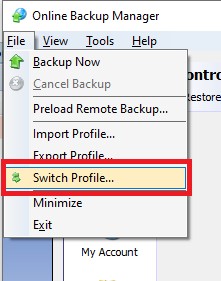
Give the profile any name, click Ok, select the new profile, and click Switch.
This will give you a new profile to work with without affecting the profile(s) already present on an existing installation.
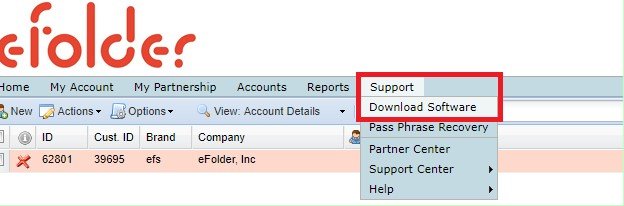
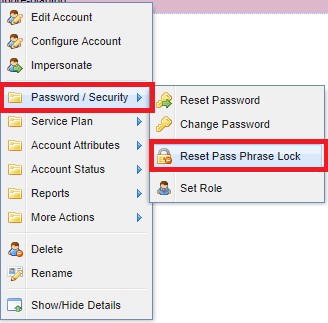
STEP 4. In the Portal, reset the Pass Phrase Lock for the account.
| From the Account Center (Visual View), right click on the account, go to Password / Security, and click Reset Pass Phrase Lock. |
 |
STEP 5. In the Online Backup Manager, configure the settings for the account whose usage should be zero'ed out. Configure the username and password (this can be reset in the portal if needed). Then create a pass phrase. See this article if you need additional instructions on configuration.
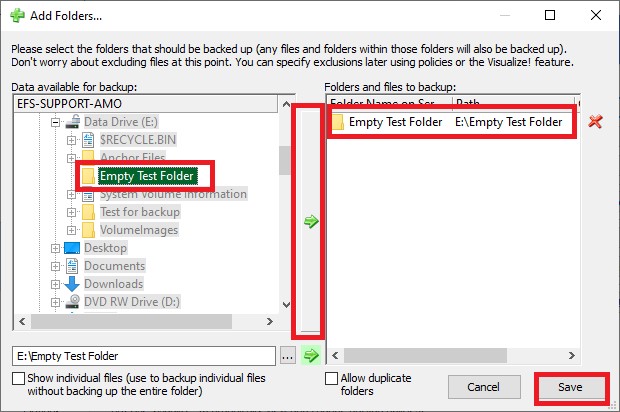
STEP 6. Using the machine where you just installed Online Backup Manager, create an empty folder on any drive.
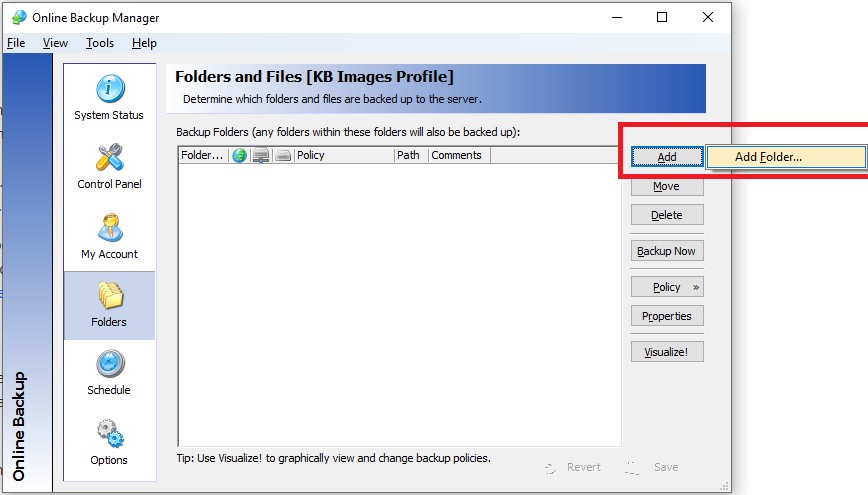
STEP 7. Add the empty folder to protection in the Online Backup Manager:
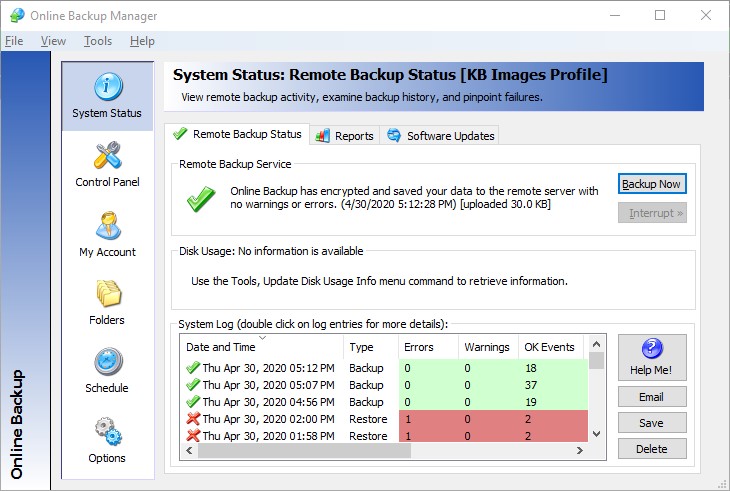
STEP 8. Go to System Status and click on Backup Now
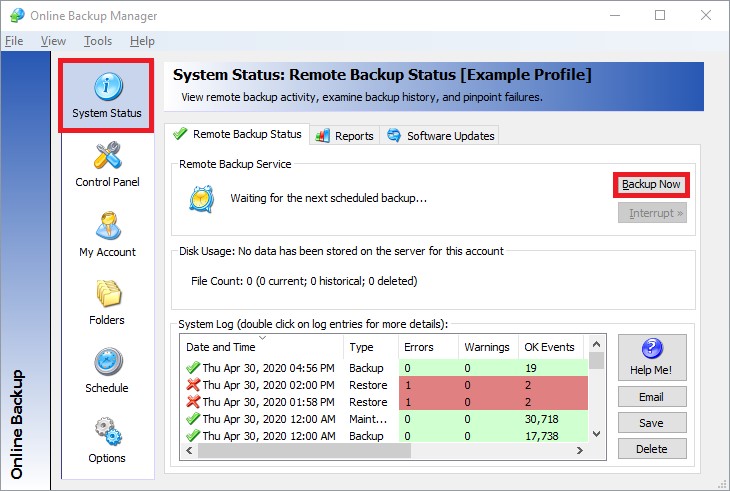
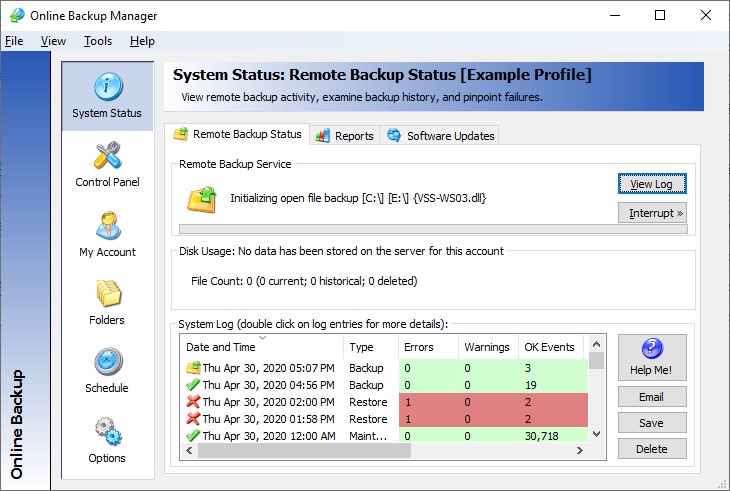
STEP 9. Wait for the backup to complete.
In progress:
Complete:
STEP 10. Usage will now show 0 GB in the portal.
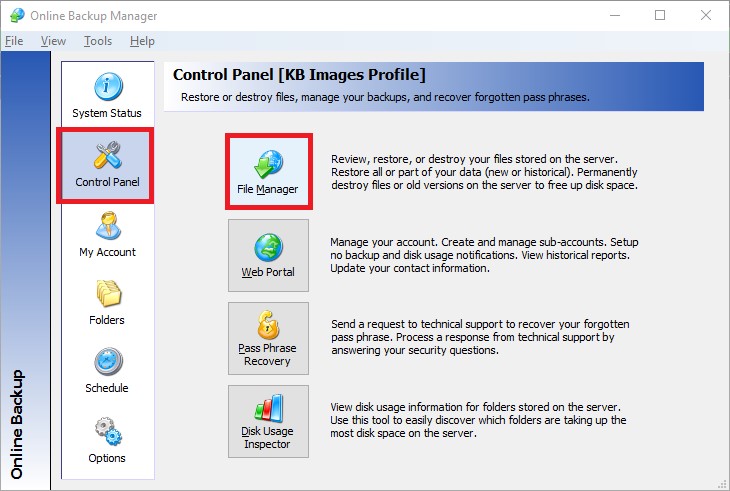
STEP 11. To be thorough, go to the Control Panel | File Manager in the Online Backup Manager.
STEP 12. On the screen with the username and password (of the account you’re zeroing), click Next.
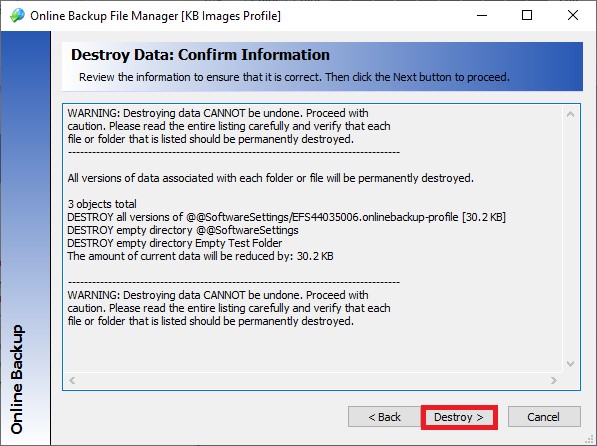
STEP 13. Click Destroy Data. Enter the password for the account.
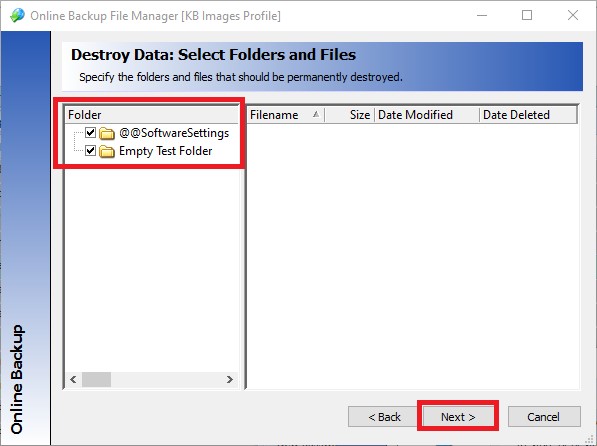
STEP 14. Select everything present. Click Next.
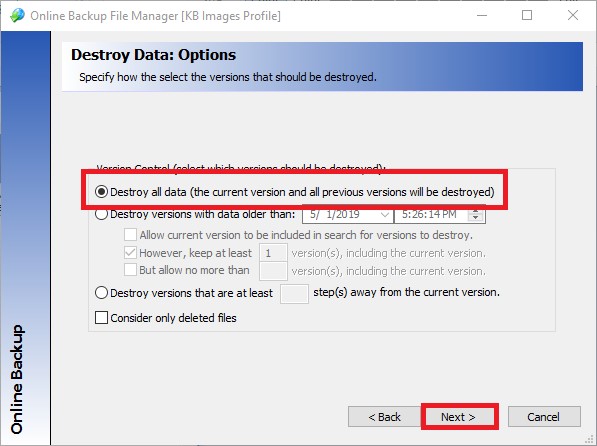
STEP 15. Select the first option Destroy all data (the current version and all previous versions will be destroyed). Then, click Next.
STEP 16. Wait for the next screen to load and change. Click Destroy.
STEP 17. Click Exit when done.
STEP 18. Uninstall the Online Backup Manager, or remove the profile if you used an existing installation of Online Backup Manager.
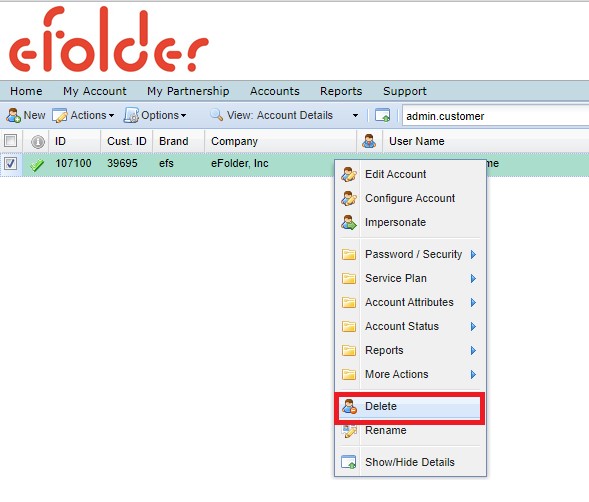
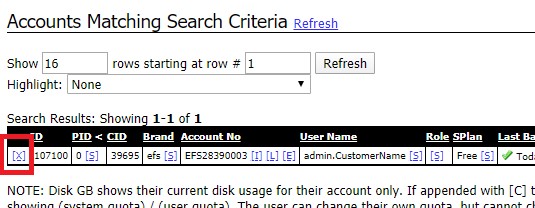
STEP 19. Delete the account in the Portal.
| In the Account Center (Visual View), right click on the account and choose Delete. |
 |
| In the Account List (Detailed View), click the X link on the left side next to the account. |
 |