
Overview
File Server Enablement (FSE) allows you to cloud-enable any folder on a machine and map it to a Team Share or a user account. You can also specify a UNC path as a source for File Server Enablement.
For instructions on configuring FSE, please reference Set up File Server Enablement.
Migrate a File Server
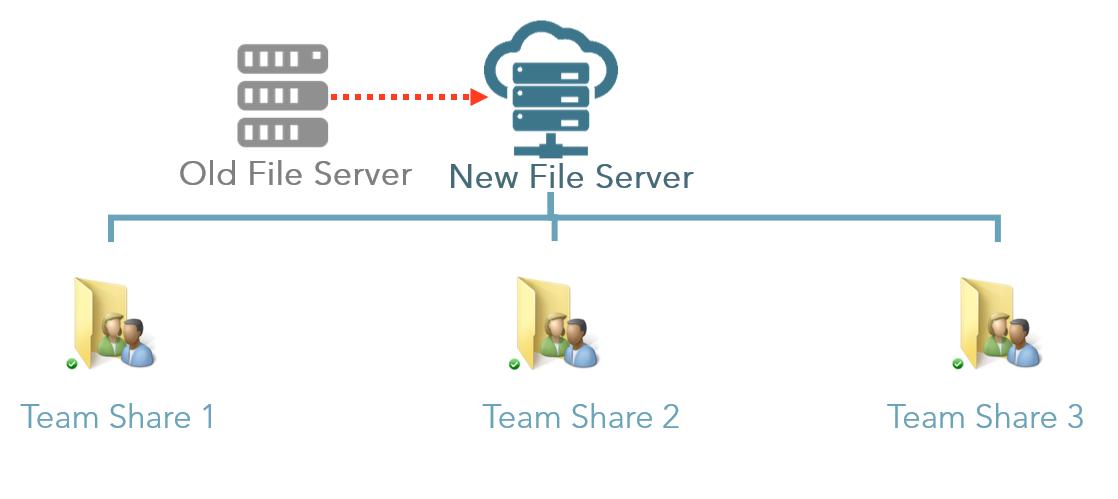
In some instances, you might need to migrate a file server that has already been configured for File Server Enablement and mapped to Team Shares. To accomplish this, you will need to:
- Copy the files from the original file server to the new file server
- Configure File Server Enablement on the new file server
- Re-map existing Team Shares to the new file server
- Decommission the original file server
Instructions
Step 1: Copy Files From the Original Server to the New Server
As a first step, you will need to copy the files from the original file server to the new file server, using your preferred migration method.
Step 2: Configure File Server Enablement on the New File Server
When the files have been successfully copied to the new file server, install the x360Sync desktop client on the new file server, and then turn on File Server Enablement.
For complete instructions, please reference Set up File Server Enablement.
Step 3: Re-Map Existing Team Shares to the New File Server
After you turn on File Server Enablement for the new file server, you can re-map the appropriate Team Shares to the new file server.
For complete instructions, please reference, please see Set up File Server Enablement
Note: Collisions might occur if this step is performed while users are accessing data on the new file server. Please perform this step when users are not likely to be accessing the system (off-hours).
Note: Once mapping is complete, the agent GUI will show files 'syncing' - This is the GUI's display of the metadata rebuild process, not a re-sync of all of the data. Only new/changed files will sync, while the rest will simply be added in the local machines databases for metadata tracking.
For instruction on resolving collisions using the Overwrite Collisions option, please reference the How to Manually Resolve a File Sync Conflict Knowledgebase article.
Step 4: Decommission the Original File Server
Note: Before you decommission the original file server, you must remove mappings or unlink the desktop client installed on the server. If you decommission the original file server with active mappings, you will lose your Team Share data.
After the Team Shares are mapped to the new file server, you can decommission the original file server if needed. If users also access the original file server directly, you might also need to point these users to the new file server.
SUPPORT | 720-204-4500 | 800-352-0248
- Contact Axcient Support at https://partner.axcient.com/login or call 800-352-0248
- Free certification courses are available in the Axcient x360Portal under Training
- Subscribe to the Axcient Status page for a list of status updates and scheduled maintenance