
Overview
These steps will guide you through set up and recovery using x360Recover local cache in an Azure instance.
- Step 1. Set up local cache in Azure
- Step 2. Configure local cache for Azure in x360Recover
- Step 3. Recovery for Azure using local cache and Recovery Center
STEP 1. Set up local cache in Azure
Create a file share in Azure
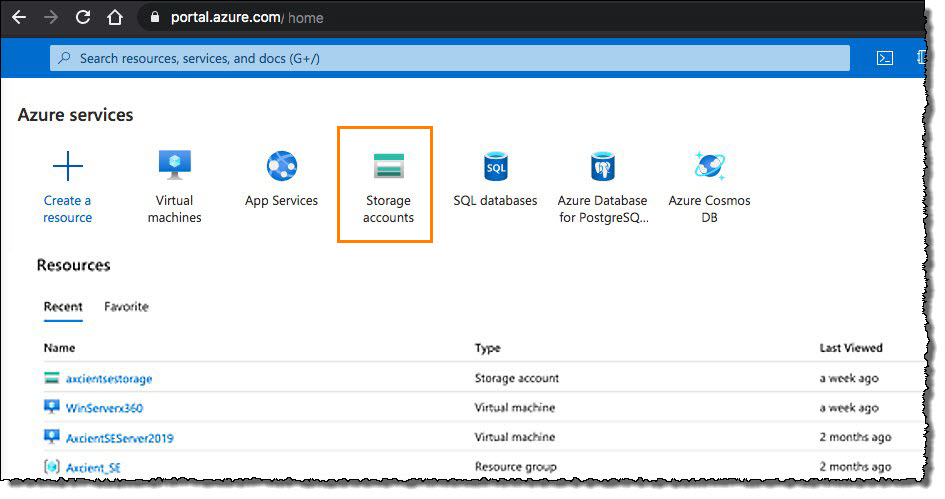
1.1. Log into your Azure portal at portal.azure.com
1.2. Select Storage accounts
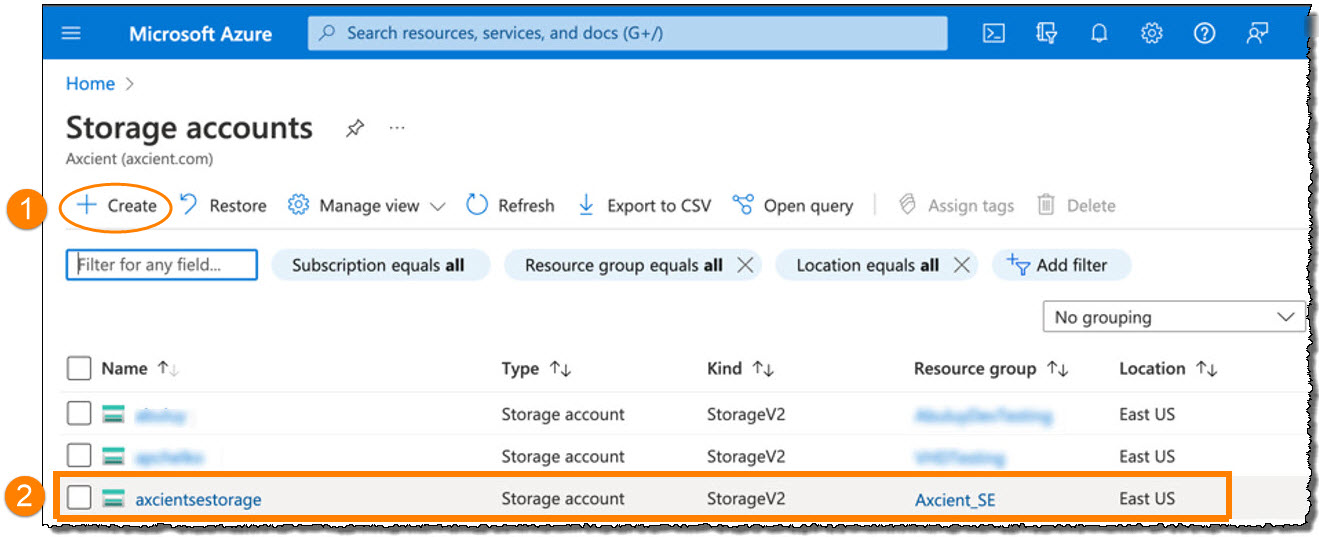
1.3. From within the Storage accounts page, (1) create a new storage account or (2) select the desired existing storage account. This will produce <azurestorageaccount>, which is a credential you will use later in this process.
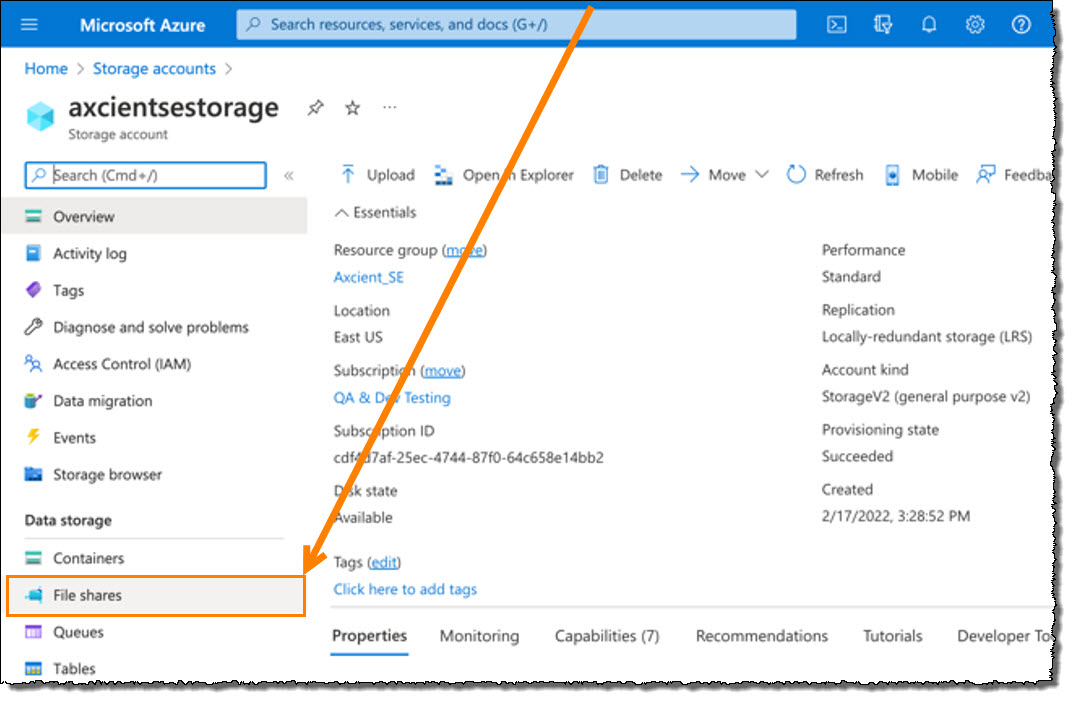
1.4. Once you have accessed the desired storage account, select File shares under the Data Storage section:
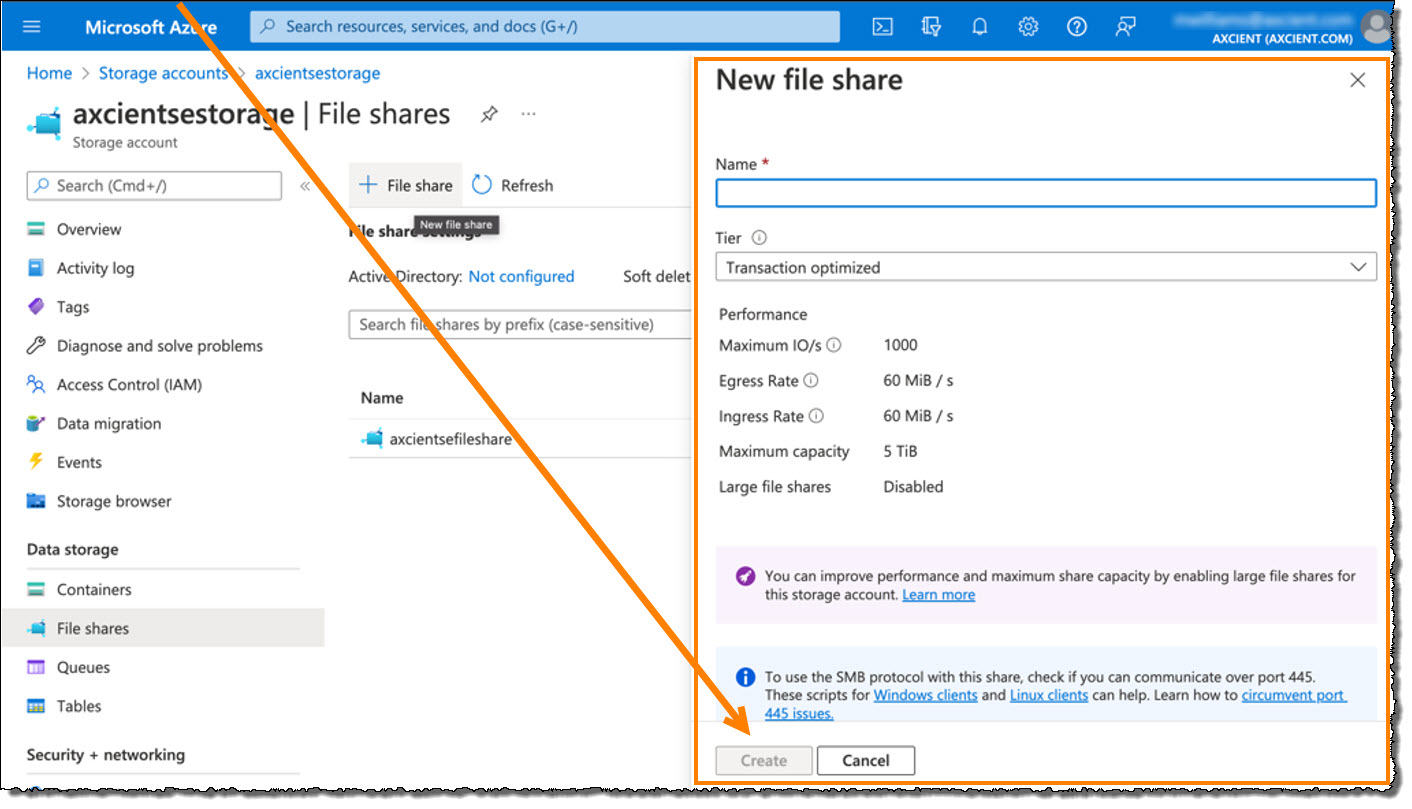
1.5. When the New file share window opens, enter the required information for a new file share and click Create to continue with the process. This will produce <fileshare> which is another credential you will use later in this process.
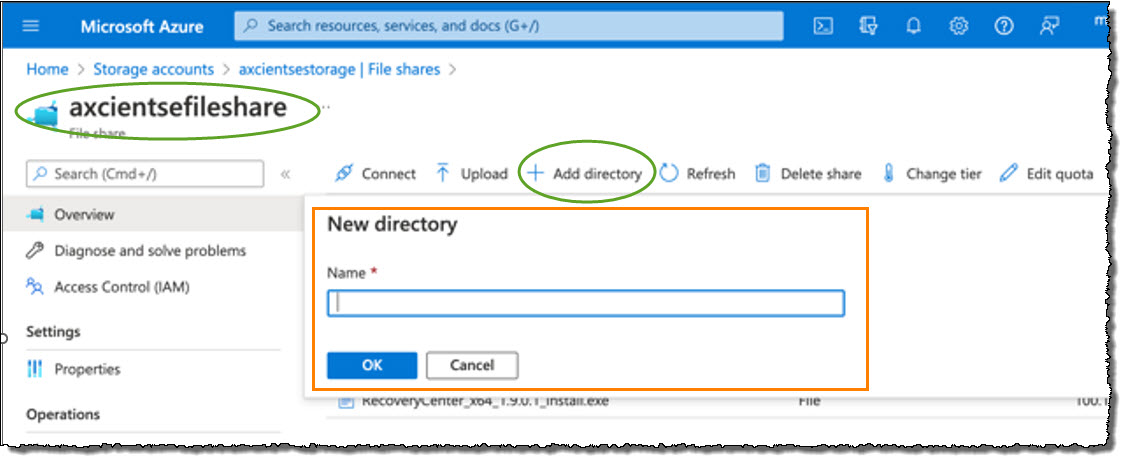
1.6. From within the new file share, select Add directory
1.7. Enter the name of the desired New directory. This will produce <directoryname> which is another credential you will use later in this process.
Click OK to continue.
1.8. While you are still in the new file share, select Connect to get file share credentials (These will be located in the grey text).
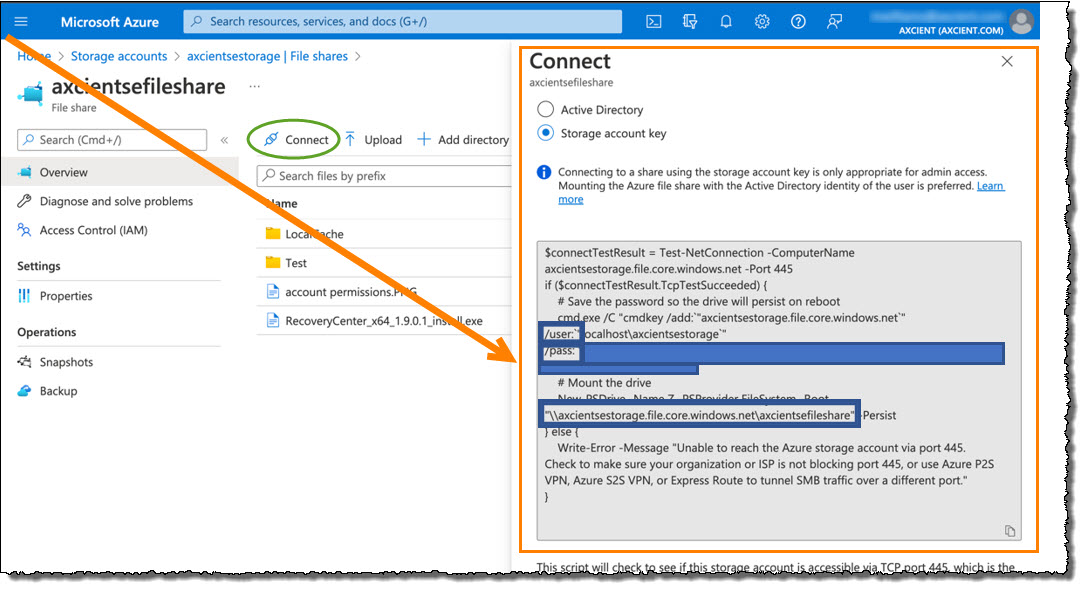
Credentials needed
The following credentials are needed to configure x360Recover local cache and recover using that local cache:
|
STEP 2. Configure local cache in x360Recover
x360Recover's local cache allows you to keep a local backup within your Azure instance - while also having a copy in the Axcient cloud.
2.1. Log into your x360Recover vault
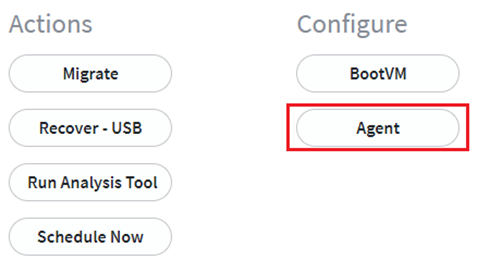
2.2. Select the desired device from the protected systems list and select the Agent button.
2.3. Within the Agent Configuration dialog, expand the Local Cache Settings:
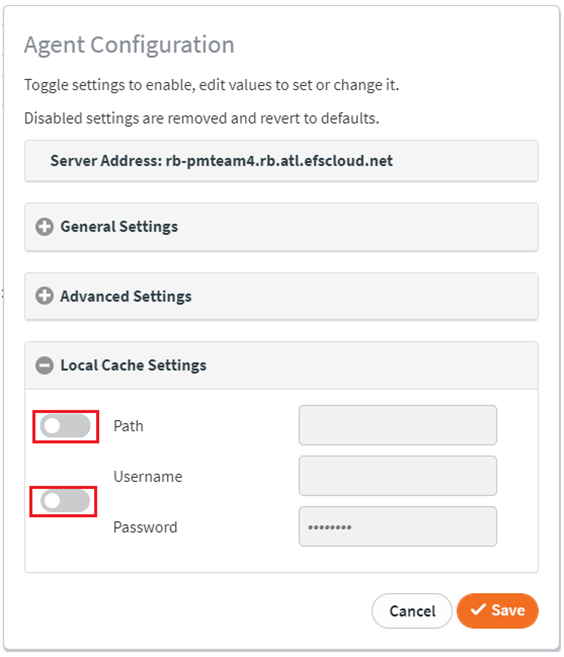
Apply the credentials you collected while you created theAzure file share.
NOTE: Be sure to add the folder name to the end of your path;
- User = localhost\<azurestorageaccount>
- Password =
Complete instructions for configuring all local cache settings are available here:
STEP 3. Recover with local cache in Azure
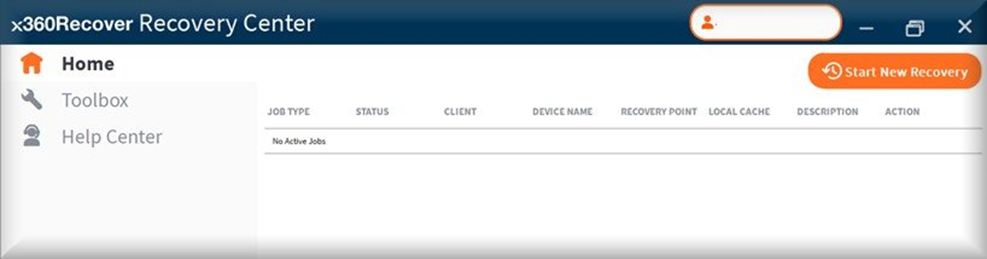
3.1. Download Recovery Center
Recovery Center is a companion recovery platform for Direct-to-Cloud (D2C) protected systems. Recovery Center is a stand-alone application that allows you to recover data directly from the Axcient cloud or a private cloud.
DOWNLOAD: https://help.axcient.com/software-downloads/iso-terms-x360recovery-center
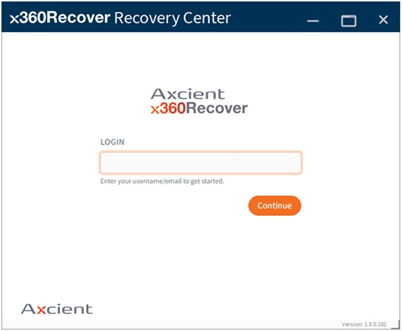
3.2. Install Recovery Center
Install recovery center.exe on any windows server in your Azure instance.
Once installed, log in using your Axcient Partner Portal credentials.
3.3. Unmount existing resource share
***Very Important***
|
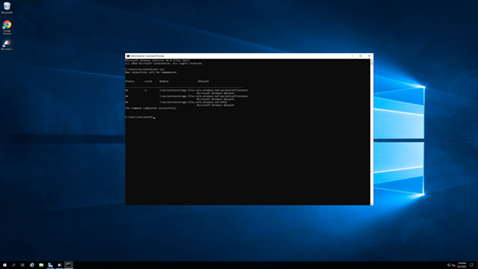
Unmount existing resource share Before doing any recovery in Recovery Center, you must first ensure that the device is not connected to the shared resource. a. Open cmd from the Windows device and type in net use
If the device is connected to the share, you will see something like this:
Unmount the connected shares by using the following commands:
You should get this result after each unmount:
\\axcientsestorage.file.core.windows.net\axcientsefileshare was deleted successfully.
\\axcientsestorage.file.core.windows.net\IPC$ was deleted successfully. Once the resource is unmounted, continue with the normal restore process via Recovery Center |
3.4. Recover using Recovery Center and x360Recover local cache
Once the resource is unmounted, continue with the normal restore process via Recovery Center. For step-by-step instructions on recovering with Recovery Center, please see Recovering with Recovery Center
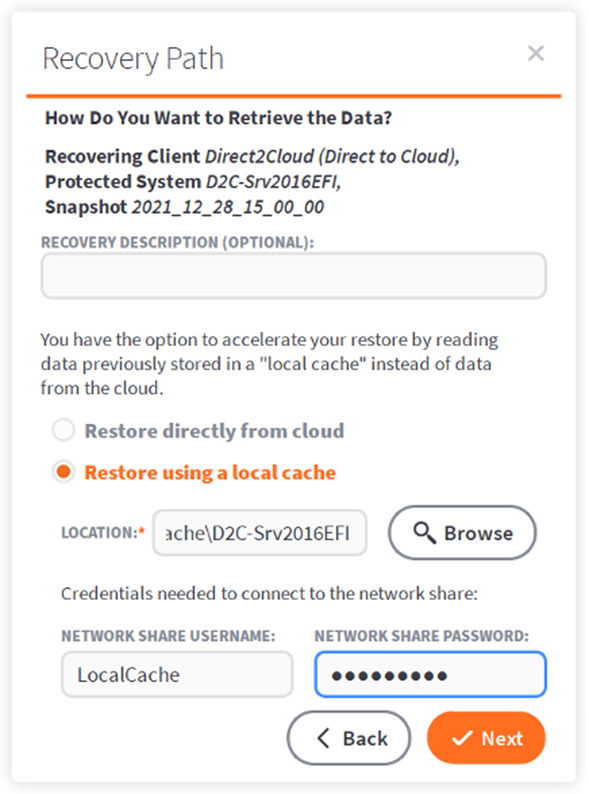
Important note on using local cache with Recovery Center: During the recovery process, when you reach the Recovery Path section, select restore using local cache.
You must use the credentials provided by Microsoft for the file share you created:
For step-by-step instructions on recovering with Recovery Center, please see Recovering with Recovery Center
SUPPORT | 720-204-4500 | 800-352-0248
- Contact Axcient Support at https://partner.axcient.com/login or call 800-352-0248
- Free certification courses are available in the Axcient x360Portal under Training
- Subscribe to the Axcient Status page for a list of status updates and scheduled maintenance
1303