
Overview
There are several different approaches available for hardware migration from BRC to x360Recover.
This document provides a step-by-step guide for migrating from Axcient BRC to x360Recover using your existing BRC appliance and the Axcient cloud.
A note on software: When you are ready to migrate from BRC to x360Recover, we offer two ISOs:
Both types of ISO downloads (with EULA) are available here |
x360Recover direct migration model using cloud retention
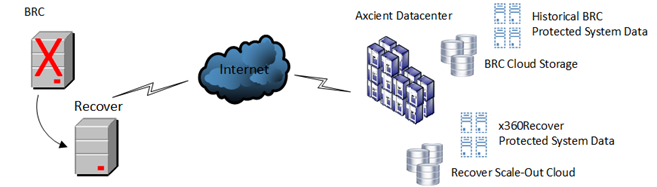
This migration method leverages your existing BRC recovery data in the Axcient Cloud to serve as your historical retention repository.
For purposes of legacy recovery point retention, your existing BRC Cloud data will be retained in the Axcient Cloud for a period of up to one year at no extra charge.
- The existing BRC appliance will be converted to x360Recover immediately after migration. x360Recover agents will deploy and begin new backups of protected systems locally.
- Shutting down the BRC appliance will freeze the existing BRC data in the cloud. Any historical recovery operations may be performed from that cloud data. You may virtualize BRC recovery points in Virtual Office, perform file and folder recovery or export virtual disks from within x360Recover Manager.
- Once the appliance has been reloaded, x360Recover agents will deploy (and BRC agents will be removed) from each of the clients’ protected systems.
- A new backup epoch under x360Recover will begin fresh, and data will then be replicated to the Axcient x360Recover Scale-Out Cloud.
Note: Although cloud storage will effectively be doubled as we duplicate the protected system data held under BRC into x360Recover Scale-Out-Cloud, this is anticipated and is included as part of the migration process. Historical BRC protected system data will be maintained in the Axcient Cloud at no additional charge for up to 1 year.
Pros and cons of this migration method
| Pros: | Cons: |
|
|
How to perform this migration
Use the following steps to migrate a BRC appliance and client to x360Recover.
STEP 1. Perform a clean shutdown of BRC services
- Disable all backup jobs scheduled for all devices.
- Verify that any running jobs have completed.
- Confirm that all off-site replication jobs have complete successfully.
- Once all job activity is complete and the appliance is in a stable state, you can shut down and power off the BRC appliance.
| Important note: DO NOT factory reset the BRC appliance before wiping and reloading with x360Recover. Performing a factory reset of the appliance will destroy the SID for the unit and delete your cloud data. |
STEP 2. Verify cloud data
Verify the state of your protected system data in the Axcient Cloud and ensure that all data is recoverable.
- Verify that all of the cloud protected systems are parked.
(Disabling backup jobs on the appliance should park the endpoints) - Perform a file and folder recovery.
- Browse and validate that all volumes are accessible
- Perform a Virtual Office test run
- Ensure that all protected systems will boot in the cloud to test data integrity
Once you are satisfied that the Axcient Cloud copy of your data is in good health, proceed with wiping and reloading your BRC appliance with x360Recover.
STEP 3. Install x360Recover
The x360Recover installation ISO will deploy the basic operating system along with all x360Recover application components.
- x360Recover runs on the Ubuntu 64-bit Linux operating system.
- BRC runs on the Debian 64-bit Linux operating system.
- Ubuntu is a child distribution build on Debian and shares the same Linux kernel tree, so hardware compatibility between the two Linux operating systems should be identical.
When you are ready to migrate from BRC to x360Recover,we offer two ISOs:
- For BRC hardware < two years old, please use the Hardware Enablement version of the ISO (v10.8.0 or newer)
- For BRC hardware > two years old, please use the standard ISO (v10.8.0 or newer)
Both types of ISO downloads (with EULA) are available here
Once you have downloaded the ISO, make a bootable image of the installer on a USB flash drive.
Instructions for creating a bootable USB flash drive are here
The following steps describe the installation of the underlying x360Recover operating system.
3A. Boot the installation ISO
|
Important note: Installing x360Recover will erase the entire contents of the hard drives on this system. Be sure you are ready to proceed before continuing. |
Typically, BRC Dell and HP appliance hardware will be configured for EFI BIOS mode by default.
Note: EFI BIOS mode does not normally opt to boot first from available CDROM or USB removable media. When powering on the appliance, you may need to press the appropriate key to enter BIOS settings or bring up the Boot Manager, and then choose to boot from the removable media containing the x360Recover installer.
On HP servers, press <F11> during boot to bring up the Boot Menu:

On Dell servers, press and hold the <F12> key during power up to open the one-time boot menu.
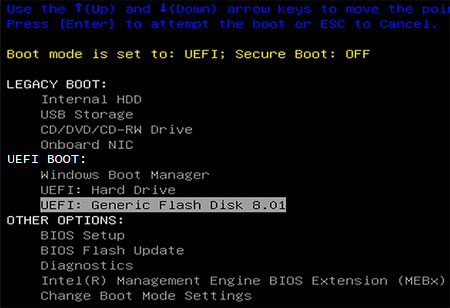
When you boot from the installation ISO/USB, the Linux grub boot menu will appear.
Select the Single-Disk/Nano x360Recover Installation option, to allow loading x360Recover onto a system with only a single disk volume.
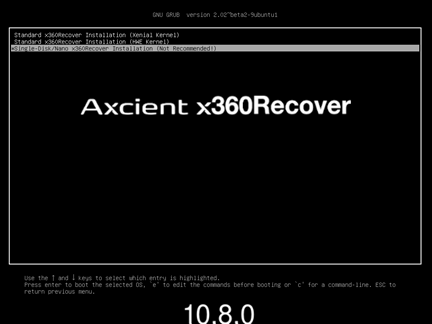
Important note: Installing x360Recover will erase the entire contents of the hard drives on this system. Be sure you are ready to proceed before continuing!
3B. Erase the disk, install x360Recover and reboot
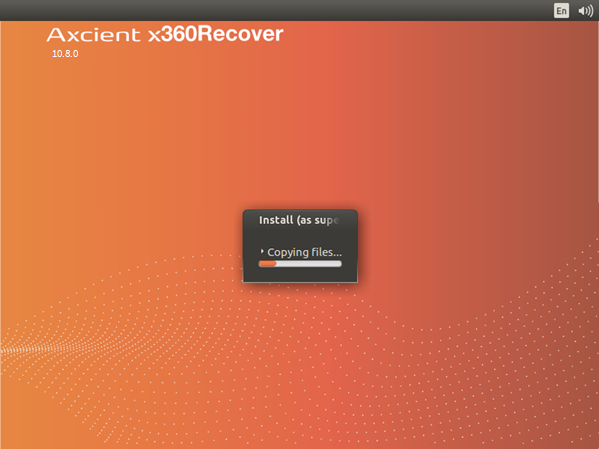
The x360Recover splash screen will appear while the installer loads.

If the Installation menu appears, select Erase Disk and Install Replibit then click Continue.
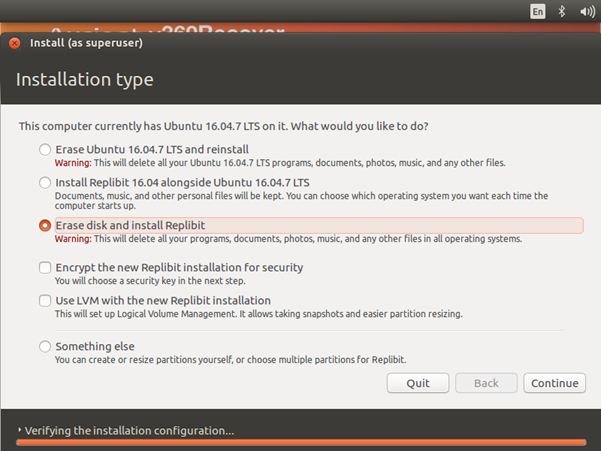
In most cases, if there is only a single disk present in the system, the installer will immediately begin deploying x360Recover.
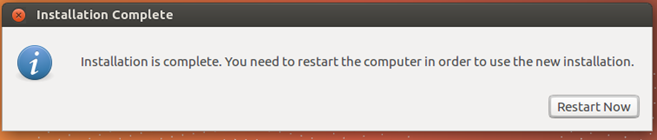
Once the installation is complete, the system will reboot.
If prompted, click Restart Now to reboot the system.
You may remove the USB boot media once the system post screen appears during the reboot.
STEP 4. Provision the appliance
Once the system has been rebooted, the Login prompt will appear on the console.
Note the IP address displayed and continue with the appliance setup and first-time login.
Complete instructions for appliance setup and first-time login are available here
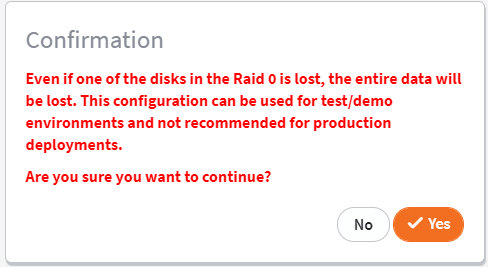
Note: When creating the storage pool during your first appliance log in, select RAID0.

Ignore the warning about RAID0. (Your data volume is protected by the underlying hardware RAID disk configuration.)
Click Yes to confirm and continue.
STEP 5. Deploy the agent
After you complete the initial login to the appliance and finish configuring the basic settings, you can proceed with installing agents onto your protected systems.
To install an x360Recover agent on each system and configure the backup settings:
a) Log in to the appliance and navigate to the Agent Downloads page.
b) Download the agent installer to a convenient location (for example, a USB thumb drive or a network share.)
c) The agent must be installed on each system you wish to backup with x360Recover.
- More details on agent installation are available here
- Information on a silent install of the agent using an RMM or other tool is here
STEP 6. Configure Replication
Once an agent has been deployed, and the initial backup has been completed, enable replication with the x360Recover Scale-Out Cloud.
Instructions on configuring replications are here
SUPPORT | 720-204-4500 | 800-352-0248
- Please contact your Partner Success Manager or Support if you have specific technical questions.
- Subscribe to the Axcient Status page for a list of status updates and scheduled maintenance.
909