
When new end users receive their welcome email, they are often provided a direct link to download file sync tools, including any device-specific apps. Alternatively, end users can access links to download tools from the web portal.
When end users install desktop clients, they are asked to register the desktop clients to their user accounts. These registered devices are listed as machines in the administrative web portal. When a machine (such as a computer or a mobile device) is attached to a user account, you can track and manage these machines by clicking the Machines tab in the administrative web portal. In the Machines page, you can view a list of machines, see the user accounts that are attached to the machines, and view logs for each machine.
In addition to these tasks, you can also use the Machines page to unlink machines from user accounts. Unlinking machines from user accounts is helpful in instances when end users lose a device, and you want to prevent unauthorized access to the system.
NOTE
The remote wipe process will not initiate while the desktop client is offline. When the desktop client comes back online, it will then complete the remote wipe process.
Manage machines
Use the Machines page to manage machines and track issues.
1. In the Organization navigation menu, select the organization in which you want to manage machines. The selected organization displays.
2. Click the Machines tab. The Machines page displays, showing a list of all machines in the selected organization.
3. You can use the columns to track machine status. For example, the Connection Info column displays information that will help you understand connection history of the specific machine. You can also use the visual indicators in the Status column to understand each desktop client’s current sync and backup status.
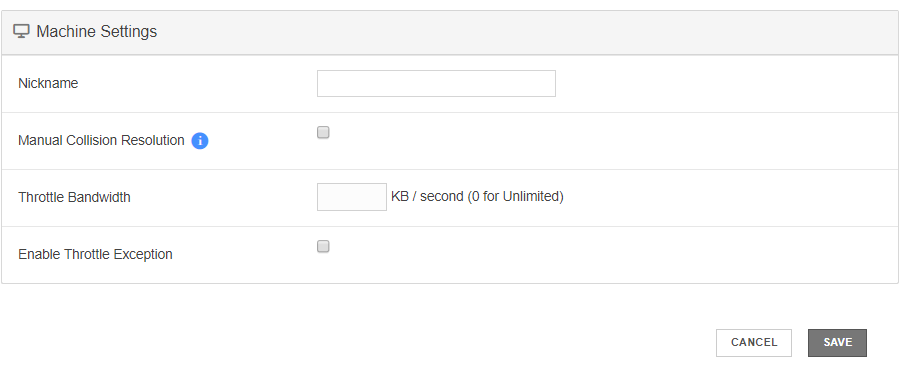
4. Click the name of a machine. The Machine Settingspage displays for the selected machine, allowing you to manage machine settings.
- In the Nickname field, you can give the machine a short name to help you identify it in the system.
- Optionally, deselect the Manual Collision Resolution checkbox to disable manual collision resolution. In most instances, it is recommended that you enable manual collision resolution. You can optionally turn off the manual collision resolution feature on machines that are not monitored daily (for example, file servers).
- In the Throttle Bandwidth field, enter specific throttle bandwidth settings to help regulate traffic and minimize bandwidth congestion. You can also configure this field for an entire organization using policy settings.
- Select the Enable Throttle Exception checkbox to configure times when bandwidth throttling is not enabled for this machine. If you select this option, you will be prompted to specify a time period during which exceptions will be scheduled. You can also configure this field for an entire organization using policy settings.
- Click the Save button when you are finished.
5. In the Machines page, you can optionally click the Enable Mapping link to set up File Server Enablement.
6. While still in the Machines page, click the drop-down arrow next to a machine name.  The machine expands to show the associated user account, as well as information about roots (files, Team Shares, and backups), current status, upload queue count, and upload queue size.
7. Optionally, click the View link to view excluded files associated with the machine.  Files that have been excluded from upload will display in a pop-up window.
Access log files
Using the Get Logs button, you can troubleshoot desktop client-related issues on Windows or Mac machines.
- Click the Get Logs button to view logs for a machine.
 A zip file will download, giving you access to multiple files.
- Unzip the downloaded folder, and use its contents to troubleshoot issues.
- Open Config.ini to view key desktop client settings. This file can also be useful as the initial troubleshooting step if a user is unable to register the desktop client, or if the desktop client is not able to connect to the server.
- Open Dbs.txt and roots.txt to view the location of roots created on this desktop client device.
- Open Env.txt to view information on the system state, running process, and operating system.
- Open Svc_out_<Date-LogID> to investigate and troubleshoot file sync and other related errors.
Unlink a machine (remote wipe)
You can also unlink a machine from a user account, which is helpful in the event of a lost or stolen device.
NOTE: The remote wipe process will not initiate while the desktop client is offline. When the desktop client comes back online, it will then complete the remote wipe process.
1. In the Machines tab, click to expand the appropriate machine.
2. Click the Unlink button to unlink the machine form the user account.  An Unlink Machine pop-up window will display.
3. Click the Keep Files on User’s Machine radio button to keep the files on the user’s machine. Alternatively, click the Remove Files From User’s Machine radio button to remove the files from the user’s machine.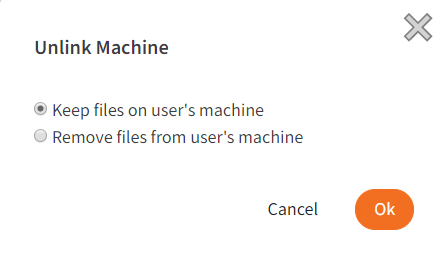
4. Click the OK button when you are finished.