
STEP 1. Configure ConnectWise
Note: You will need access to the ConnectWise System > Members page.
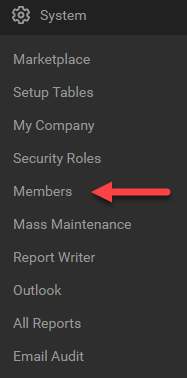
1.1 Once in the System > Members page:
1.1.1 Go to the API Members tab
1.1.2. Select the ‘+’ icon to add a new API Member.

1.2. For the Member ID, enter
Complete all required fields.
When you get to the Role ID field, the member role must have permissions to Add, Update, and Close tickets, as well as update quantities to products that have been added to a customer agreement (if you will be using x360Recover to update your billing.)
Once the form is filled out, press the Save button (Do not press save and close).
![]()
1.3. Once you press the Save button, you will now have access to the API Keys tab.
1.3.1. Open the API keys tab.
1.3.2. Select the ‘+’ to create an API key for x360Recover.

1.4.1. Type “Replibit” into the description field.
1.4.2. Press the Save button.
IMPORTANT: When you press save, do not press close until you have obtained both the public and private key outside of ConnectWise.
ConnectWise will not allow you to view the private key once you close this screen.

When you press save, the screen should look similar to this:
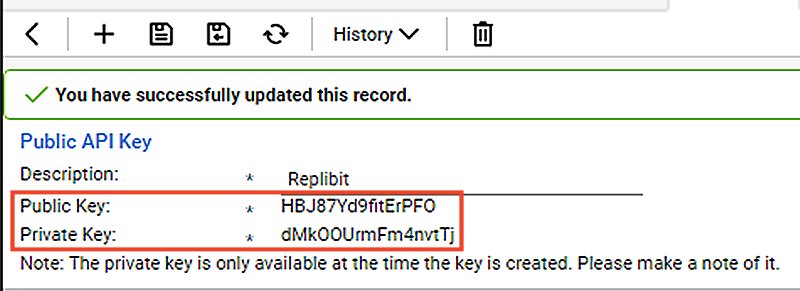
IMPORTANT: Please note both keys and keep that information somewhere safe.
You will use these two keys in the next section when you configure x360Recover ConnectWise Integration.
1.5. Browse to System > Setup Tables > Service Board
1.6. Select the service board you wish to use for ticketing
1.7. Go to the Teams tab and confirm that a team is part of your service board.
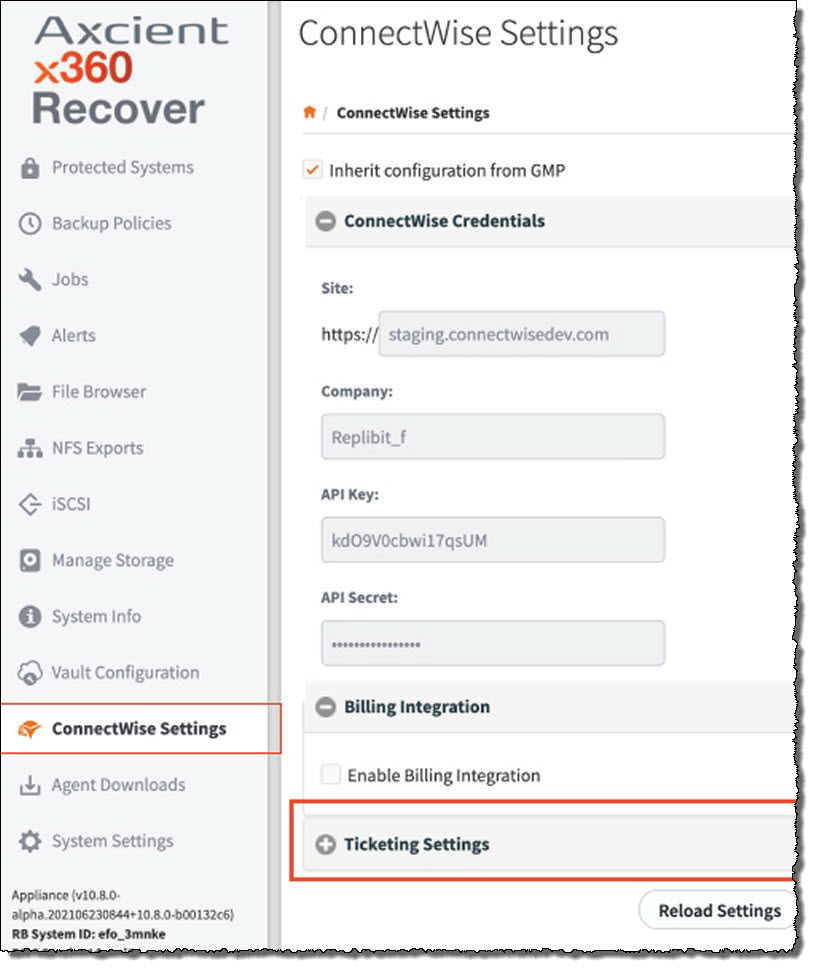
STEP 2. Configure your appliance/vault:
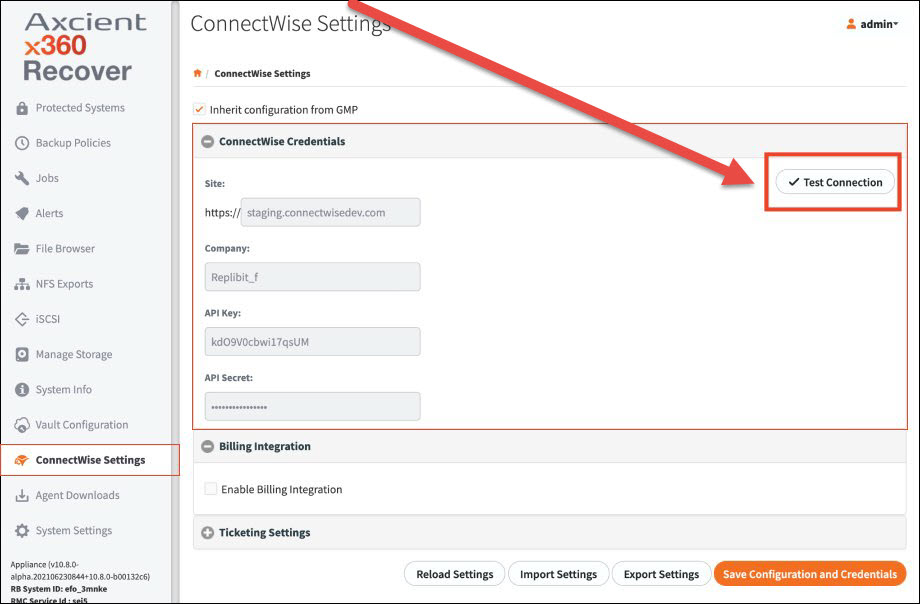
2.1. When logged into your x360Recover device, select ConnectWise Settings
2.2. Fill out the displayed information.
When all fields have been completed as desired, click Test Connection
STEP 3. Set up billing integration
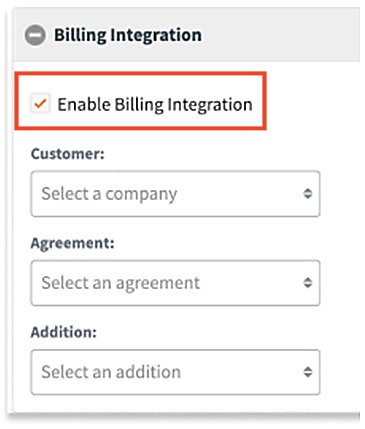
3.1 Once the connection is successful, the selection box for Billing Integration will be shown.
If you do not wish to enable billing integration, continue to the instructions for Ticketing Settings below.
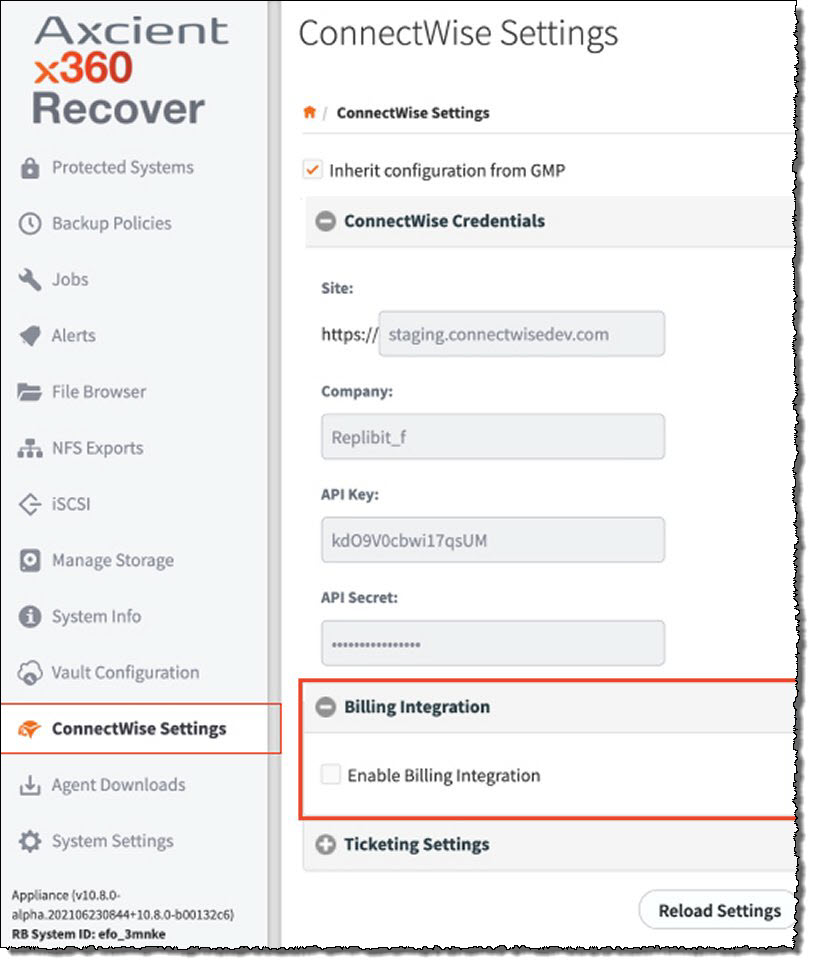
3.2. Click the box to the left of Enable Billing Integration and select your Customer, Agreement, and Addition. The addition is what we will update with total usage in GB on the vault for the appliance you are configuring.
IMPORTANT NOTE: These Enable Billing Integration settings only apply to your appliances which can be configured within the appliance GUI. All other PSA integration (outside of the appliance GUI) is on a ticket-only basis.
STEP 4. Set up ticketing settings
Once you have billing set up, click on Ticketing Settings to continue.
4.1. Select the desired Service Ticket Company. All opened tickets will be assigned to this company.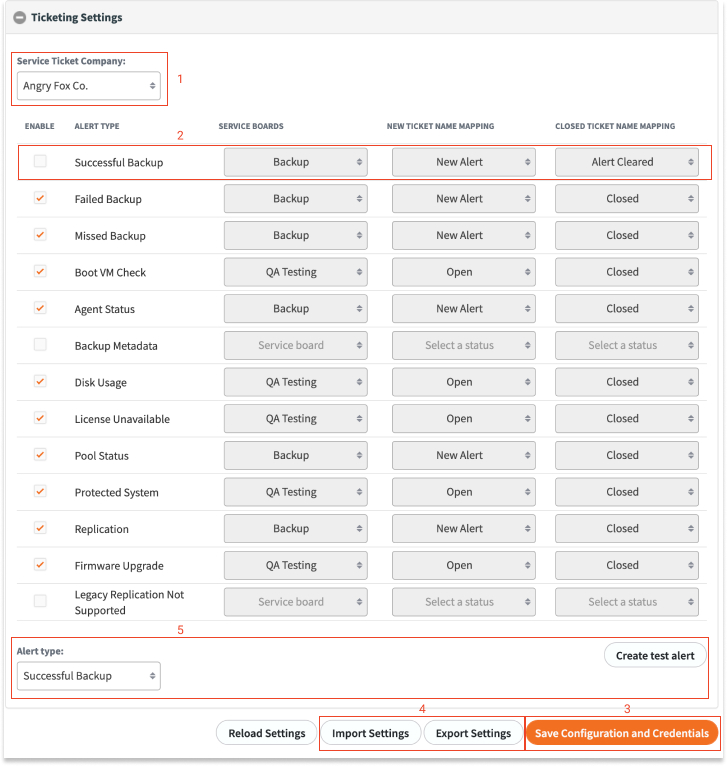
4.2. Check any desired alert types to enable notifications.
Then select the Service Board, New Ticket Status Mapping, and Closed Ticket Status Mapping.
4.3. Once you have configured the desired ticket mappings, select Save Configuration and Credentials.
4.4. If you wish to use these ticket board settings on other devices, you can download and upload the configuration using the Import Settings and Export Settings buttons.
4.5. After your settings are saved, you can test them by selecting the type of alert you want to open a test ticket as and press the Create Test Alert button.
-----------------------------------------------------------------------------------------------------------------
Old Instructions below
Old instructions
-
About the x360Recover ConnectWise Integration
- x360Recover will generate ConnectWise tickets on the Service Board of your choice.
-
Types of Alerts
- Backup Notifications - Success, Failed and Missed Backups
- Storage Alerts - Backup Storage Pool Utilization greater than 80%, Drive Failures, Block Storage Utilization by Customer (if enabled on the Vault under the Users section)
- Replication Alerts - Replication Out of Sync
- Navigate here for a longer list of Alerts: http://support.x360Recover.com/Knowledgebase/Article/View/2/0/x360Recover-timings
-
Boot VM Check
- When enabled on Protected System(s), the Appliance will boot each Protected System one at a time in Test Mode and take a screenshot after 7 minutes. This occurs once per day and begins at 2:00 AM. The Appliance will then attach the screen-shot(s) to a new ticket in ConnectWise.
-
Customer Agreement Updates
- A Configuration will be created for each Protected System.
- An Addition in the Company Agreement will be created. The Addition will be updated every 24 hours with current Vault Storage Usage (in gigabytes) for all Protected Systems for the Company.
-
Initial Setup
-
Integrator Login Example
- You'll need a single ConnectWise Integrator Login for your x360Recover Appliances and Vaults.
- In ConnectWise, navigate to Setup Tables. Search for and open the Integrator Login table. Now you'll be able to create a new entry.
- For the Access Level, make sure that you select "All Records".
- The following API's need to be enabled: Service Ticket API, Managed Services API, Company API, Product API, Reporting API and the Configuration API.
- For the Service Ticket API, choose your preferred Service Board for internal alerts.
-
Managed Devices Integration Example
- In ConnectWise, navigate to Setup Tables. Search for and open the Managed Devices Integration table. Now you'll be able to create a new entry.
- After populating the Name and Solution fields, select the new Integrator Login that you created earlier. Then un-check "Disable Newly discovered Cross-References" and select a Location and Business Unit for "Defaults for New Configurations". You can also choose to select whether you want new Configurations to be set as Billable by using the check box next to "Set Configuration to Bill the Customer". Do note that your Agreements can override this setting.
-
Product Example
- A Product is necessary to create the Addition on Agreements. To create a Product, navigate to the Products section in ConnectWise and click on the New Item icon. When naming this new Product, keep in mind that the Product will indicate the amount of gigabytes stored on your Vault per Customer. After selecting the appropriate Category/Sub Category, Product Type and Product Class, you will need to change the Unit of Measure to "Each".
-
Integrator Login Example
-
Appliance / Vault Integration
- After completing the Initial Setup, its time to integrate your Appliances and Vault(s). Before continuing, make sure to have at least one Protected System on the Appliance/Vault.
-
On each Appliance and Vault, log into the device and navigate to the ConnectWise Settings section.
-
Integrator Login Details Example
- Input your ConnectWise URL and Company name.
- For Integrator UserName and Password, use the Username and Password for the Integrator Login that you created in the Integrator Login section of the Initial Setup. Click "Test Connection" to verify credentials. If the "Configuration Details" section automatically expands, your entries were correct. If you receive the message "Please enter valid Integrator login details and perform a test connection", review the Integrator Login section of the Initial Setup.
-
Configuration Details Example
- Select the Service Ticket Company for which the Appliance is assigned to. For Vaults, select your Company (you will need to create an Agreement for your Company if none exist).
- Select the Agreement Type for the Company's Agreement. Select the Product that you created in the Initial Setup section above. Select the Management Solution Name that you created Managed Devices Integration section of the Initial Setup. Click "Test Configuration" and the "Service Board Settings To Enable Ticketing" should automatically expand. If you receive an error, notate the contents of the error and review the relevant sections of the Initial Setup.
- Service Board Settings To Enable Ticketing Example
- Select the Alerts and Notifications for which you which you want corresponding ConnectWise tickets. Select the Service Board and the Closed and New Ticket Name Mapping for the select Service Board. "Success Backups" ticketing will create a ticket in a Closed status. Therefore, a New Ticket Name Mapping for "Success Backups" is not requested.
- After choosing your requested settings, click "Save Configuration and Credentials". You should receive a "Successfully saved" message. All new Alerts on this Appliance or Vault will appear as tickets in ConnectWise on the requested Service Board.
- Only one ticket will be created per active Alert. If 10 backups fail on a Protected System, a single ConnectWise ticket will exist. If an Alert is cleared on an Appliance or a Vault, the corresponding ticket in ConnectWise will be updated to the status that you selected under "Closed Ticket Name Mapping".
-
Integrator Login Details Example
SUPPORT | 720-204-4500 | 800-352-0248
- Contact Axcient Support at https://partner.axcient.com/login or call 800-352-0248
- Have you tried our Support chat for quick questions?
- Free certification courses are available in the Axcient x360Portal under Training
- Subscribe to Axcient Status page for updates and scheduled maintenance
918 | 1127 | 1724