
|
Overview of x360Recover Runbooks: |
Runbooks allow you to configure an automatic deployment plan for virtualized devices in the x360Recover Virtual Office.
Runbooks can be leveraged for the following use cases:
- Test Disaster Recovery – Create a Runbook to test the user’s disaster recovery plan in the event of a real disaster situation. This will help address any potential issues that may arise so that if a disaster occurs, the user will experience no issues with deploying a production Virtual Office.
- Production Disaster Recovery – Create a Runbook to automatically deploy a production Virtual Office with all the desired devices and configurations. The user will require the help of Axcient Support to help shut down the Virtual Office when ready.
You must first configure a subnet in the Network section that matches the subnet of the devices to be virtualized. By default, the subnet settings in the Network section are set by the network settings of the Appliance.
Runbooks are unique to each Virtual Office. After shutting down a Virtual Office, the Runbook changed state to Ready.
Configuring a Runbook allows you to specify:
- Devices to be virtualized
- The order in which the devices should be virtualized
- Resources to allocate to each device
- Wait time between the deployment of each device
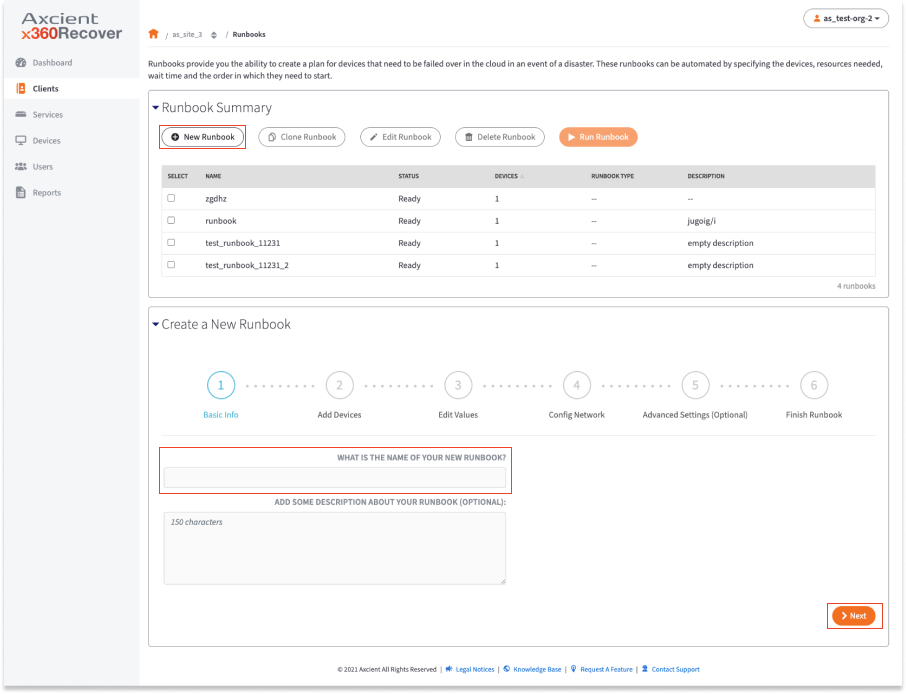
How to create a new Runbook
 |
View the walkthrough simulation |
1. On the Site Details page, click the Manage Runbooks link found in the Virtualization section of the page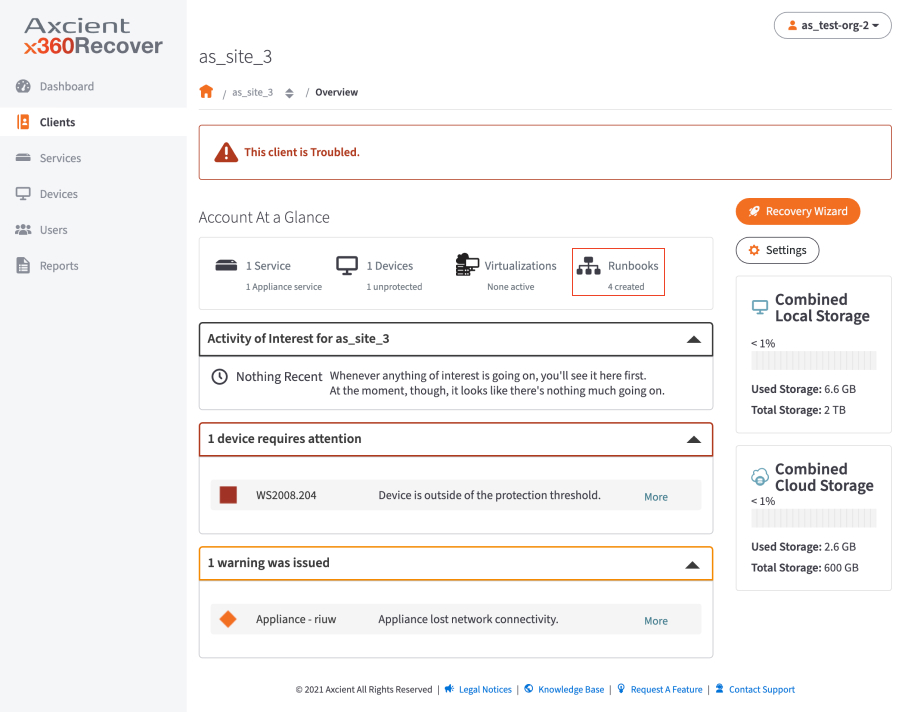
2. In the Create a New Runbook section of the page, enter the name of the new Runbook.
Optionally, enter a description for the Runbook. Click the Next button to continue.
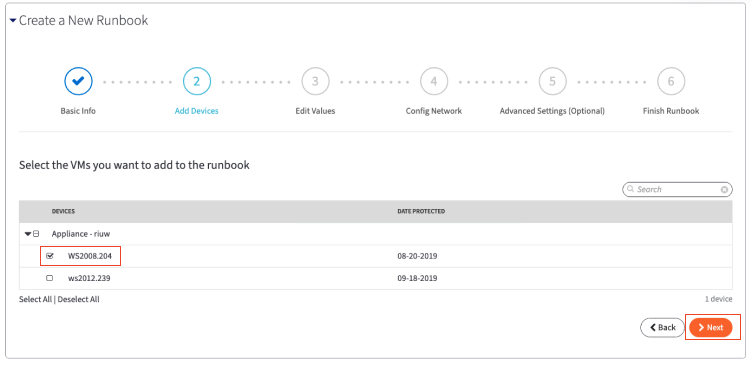
3. In the Add Devices screen, use the checkboxes to select the devices to include in the Runbook.
Note: The Virtual Office will automatically select the most recent recovery point to use in deploying the Virtual Office.
Click the Next button to continue.
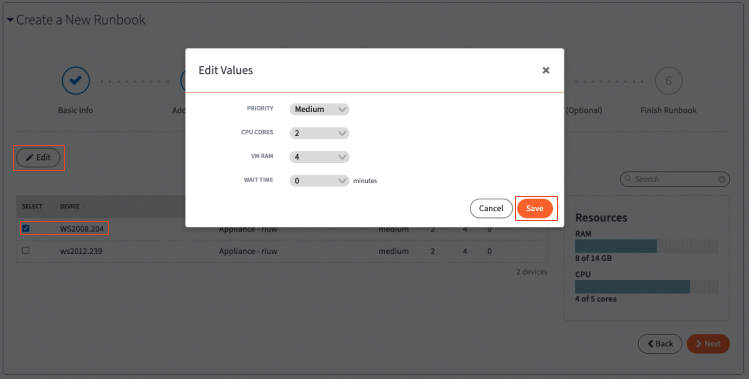
4. In the Edit Values section, review the selected devices.
Click the Edit and Delete buttons to edit or delete any of the devices.
You will be able to edit the following:
- In the Priority tab, specify the boot priority of the selected device(s). Devices with the same boot priority will be started at the same time.
- In the CPU Cores tab, specify the number of CPU cores to allocate to the selected device(s).
- In the VM Ram tab, edit the amount of virtual RAM to allocate to the selected device(s).
- In the Wait Time tab, edit the wait time between boot priority. For example, if you have a device with a Medium boot priority and a 15 minute wait time, and then a second device with a Low boot priority, the Runbook will wait 15 minutes before deploying the Low priority device. You can also configure different wait times between devices with the same priority.
Click the Save button when you are finished.
Click the Next button to continue.
5. In the Network screen, you can configure the following:
- In the Network section, configure the Gateway IP and Netmask of the Virtual Office. Please refer to x360Recover - Virtual Office for more information.
- In the VNC IP section, enter the IP address for the VNC clients, which can be any available (unused) IP address in the Virtual Office. This field is optional when you configure the network in the Runbook. If you leave this field blank, it will be filled in automatically after the Runbook is created from the first subnet. Please refer to x360Recover - Virtual Office for more information.
- Optionally, enable the Outbound Access option to allow outbound access to the Internet. Please refer to x360Recover - Virtual Office for more information.
Click the Next button to continue.

6. In the Advanced Settings section, you can enable and configure the following methods for accessing devices in the Virtual Office:
- VPN
- User Authentication
- Port Forwarding
- DHCP
- Site-to-Site VPN
- Site-to-Site IPSec VPN
You can also update these settings after the Runbook has started from the Configure Office page.
Please refer to x360Recover - Virtual Office for more information.
Click the Next button to continue.
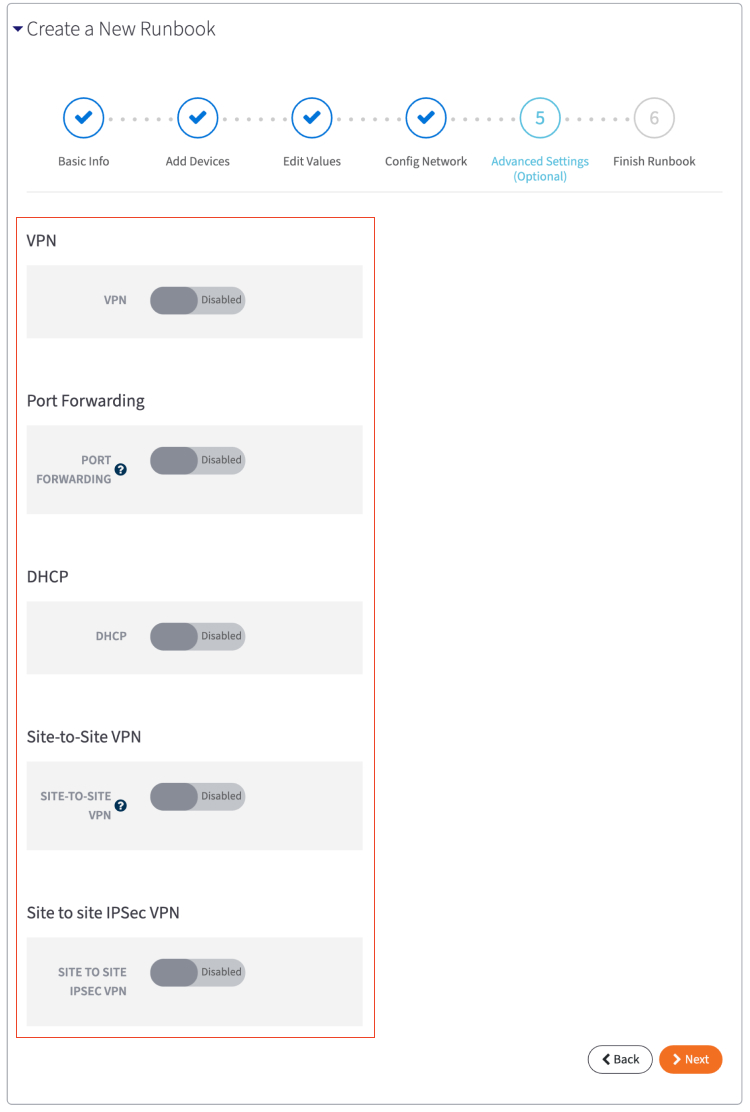
Note: When enabling port forwarding, be aware that two public IP addresses will be dynamically assigned to your Virtual Office when the Runbook is executed. You may pre-configure service port forwarding for the two included IP addresses, but you will not know what addresses have been assigned until after the Runbook has been executed and the Virtual Office environment is created. If you require additional public IP addresses for hosting services within your Virtual Office environment, please contact Axcient support. It is possible to add up to a maximum of four total public IP addresses to a Virtual Office.
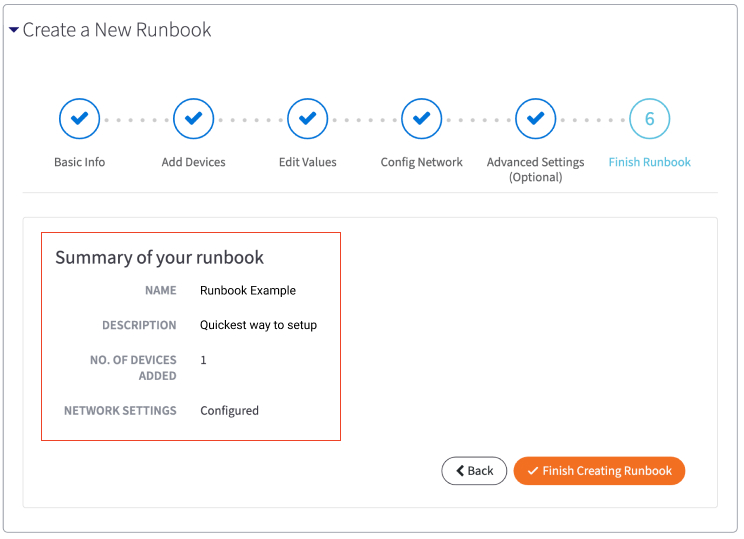
7. In the Finish Runbook screen, review summary information to confirm that the Runbook settings are correct.
Click the Finish Creating Runbook button to create the Runbook.
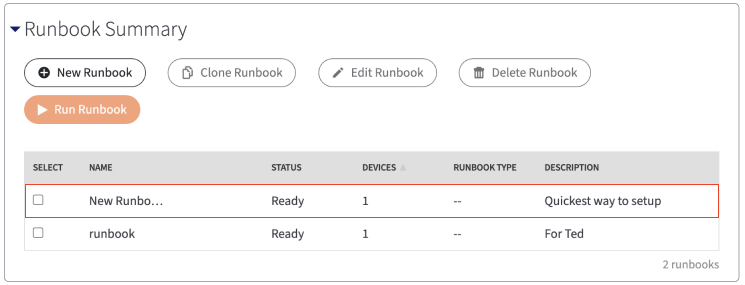
The Runbook will now be listed under the Runbook Summary section where you can edit or delete as needed.
View the walkthrough simulation?
More questions about Runbooks?
|
Overview of x360Recover Runbooks: |
SUPPORT | 720-204-4500 | 800-352-0248
- Contact Axcient Support at https://partner.axcient.com/login or call 800-352-0248
- Free certification courses are available in the Axcient x360Portal under Training
- Subscribe to the Axcient Status page for a list of status updates and scheduled maintenance
653 | 1667