
You can configure branding options that conform to your company’s—or your clients'—branding strategy. For example, you can configure the system to take on a custom
- Logo,
- Icon,
- Splash screen,
- Company name,
- Company URL,
- Program name,
- Folder name, and
- Terms of service.
These branding settings will affect the look of the web portal, mobile apps, and the desktop client. Branding even influences the layout of informational resources like the Daily Digest email, which inherits the branded logo. When you configure custom branding for an organization, the settings will be inherited by suborganizations.
NOTE: All custom branding should be configured before deploying to end users. Branding is inherited when desktop clients are installed; changes made to the branding will not be inherited by desktop clients that have already been deployed. If a change in branding occurs after desktop clients have been deployed, these desktop clients will need to be reinstalled. This can be done through a batch script.
To configure custom branding:
1. In the appropriate organization, click the Settings tab. The Settings page displays.
2. In the Settings page, click the Branding tab. The Branding Settings section displays.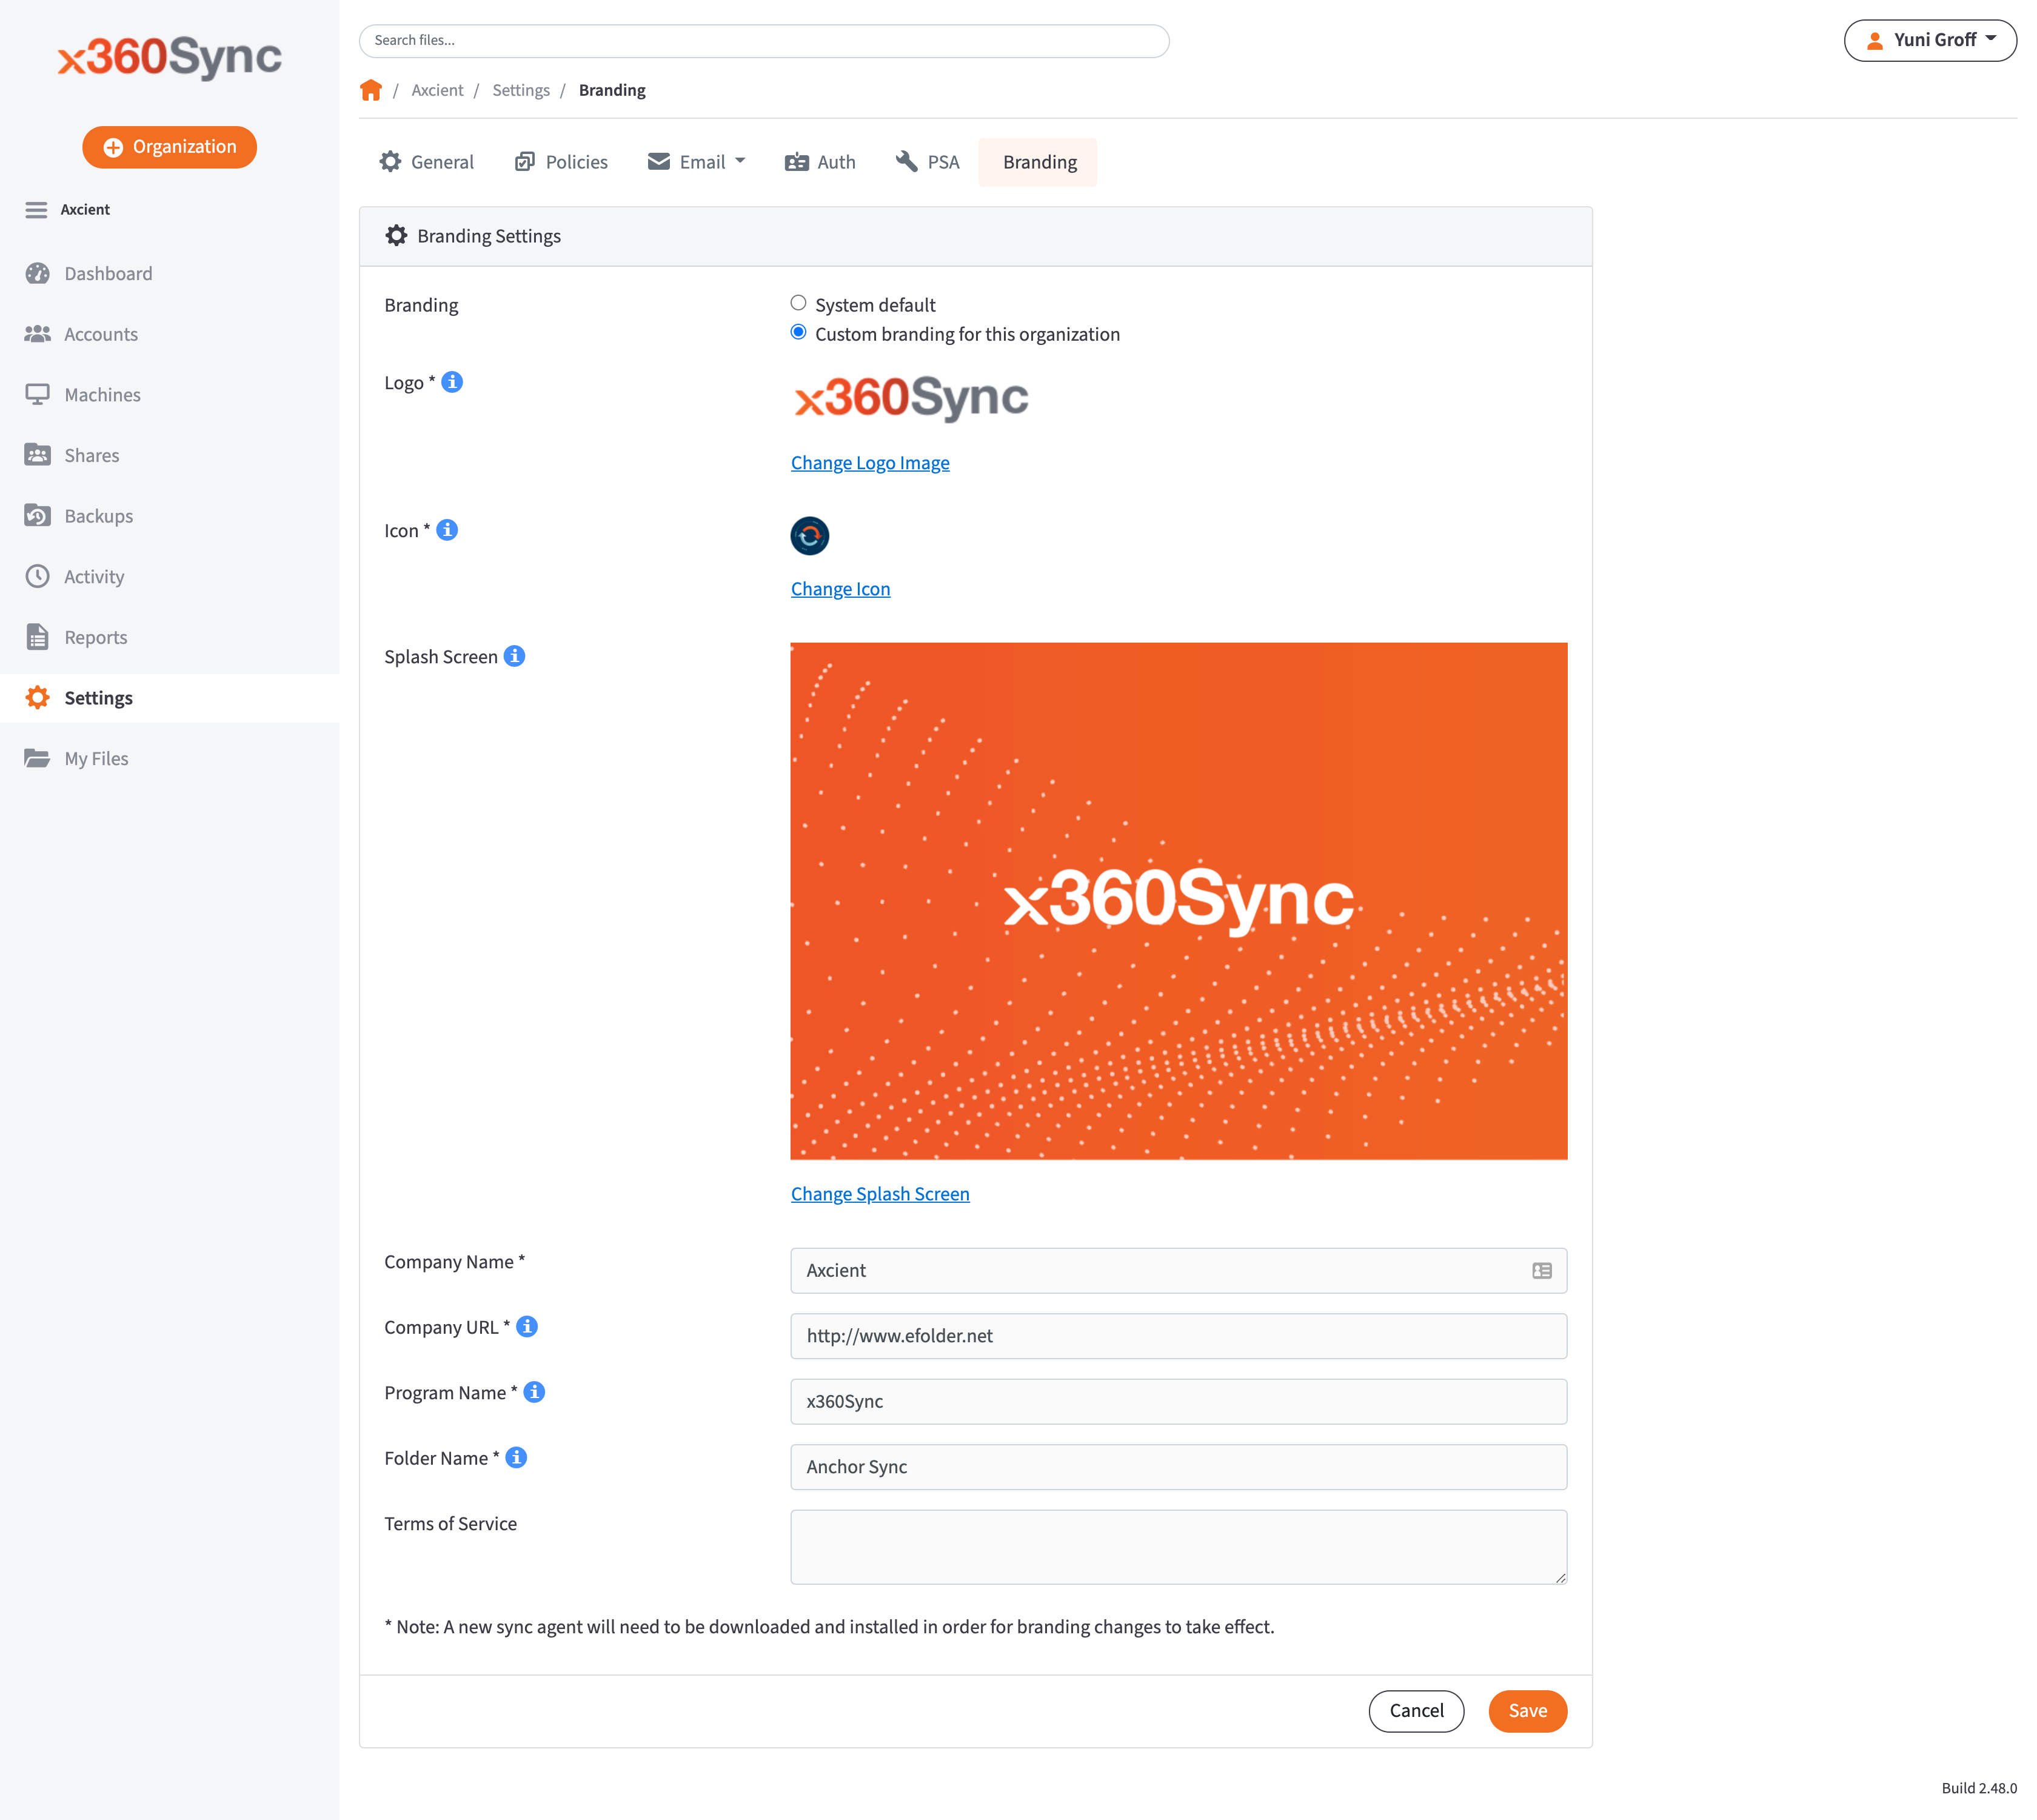
3. Click the Custom branding for this organization radio button. The Branding Settings section expands to display custom branding options.
4. In the Logo area, click the Choose File button to browse your computer for a custom logo, which will be used as your organization’s image file on the web. Images cannot be larger than 200px by 50px, and it is recommended that images be in PNG, transparent format.

5. In the Icon area, click the Choose File button to browse your computer for a custom icon, which will set the desktop, explorer, and system tray icon. The icon must be in .ico format.

6. In the Splash Screen area, click the Choose File button to browse your computer for a splash screen image, which will display to users who log in on mobile devices.
- In the Company Name field, enter the name of your organization, which will be featured along with your organization’s logo.
- In the Company URL field, enter the web address of your company.
- In the Program Name field, enter a name to replace the default Synced Tool program name. It will be used in conjunction with desktop icons on local machines.
- In the Folder Name field, enter a folder name to replace the branding.
- In the Terms of Service field, enter your organization’s specific terms of service text.
7. When you are finished, click Save.
You can now allow end users to download and install the newly branded desktop clients and apps.
SUPPORT | 720-204-4500 | 800-352-0248
- Contact Axcient Support at https://partner.axcient.com/login or call 800-352-0248
- Free certification courses are available in the Axcient x360Portal under Training
- Subscribe to the Axcient Status page for a list of status updates and scheduled maintenance
1254