
Configuring Dual Hostname Settings
By default, the x360Sync and Apache services are installed on one server, with one shared domain (for example, https://file.syncapp.com , and run on the localhost. Port 443 can only be used by one service. Under the default settings, port 443 is reserved for the x360Sync service, and ports 80 and 510 are reserved for the Apache service.

As an alternative to this configuration, x360Sync and Apache can be configured to use two separate domains (or use a domain and a subdomain, such as http://SyncApp.com and http://web.SyncApp.com). A dual Host Certificate and two Public IP’s is required. Under this configuration, both the x360Sync service and the Apache service can allow external connections on 443, which improves access.
Running two (2) apache server services is not supported. See HA guide for options to cluster the apache web service. In this setup, port forwarding will be used to NAT traffic from https://file.syncapp.com:443 to Apache Service Server IP 10.X.X.12:510. Apache will continue listening on port 510 internally.
If you would like to completely remove all traces of port 510, then either an additional internal IP will be needed to allow for the x360Sync and Apache services both to listen on port 443, or Apache can be run on a vm that is not running x360Sync.
Configuration Instructions
Step 1: Configure a Second Domain or Subdomain
Note: If you have already deployed agents, you will need to reserve your original domain for the x360Sync service and assign the new domain or subdomain to Apache. This means that you and your users will no longer be able to access the web portal through the existing domain. Agents are hard-coded and will not recognize a new domain without a full uninstall and reinstall of the agents.
Please contact Support if you are deploying this into a production environment.
As a first step, you will need to configure a second domain, or create a new subdomain, through your DNS hosting provider. For specific instructions, please contact your DNS hosting provider.
(Optional) Step 1a: Configure an Additional IP Address
This step is only necessary if you want to completely remove all traces of port 510. After you configure a second domain, or subdomain, you can configure a new IP address. You do not need a new NIC.
Note: These steps will help you configure an IP address at the OS-level. Alternatively, you can utilize a different configuration method (for example, network level configuration).
1. In the Start menu, open the Control Panel, and select Network and Internet and then select Network and Sharing Center. The Network and Sharing Center window displays.
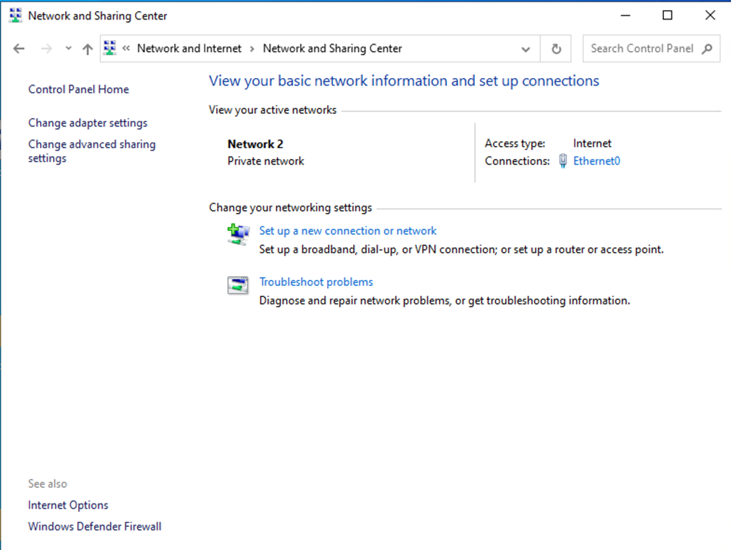
2. In the Network and Sharing window, click Change adapter settings. The Network Connections window displays.
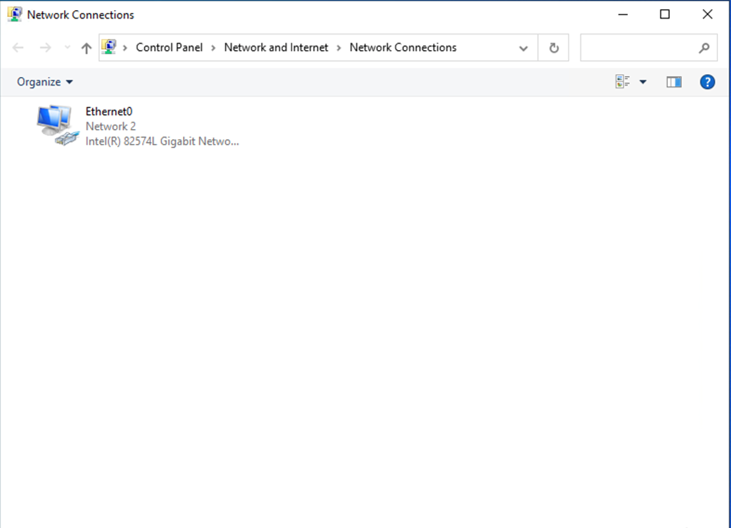
3. In the Network Connections window, right-click the network adapter to which the IP address will be added, and select Properties.
The Connection Properties dialog box displays.
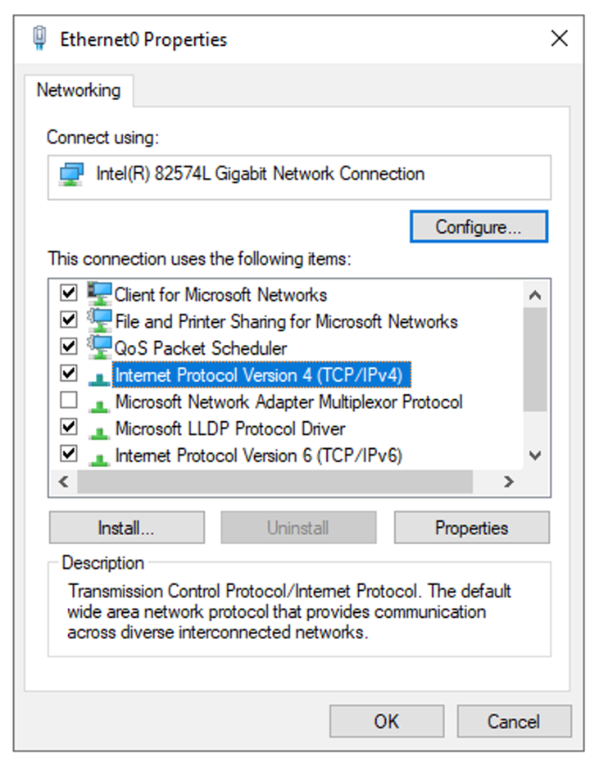
4. In the Connection Properties dialog box, click to highlight Internet Protocol Version 4 (TCP/IPv4). With Internet Protocol Version 4 (TCP/IPv4) highlighted, click the Properties button. The Internet Protocol Version 4 (TCP/IPv4) Properties dialog box displays.
5. In the Internet Protocol Version 4 (TCP/IPv4) Properties dialog box, click the Advanced button. The Advanced TCIP/IP Settings dialog box displays.
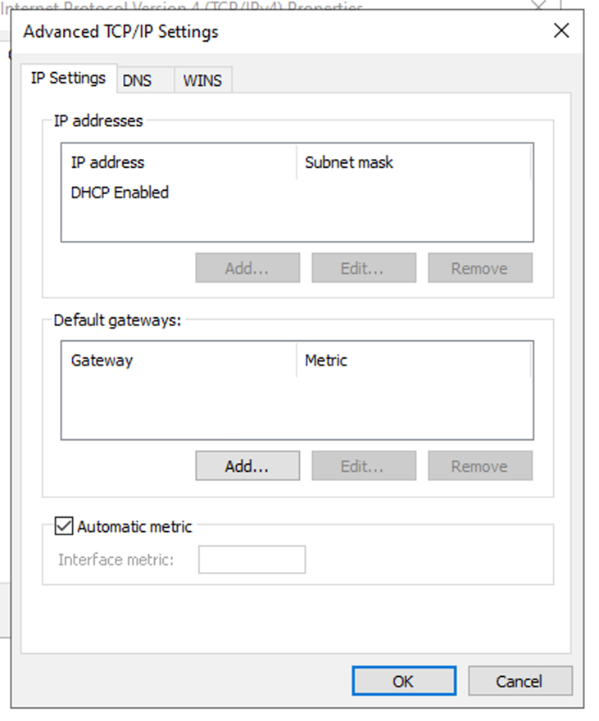
6. In the Advanced TCIP/IP Settings dialog box, click the Add… button. The TCP/IP Address dialog box displays.

7. In the TCP/IP Address dialog box, enter the IP address and Subnet mask, and click the Add button. The Advanced TCP/IP Settings dialog box now shows the new IP address and Subnet mask.
8. Click the OK or Close buttons to return to the Network and Sharing Center window.
(Optional) Step 1b: Stop the Apache and x360Sync Services
After you configure a new domain and a new IP address, you will need to stop the Apache and x360Sync services.
Note: Ensure that any affected customer knows of this temporary downtime before stopping the services.
The Apache service should be stopped before the x360Sync service.
1. On the Apache server, launch services.msc.
2. In the Services window, right-click the Apache service and select Stop. The Apache service is now stopped.
3. While still in the Services window, right-click the x360Sync/Anchor service and select Stop. The x360Sync/Anchor service is now stopped.
Step 2: Point the New Domain or Subdomain to the new IP Address
Once the services have stopped, you can then point your new domain to the new IP address configured in the steps above.
For specific instructions, please reference guidelines provided by your web hosting provider.
Step 3: Configure the Port Address Translation (PAT) Settings
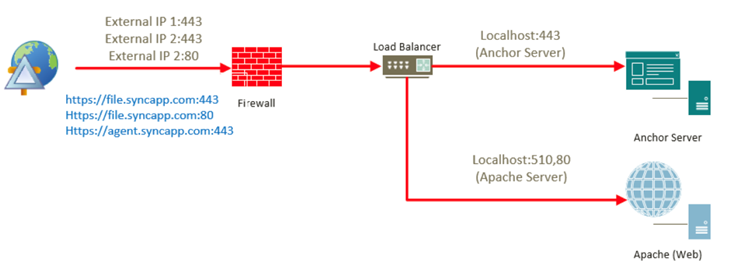
The following PAT settings need to be configured:
file.syncapp.com:443 → External_IP1:443 → localhost:510 → Apache
file.syncapp.com:80 → External_IP1:80 → localhost:80 → Apache
agent.syncpp.com:443 → External_IP2:443 → localhost:443 → x360Sync service
You can remove Port 510 completely, assuming x360Sync Server and Apache are running on the same VM:
file.syncapp.com:443 → External_IP1:443 → Internal IP 1:443 → Apache
file.syncapp.com:80 → External_IP1:80 → localhost:80 → Apache (Apache/httpd does the redirect and should always be set to listen on port 80 on the localhost)
Step 4: Configure the SSL Certificates
For information on configuring SSL certificates, please reference the Configure a single domain SSL certificate or a wildcard certificate Knowledgebase article.
Step 5: Update the Apache Configuration File
Next, the Apache configuration file will need to be updated with the new domain or subdomain.
1. In your Apache server, open the httpd.conf file, which is located at [target drive]:\Apache24\conf\.
2. Copy and paste the file in the current location. This will create a backup of the current running configuration file.
3. Compare the httpd.conf file to the http.conf file listed below. Make the necessary replacements, making sure to retain appropriate SSL certificate file paths.
###
### DUAL HOSTNAME INSTRUCTIONS:
### Using Find and Replace, please replace the following values:
###
### APP.DOMAIN.COM -> The domain that will point to Anchor server
### WEB.DOMAIN.COM -> The domain that will point to Apache
### APPCRT.CRT -> The SSL CRT filename of your APP domain
### APPKEY.KEY -> The SSL KEY filename of your APP domain
### WEBCRT.CRT -> The WEB CRT filename of your WEB domain
### WEBKEY.KEY -> The WEB KEY filename of your WEB domain
### SSLCHAIN.CRT -> The SSL chain certificate for your domains
Listen 80
LoadModule actions_module modules/mod_actions.so
LoadModule alias_module modules/mod_alias.so
LoadModule asis_module modules/mod_asis.so
LoadModule auth_basic_module modules/mod_auth_basic.so
LoadModule authn_core_module modules/mod_authn_core.so
LoadModule authn_file_module modules/mod_authn_file.so
LoadModule authz_core_module modules/mod_authz_core.so
LoadModule authz_groupfile_module modules/mod_authz_groupfile.so
LoadModule authz_host_module modules/mod_authz_host.so
LoadModule authz_user_module modules/mod_authz_user.so
LoadModule autoindex_module modules/mod_autoindex.so
LoadModule cgi_module modules/mod_cgi.so
LoadModule env_module modules/mod_env.so
LoadModule include_module modules/mod_include.so
LoadModule isapi_module modules/mod_isapi.so
LoadModule log_config_module modules/mod_log_config.so
LoadModule mime_module modules/mod_mime.so
LoadModule negotiation_module modules/mod_negotiation.so
LoadModule setenvif_module modules/mod_setenvif.so
LoadModule ssl_module modules/mod_ssl.so
LoadModule socache_shmcb_module modules/mod_socache_shmcb.so
LoadModule wsgi_module modules/mod_wsgi.so
LoadModule rewrite_module modules/mod_rewrite.so
LoadModule headers_module modules/mod_headers.so
ErrorLog "logs/error.log"
LogLevel warn
<IfModule log_config_module>
LogFormat "%h %l %u %t \"%r\" %>s %b \"%{Referer}i\" \"%{User-Agent}i\"" combined
LogFormat "%h %l %u %t \"%r\" %>s %b" common
CustomLog "logs/access.log" common
</IfModule>
<IfModule mime_module>
TypesConfig conf/mime.types
AddType application/x-compress .Z
AddType application/x-gzip .gz .tgz
</IfModule>
AllowEncodedSlashes On
TraceEnable Off
AcceptFilter http none
AcceptFilter https none
EnableSendfile Off
EnableMMAP Off
RewriteEngine On
RewriteCond %{HTTPS} off
RewriteCond %{REQUEST_URI} !^/updater
RewriteCond %{REQUEST_URI} !^/static/assets/
RewriteCond %{REQUEST_URI} !^/server/hostname
RewriteRule (.*) https://%{HTTP_HOST}:510%{REQUEST_URI}
<VirtualHost *:80>
ServerName APP.DOMAIN.COM
RewriteEngine On
RewriteCond %{REQUEST_URI} !^/updater
RewriteCond %{REQUEST_URI} !^/activity/create/
RewriteCond %{REQUEST_URI} !^/static/assets/
RewriteCond %{REQUEST_URI} !^/server/hostname
RewriteRule (.*) https://WEB.DOMAIN.COM$1 [R=301,L]
</VirtualHost>
### SSL ###
Listen 510
SSLProtocol All -SSLv2 -SSLv3
AddType application/x-x509-ca-cert .crt
AddType application/x-pkcs7-crl .crl
SSLPassPhraseDialog builtin
SSLSessionCache "shmcb:logs/ssl_scache(512000)"
SSLSessionCacheTimeout 300
<VirtualHost _default_:510>
ServerName APP.DOMAIN.COM
<IfModule mod_headers>
Header always set Strict-Transport-Security
"max-age=63072000;includeSubdomains; preload"
</IfModule>
SSLEngine on
SSLHonorCipherOrder on
SSLCipherSuite "EECDH+ECDSA+AESGCM EECDH+aRSA+AESGCM EECDH+ECDSA+SHA384 EECDH+ECDSA+SHA256 EECDH+aRSA+SHA384 EECDH+aRSA+SHA256 EECDH EDH+aRSA !aNULL !eNULL !LOW !3DES !MD5 !EXP !PSK !SRP !DSS !RC4"
SSLCertificateFile "conf/ssl/server.crt"
SSLCertificateKeyFile "conf/ssl/server.key"
AllowEncodedSlashes On
</VirtualHost>
<VirtualHost _default_:510>
ServerName WEB.DOMAIN.COM
<IfModule mod_headers>
Header always set Strict-Transport-Security
"max-age=63072000;includeSubdomains; preload"
</IfModule>
SSLEngine on
SSLHonorCipherOrder on
SSLCipherSuite "EECDH+ECDSA+AESGCM EECDH+aRSA+AESGCM EECDH+ECDSA+SHA384 EECDH+ECDSA+SHA256 EECDH+aRSA+SHA384 EECDH+aRSA+SHA256 EECDH EDH+aRSA !aNULL !eNULL !LOW !3DES !MD5 !EXP !PSK !SRP !DSS !RC4"
SSLCertificateFile "conf/ssl/server.crt"
SSLCertificateKeyFile "conf/ssl/server.key"
AllowEncodedSlashes On
</VirtualHost>
<IfModule ssl_module>
SSLRandomSeed startup builtin
SSLRandomSeed connect builtin
</IfModule>
### END-SSL ###
WSGIPythonHome "C:/Anchor Server/penv"
WSGIScriptAlias / "C:/Anchor Server/web/anchor.wsgi" application-group=%{GLOBAL}
WSGIImportScript "C:/Anchor Server/web/anchor.wsgi" application-group=%{GLOBAL}
WSGIPassAuthorization On
Save the file when you are finished and restart Apache server service. Apache should start with no exception. Consult the event logs if there is an error.
Step 6: Specify the App Server Hostname within the Web Portal
1. With both the Apache and x360Sync services running, open the web portal in your browser.
2. From the web portal dashboard, click the Settings tab. The Settings page displays.
3. In the Settings page, click the General tab. The General Settings page displays.
4. In the Dual Hostnames field, click the Dual Hostnames checkbox.
5. In the App Server Hostname field, specify the new app server hostname address.
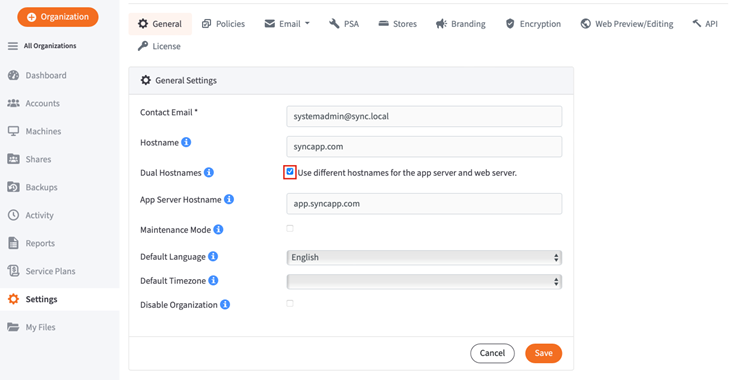
6. Click the Save button when you are finished.
7. Restart the x360Sync/Anchor and Apache services.
After these steps are complete, email links will use the web domain name, and agents will connect to the app domain name.
What is a Dual Hostname Environment?
By default, the x360Sync and Apache services are installed on one server with one shared domain (for example, https://file.syncapp.com), and run on the localhost. Port 443 can only be used by one service. Under these default settings, port 443 is reserved for the x360Sync service, and ports 80 and 510 are reserved for the Apache service.
As an alternative to this configuration, x360Sync and Apache can be configured to use two separate domains (or use a domain and a subdomain, such as http://SyncApp.com and http://web.SyncApp.com).
Why is a Dual Hostname Environment Important to Private Cloud Partners?
Under a dual host configuration, both the x360Sync service and the Apache service can allow external connections on 443, which improves access.
How do I Configure Dual Hostnames?
For instructions on configuring a dual host environment, please reference the complete Dual Hostname Configuration guide.
SUPPORT | 720-204-4500 | 800-352-0248
- Contact Axcient Support at https://partner.axcient.com/login or call 800-352-0248
- Free certification courses are available in the Axcient x360Portal under Training
- To learn more about Axcient products, sign up for a free one-on-one training
- Subscribe to the Axcient Status page for updates and scheduled maintenance
1757