
If you have questions regarding these steps or need assistance with upgrading, please contact Support.
Starting with Private Cloud 3.6.20, new Private Cloud installations come with PostgreSQL 12 pre-installed and PostgreSQL set as default root database type. To upgrade an existing installation, follow the steps below.
The recommended process for upgrading PostgreSQL on a Private Cloud server involves running versions 9.x and 12.x side by side, taking all services offline, performing a backup from the old server, restoring to the new server, and then bringing services back online.
This will result in downtime during the migration process. The length of the downtime will depend on the size of the database. A simple method to estimate downtime in advance is to perform the database backup while services are online (step 4 below). Double the time it takes to create the backup for a rough approximation of how long the backup-and-restore process will take. Do not use that backup for the actual migration.
For help on upgrading other versions of PostgreSQL, see:
The process
STEP 1. Download the PostgreSQL 12.22 installer
- You can use the direct link from the official website: https://sbp.enterprisedb.com/getfile.jsp?fileid=1259240 or a reserve option: https://syncedtool.com/shares/file/ZiaTVO1LL93/.
- For the purposes of this document, PostgreSQL 12 is used.
STEP 2. Run the PostgreSQL installer
- All default options are fine:
- All components selected
- Installation directory: C:\Program Files\PostgreSQL\12
- Data directory: C:\Program Files\PostgreSQL\12\data
- Port: 5433 (Take note in case this differs. This port information will be needed later)
- When prompted for a password for the postgres user, use the password configured in the server's config.ini in the [portal] section. If a different password is used, the server will fail to connect.
STEP 3. Stop services: Anchor Server, Anchor Celery, Apache
STEP 4. Backup the original portal database from the original server using pgAdmin III
4.1. Open pgAdmin III
4.2. You should see both the original server and PostgreSQL 12 in the server list.
4.3. Connect to the original server
4.4. Expand the list of databases
4.5. Right-click the portal database and select Backup…
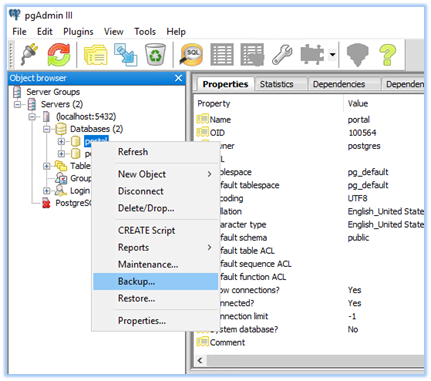
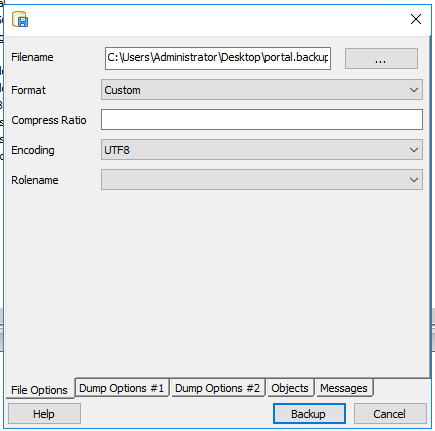
4.5.1. Filename: Choose a location to save the backup and name it portal.backup
4.5.2. Format: Custom
4.5.3. Encoding: UT8
4.5.4. Leave all other options as the defaults
4.5.5. Click Backup
4.6. The backup process may take a while depending on the size of the database.
It should finish with the line "Process returned exit code 0.”
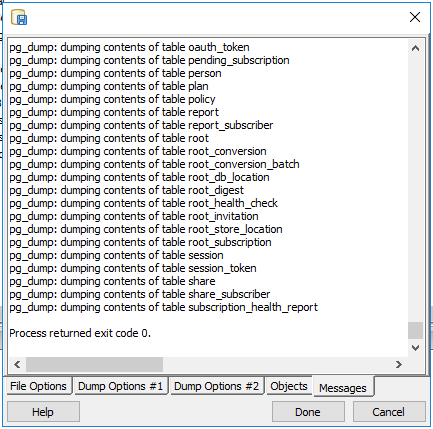
4.7. When the backup completes, click Done and close pgAdmin III.
STEP 5. Restore the portal database on the new server using pgAdmin 4
5.1. Open pgAdmin 4
You may be prompted to set a master password for pgAdmin 4 the first time you open it. A password at this point is not required. You may (a) opt to set a password if you prefer or (b) click Cancel to ignore the password prompt.
5.1.1. If the following error occurs when attempting to open pgAdmin 4, you will need to install a supported version for your operating system:
The procedure entry point discardvirtualmemory could not be located in the dynamic link library C:\Program Files\PostgresSQL\12\pgAdmin4\runtime\nw.dll
5.1.2. If you experienced the error as described above, download pgAdmin 4 v6.21 from https://www.pgadmin.org/download/pgadmin-4-windows/ Note: This download is for Windows Server 2012 and above.
5.1.3. We recommend that you install pgAdmin 4 v6.21 somewhere easy to find (such as the Postgres12 directory: C:\Program Files\PostgresSQL\12\pgAdmin4 )
5.2. Connect to the new server, named "PostgreSQL 12" by default

5.3. Create the new portal database
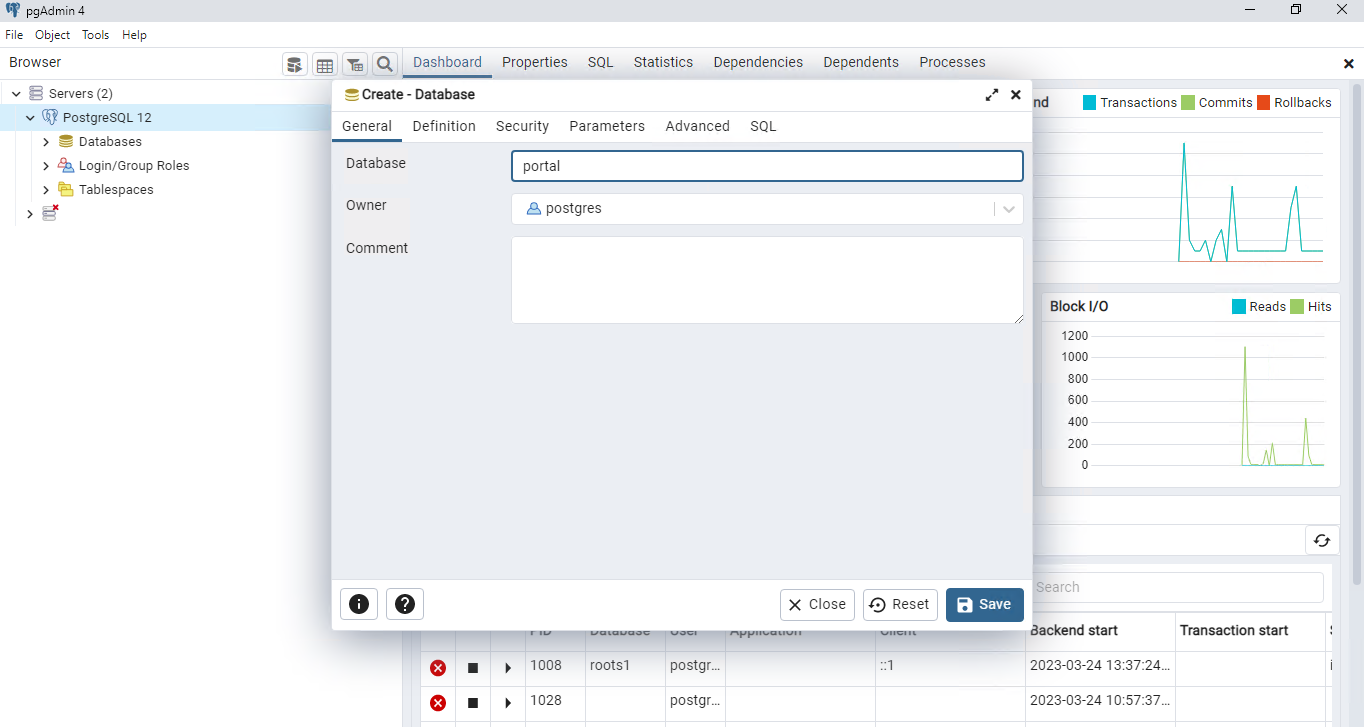
5.3.1. Right click the server and select Create > Database...
5.3.2. Enter portal for the database name
5.3.3. Leave all other options as the defaults
5.3.4. Click Save
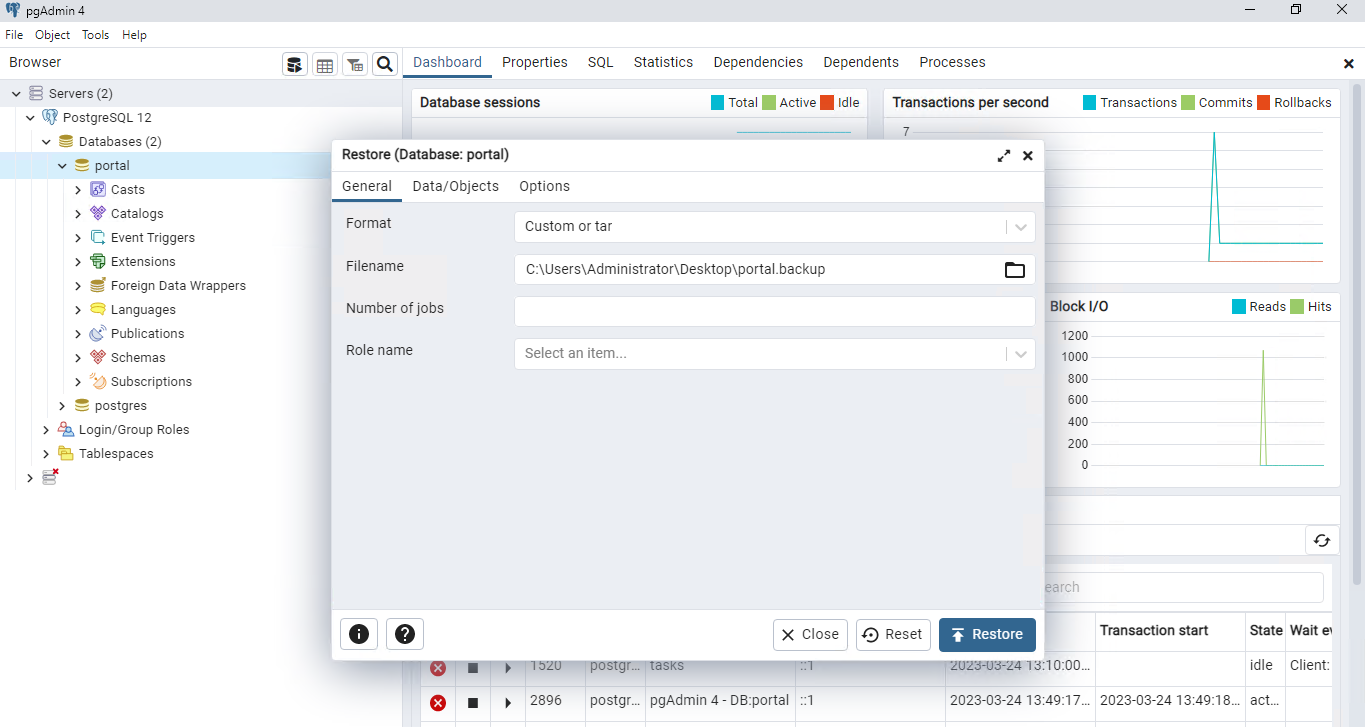
5.4. Restore the portal database to the new server
5.4.1. Right click the new portal database and select Restore…
5.4.2. Format: "Custom or tar"
5.4.3. Filename: Select the portal.backup file you saved earlier
5.4.4. Leave all other options as the defaults
5.4.5. Click Restore
5.5. The restore process may take a while depending on the size of the database.
It will finish with the message "Process failed".
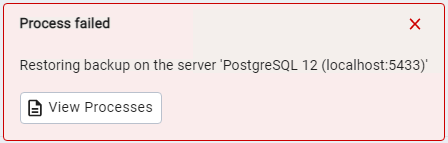
5.6. Confirm the restore completed as expected:
5.6.1. Click View Processes
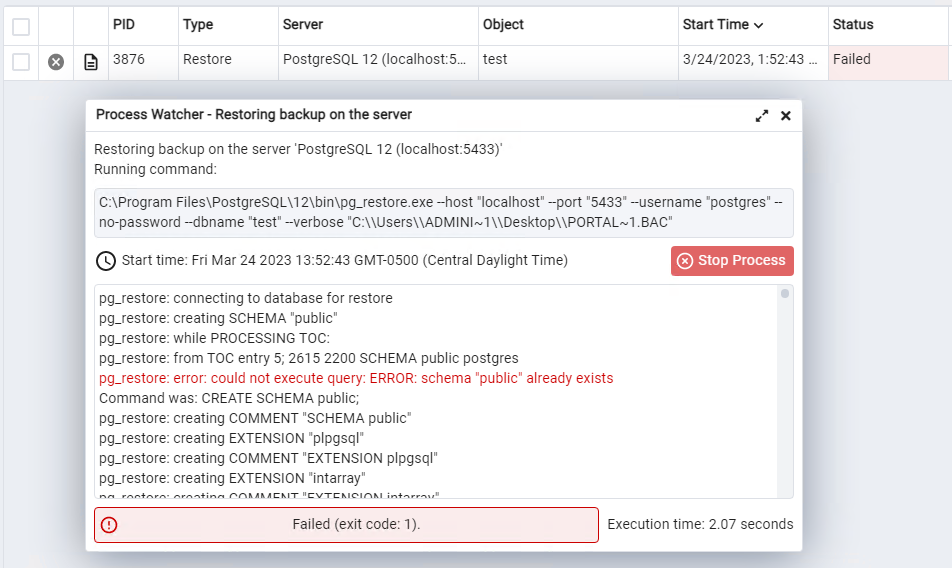
5.6.2. Click the document icon on the Restore row
5.6.3. You should see an error in the restore log: pg_restore: error: could not execute query: ERROR schema "public" already exists
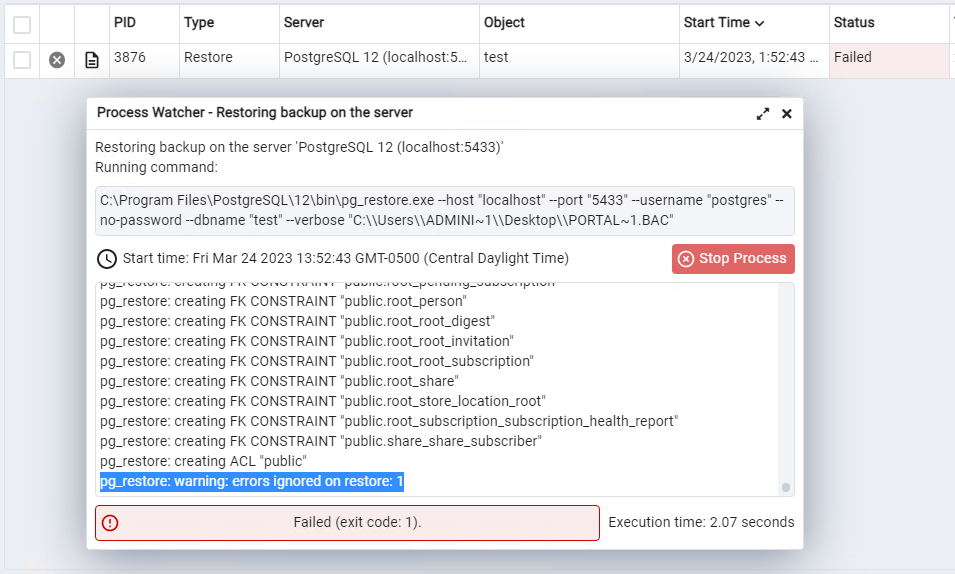
5.6.4. Scroll to the end of the log and you should see: pg_restore: warning: errors ignored on restore: 1
STEP 6. Update the server config
6.1. Open \Anchor Server\conf\config.ini in a text editor
6.2. Change the port entry in the [portal] section to 5433 (or the port value you chose during the PostgreSQL installation)
[portal]
host = localhost
database = portal
port = 5433
6.3. Save
STEP 7. Update the web config
7.1. Open \Anchor Server\web\config.py in a text editor
7.2. Add the following line after the PORTAL_DB_NAME line (change the port number if a different one was used during the PostgreSQL installation). If config.py already has a value for PORTAL_DB_PORT, update it instead
PORTAL_DB_PORT = "5433"
7.3. Save
STEP 8. Stop postgresql-9.x service
STEP 9. In postgresql-9.x service properties change Startup type to Manual
STEP 10. Restart services: Anchor Server, Anchor Celery, Apache
STEP 11. Verify the application works as expected
Something Went Wrong...
If the backup/restore does not complete as expected or services fail to restart or function as expected, revert to the original database server:
- Ensure the postgresql-9.x services is running
- Revert the configuration changes
- Restart services
If services were brought back online and users created new organizations, accounts, roots, etc., reverting to the original database will lose those changes. Data in roots that existed before the migration would be unaffected. The risk can be mitigated by disabling public access to services before bringing them back online, verifying functionality, then allowing public access. For example, by using a firewall or changing the server and Apache config to only listen locally. That process may vary per environment and is outside the scope of this document.
SUPPORT | 720-204-4500 | 800-352-0248
- Contact Axcient Support at https://partner.axcient.com/login or call 800-352-0248
- Free certification courses are available in the Axcient x360Portal under Training
- Subscribe to the Axcient Status page for updates and scheduled maintenance
1532 | 1579