The Manage Storage page allows you to see the status and configuration of the Storage Pool and all disk volumes active within the system. From this menu pane, you can create or destroy the Storage Pool, replace failed disks and perform a rebuild of the Storage Pool, or add disks to the Storage Pool to expand storage capacity.
To view storage settings for the Appliance:
- Log in to the Appliance Web interface.

- In the left-hand navigation menu, click the Manage Storage tab. This gives you access to storage settings.

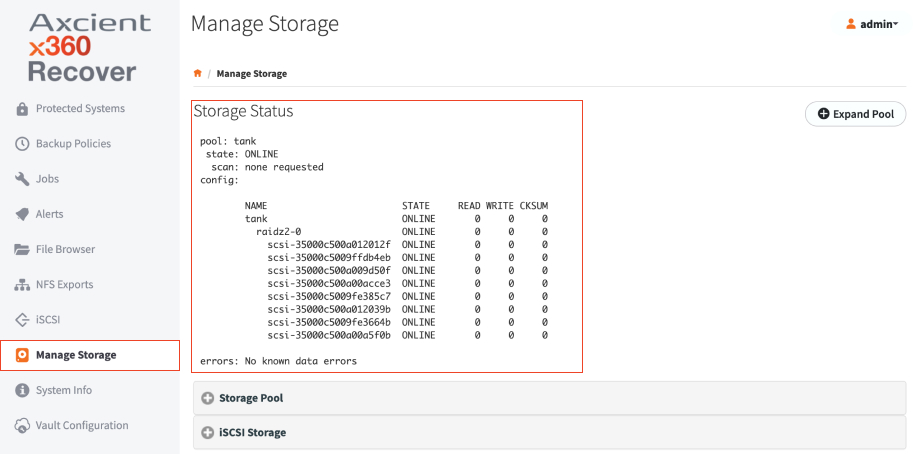
- In the Storage Status section, review the current configuration and status of the Storage Pool. For example:
- The Pool field should be marked as Online.
- The State field should be marked as Online.
- The Read, Write, and CKSum error count columns should be marked as 0.
- The Errors field should be marked as No Known Data Errors.
- Optionally, click the Expand Pool button to scan for the Storage Pool size, change, and add the new storage space to the Pool.

- If available, click the Destroy Pool button to delete the Storage Pool and all data.
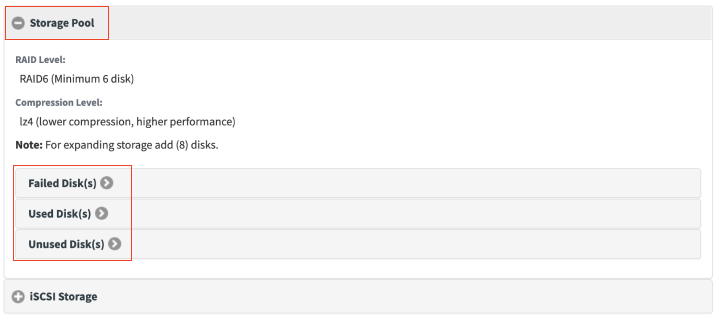
- Click the Storage Pool section to view failed, used, and unused disks.
- Click the Failed Disks sub-section to identify disks that have failed. You can also use this section to replace failed disks, if necessary. For more information, please reference the Managing Failed Disks section of this guide.
- Click the Used Disks sub-section to identify disks in use. This section is useful to view disk information, including disk status and size.
- Click the Unused Disks sub-section to identify disks not yet in use. This section can be used to expand the capacity of the Storage Pool, if necessary. For more information, please reference the Expanding the Storage Pool section of this guide.

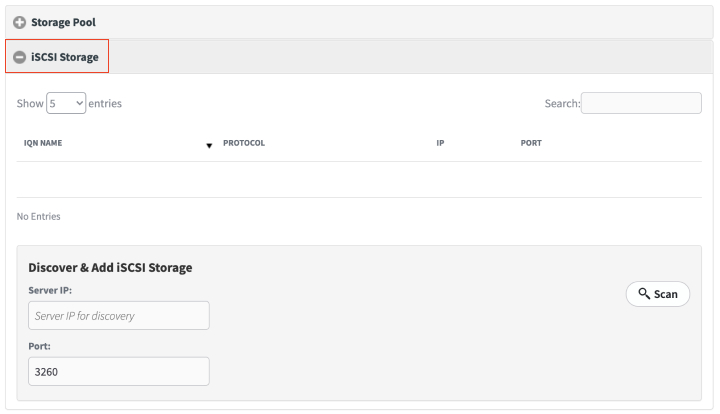
- Click the iSCSI Storage section to view any external iSCSI disk volumes. iSCSI utilizes the network layer instead of a dedicated storage controller when performing disk and storage operations.
