
Overview
You can use the Manage Storage menu on the appliance interface to manage the status and configuration of the storage pool. You can view all disk volumes present within the system and review storage status information, along with performing diagnostic and repair tasks.
 |
Use the appliance Manage Storage menu to: |
How to access the storage pool
Log in to the appliance web interface:
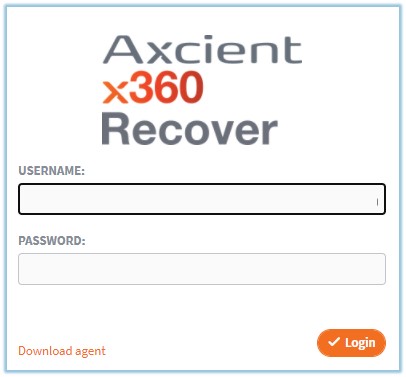 I
I
In the appliance menu pane, click Manage Storage.
The Manage Storage menu displays the status and configuration of the storage pool and all disk volumes present within the system, along with other storage pool information.
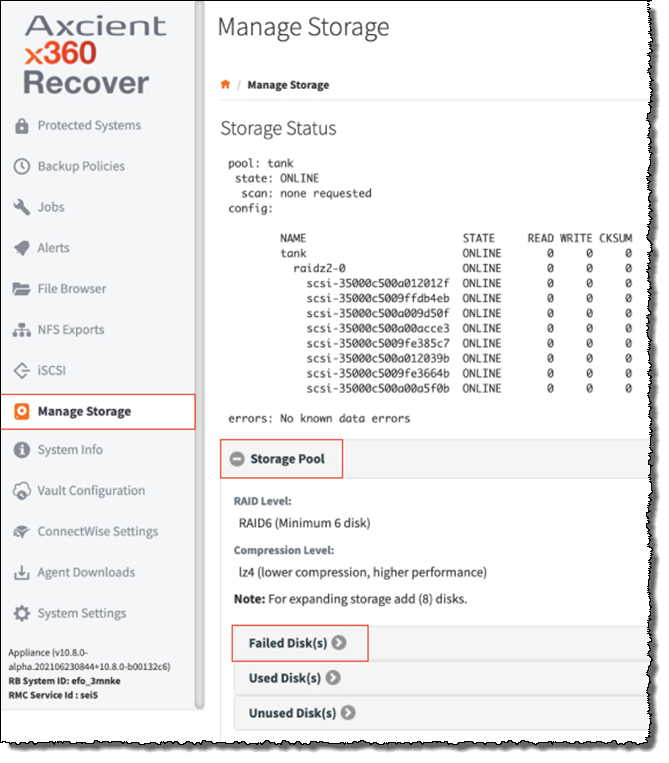
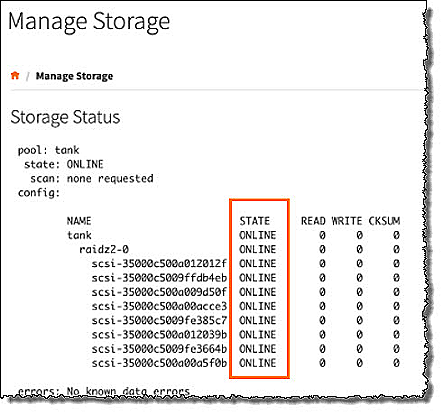
1. In the Storage Status section, review the current configuration and status of the storage pool. For example:
- The pool State field should be marked as Online.
- The State of each disk volume present should be marked as Online.
- The Read, Write, and CKSum error count columns should be marked as 0.
- The Errors field should be marked as No Known Errors.
NOTE: Contact Support if the Storage Status section does not display expected values.
The Storage Pool menu allows you to view the current RAID level, disk-set size, and compression settings.
1. Click to expand the Storage Pool menu.
2. Review the current RAID level, disk-set size, and Compression settings.
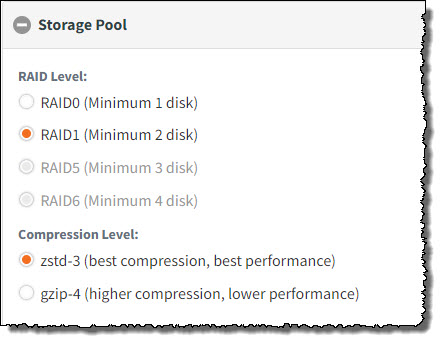
For example, the example above lists RAID1 using 2 disks per RAID volume set, with a compression scheme of zstd-3.
Identify and replace failed disks
If disks in the storage pool have failed, the Storage Status will change from Online to Degraded or Faulted, depending on the severity of the failure and the RAID level selected.
- Failed disks should be replaced as soon as possible in order to restore RAID redundancy and prevent the possible loss of customer data should additional storage pool disks fail.
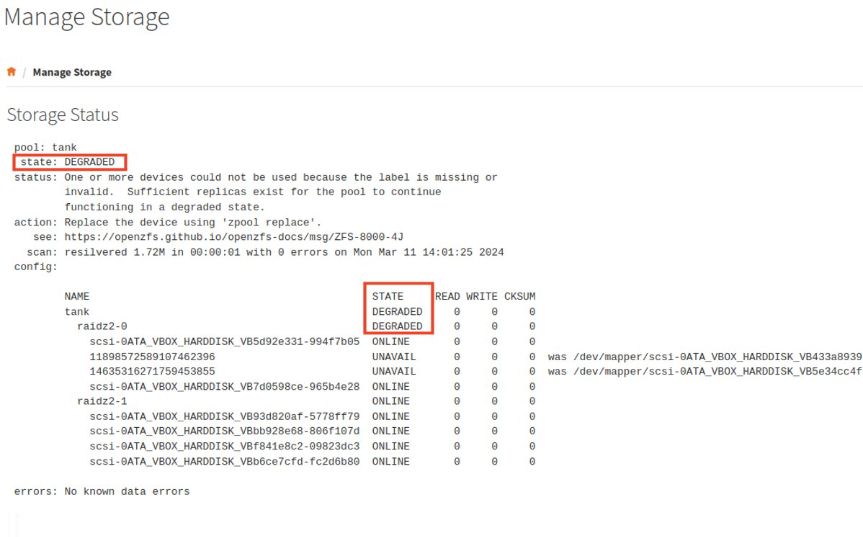
- If sufficient RAID redundancy exists, the storage pool status will become Degraded but will continue to operate in RAID Recovery mode. Performance will be impacted but the device will continue to function, and no customer data will be lost.
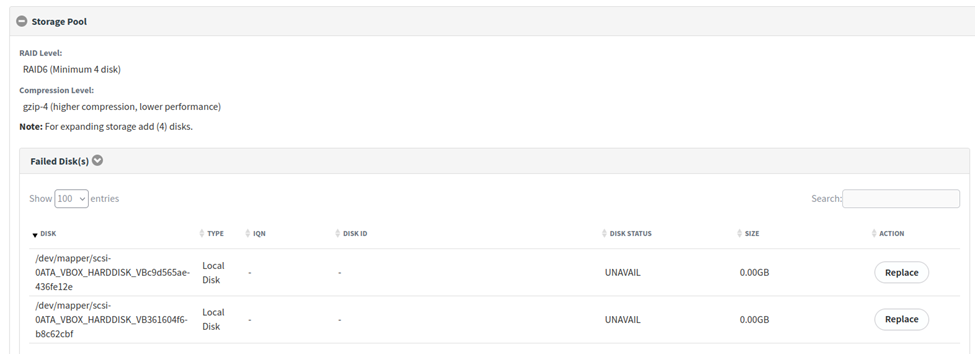
1. When you have replaced the failed disks within the device, navigate to the Manage Storage menu and click to expand the FailedDisks section.
2. Click the Replace button to start the failed disk recovery process.
The Replace Disk dialog box displays.
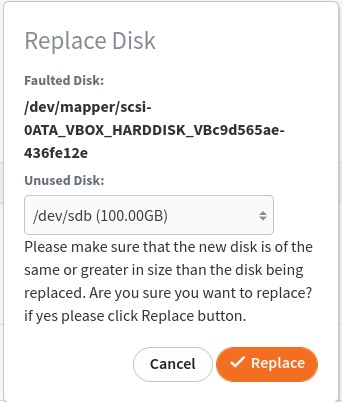
1. In the Unused Disk dropdown menu, select an available disk that is as large as or larger than the original failed volume.
2. Click the Replace button to begin rebuilding the RAID set onto the replacement drive.
NOTE: If insufficient RAID redundancy exists to provide for the failed disk volumes, the storage pool status will become Faulted and all customer data present will be lost. Faulted storage pools will need to be destroyed and recreated, after the failed disks have been replaced. For instructions on retrieving data from the vault, please reference Recovering a Protected System from a Vault.
Identify used disks (Disk Device Identification)
The Used Disks section displays a list of all disk volumes in use, along with identifying information.
1. Click to expand the Used Disk section.
2. Use the columns to view information about disk volumes in use, including:
- Disk displays the local device address of the disk.
- Type displays whether the device is a local physical volume or a remote iSCSI LUN.
- QN lists the identity of attached iSCSI LUN’s.
- Disk ID displays the identity of the device within the storage pool.
- TargetIP and TargetPort displays connection information about the iSCSI Target.
- Disk Status shows the current status of the disk.
- Size displays the total size of the volume.
Add additional storage capacity to the pool
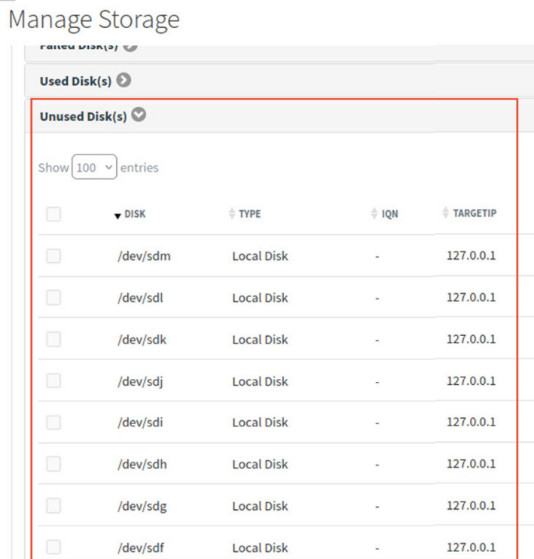
The Unused Disks section displays a list similar to the Used Disks display described above. Unused Disks may be used to expand the capacity of the storage pool
1. Click to expand the Unused Disks section.
2. Select the minimum number of disks. Minimum Disks is defined as the number of disks used to initially create the storage pool.
In the image listed below, Minimum Disks is displayed in the RAID Level configuration, as well as noted under Compression Level.
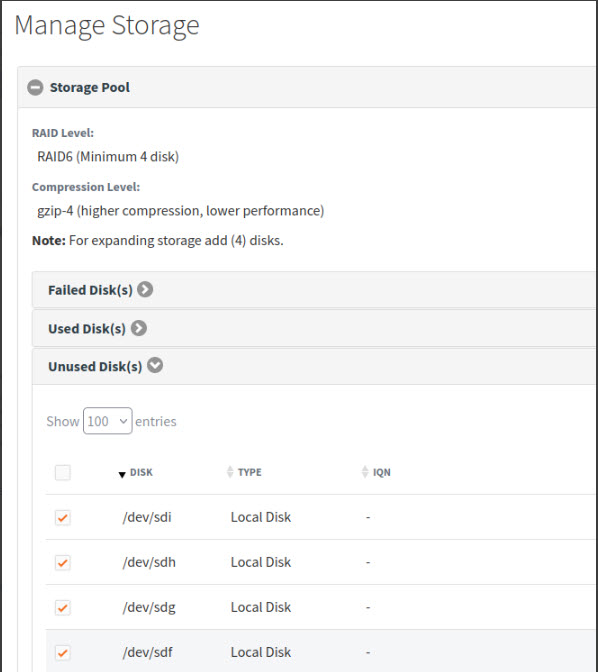
3. Use the checkboxes to select a set of disks that are the same size. The size does not have to be the same as other RAID sets already assigned to the storage pool.
4. Click the Add to Storage button to create a new RAID set and add it to the existing storage pool.
NOTE: Additional RAID sets are spanned onto the existing storage pool similar to RAID-0. For example, if your storage pool is configured for RAID-5, then adding a new RAID set is similar to RAID-50. Each RAID set contains its own set of redundant disks. For example, a single disk could be lost from each RAID-5 set without losing data integrity of the storage pool.
iSCSI storage (Manage remote storage volumes)
x360Recover supports using external iSCSI disk volumes for creating the storage pool.
iSCSI utilizes the network layer instead of a dedicated storage controller when performing disk and storage operations. Multiple network adapters should be employed when utilizing iSCSI for the storage pool in order to prevent network performance bottlenecks.
IMPORTANT: Mixing local storage with iSCSI storage devices when creating the storage pool is unsupported and we do not recommend it.
NOTE: iSCSI network traffic may be segregated from backup traffic by placing it in an alternate subnet bound to a second physical NIC.
NOTE: We recommend 10Gbe Ethernet cards when using iSCSI devices for the storage pool to improve disk performance.
Important: Using 1Gbe Ethernet (even when using multi-path) for iSCSI storage pool devices is officially unsupported by the x360Recover, due to poor performance concerns. Use at your own risk.
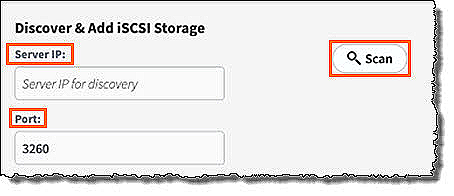
1. Click to expand the iSCSI Storage section.
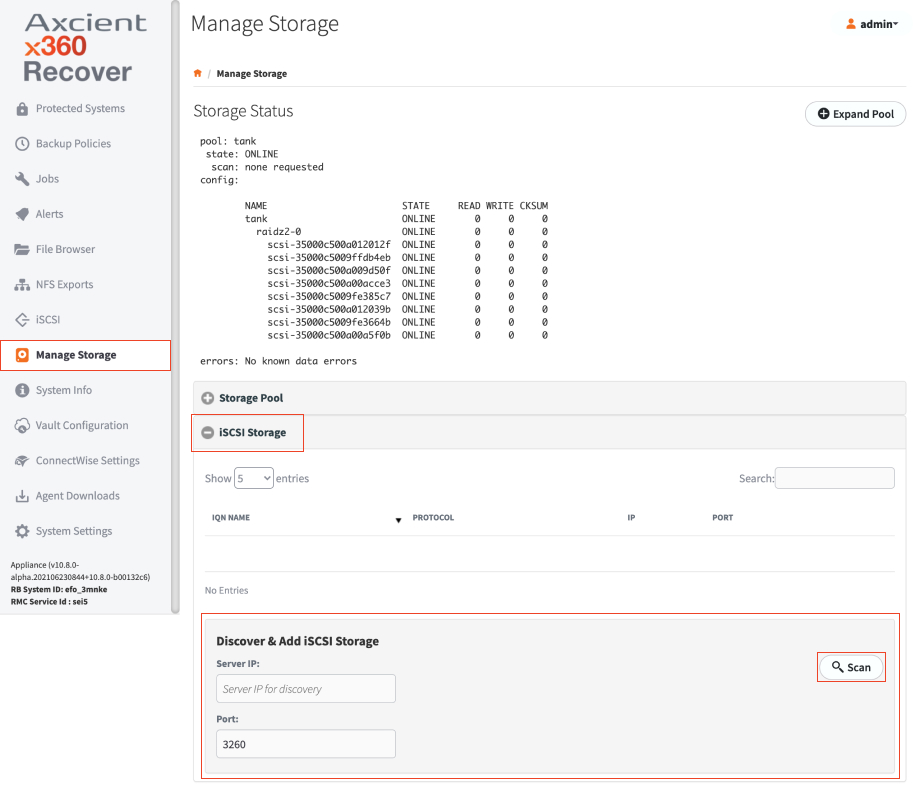 This section displays iSCSI Initiator management settings.
2. In the Server IP field, enter the iSCSI Target Server IP address.
3. In the Port field, enter the port number if it has been changed from the default port.
4. Click the Scan button to search for accessible storage volumes.
5. Click Add on each discovered disk volume that you would like use as a storage pool disk for the appliance.
Expand the storage pool
If you are using a SAN to provide storage for your storage pool (using iSCSI, as described in the section above) and you have expanded the size of any LUN that you are exporting to the x360Recover device, click the Expand Pool button to rescan the LUN for the size change and add the new storage space to the pool.
SUPPORT | 720-204-4500 | 800-352-0248
- Contact Axcient Support at https://partner.axcient.com/login or call 800-352-0248
- Have you tried our Support chat for quick questions?
- Free certification courses are available in the Axcient x360Portal under Training
- Subscribe to Axcient Status page for updates and scheduled maintenance
979 | 1739