
x360Recover can be installed on a Datto appliance.
Follow these steps to complete the conversion.
STEP 1. Prepare the x360Recover ISO
1.1. Download the x360Recover ISO
Note: For NVM M.2 OS drives, use the HW ISO.
STEP 2. Factory reset the BIOS.
2.1. Change from legacy mode to UEFI boot mode.
2.2 Make the selection required to allow virtualization.
STEP 3. Disconnect all storage drives from the unit.
Leave the M.2 flash (or other preferred drive) for the OS install
STEP 4. Install the x360Recover OS
Note: If installing to a Datto Alto or other device that does not have a separate independent OS disk, be sure to select the 'Single Disk / Nano Install' option when installing x360Recover:

STEP 5. Reboot.
Make sure the OS comes up
STEP 6. Shutdown and reconnect all the storage drives.
After confirming that all storage devices are properly reconnected, boot up and proceed with install normally.
Configure the device as an appliance
When your appliance has the x360Recover operating system software installed, you can begin the provisioning and configuration process. The appliance must have internet access to complete this process.
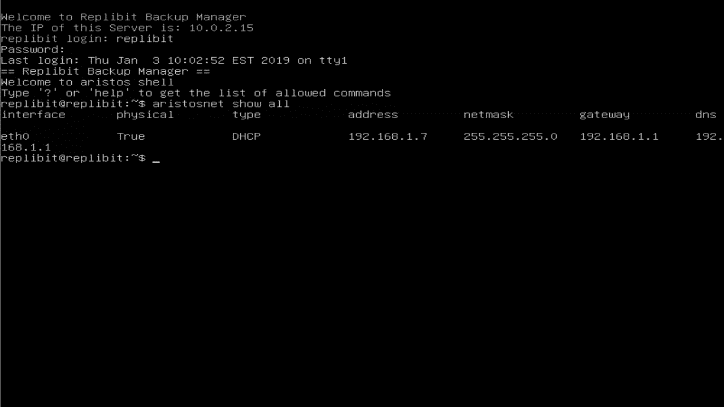
1. Power on the appliance.
2. Record the IP address listed on the screen. If you do not see an IP address, wait a few minutes and then press the Enter key on your keyboard to refresh the screen.
3. When you have recorded the correct IP address, open a browser on a different machine within the same network. Make sure your appliance is turned on, because you will not be able to access this location when the appliance is turned off.
4. Click the Proceed button to continue.
5. In the Setup Wizard, read the End User License Agreement (EULA) and select the I Accept the terms in the license agreement radio button.
6. Click the I Agree button to continue.
7. In the next screen, click the First machine in Cluster radio button.
8. Click the Next button to continue.
9. In the next screen, configure each appliance password, including:
- The Linux RootUser password, which is the operating system super-user; this user requires a highly secure password,
- The User password, which is a limited access shell account, and
- The Admin (Web GUI) password, which is used to access the Web Interface and all features
10. Click the Next button to continue.
11. In the next screen, select the Appliance option to indicate this machine will serve as the appliance.
12. Click the Next button.
13. In the next screen, enter your reseller username and password and then click the Get Customers button. The screen expands, prompting you to select the Customer and Location where this appliance will be deployed.
14. In the Customer Username drop-down menu, select the appropriate Customer Username.
15. In the Customer Location drop-down menu, select the appropriate Location. If the drop-down menu does not display a list of customers and locations, then you do not have customers with unused locations configured within the License Portal.
16. Click the Next button when you are finished.
17. In the next screen, use the Select Time Zone drop-down menu to select the time zone for the selected Location.
18. Click the Setup button when you are finished. The appliance will complete the configuration process and reboot.
SUPPORT | 720-204-4500 | 800-352-0248
- Contact Axcient Support at https://partner.axcient.com/login or call 800-352-0248
- Free certification courses are available in the Axcient x360Portal under Training
- To learn more about any of our Axcient products, sign up for a free one-on-one training
- Subscribe to the Axcient Status page for a list of status updates and scheduled maintenance
1282